G Golden Path
Browse / Clair Obscur / Clair Obscur: Expedition 33
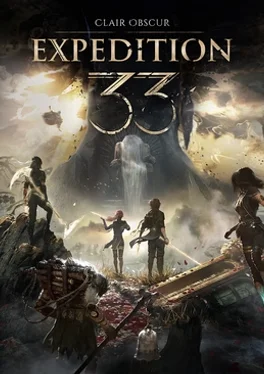
Clair Obscur: Expedition 33 box art
Fan guide PlayStation 5 / Xbox Series X|S / PC Golden path + boss strategies Spoiler-safe

Clair Obscur: Expedition 33

Sandfall's Belle Époque turn-based RPG sends Expedition 33 across the sea to end the Paintress before she paints the next cursed number. This golden-path walkthrough takes you from the Gommage in Lumière, through every act and major boss, to the ending choice — with reactive-combat tactics throughout.

Golden-path progress 0 / 13 sections

Good to know

Do this now Learn to dodge first, then add parry once you read the tells. Every enemy attack can be avoided with a timed dodge (a generous window) or a parry (a tight window that lets you counter and build toward a Break). When you first meet a foe, dodge until you have learnt its rhythm, then start parrying the predictable strikes. A perfect dodge with the right Picto equipped refunds AP, so defence is also your economy.
Tip Master Pictos to unlock Luminas you can share across the party. Each character equips up to three Pictos — each grants a stat and a passive. Win four battles with a Picto equipped and you permanently learn its Lumina, which you can then switch on for any character using your shared Lumina points. Always have a fresh Picto mastering in the background so your whole roster keeps gaining passives.
Tip Break the enemy, then unload. Hitting weaknesses, landing parries and using the right skills fills a foe's Break gauge. A Broken enemy takes vastly more damage and loses its turn, so line up your biggest hits for that window rather than spending them piecemeal.
Heads up Clear side content before each act finale. Difficulty steps up sharply at the end of every act. Before you commit to a finale, sweep the optional areas you have unlocked, master a few more Pictos, and upgrade weapons — under-levelled parties hit a wall at the act bosses, especially in Act III.
Missable The ending is a permanent choice — there is no wrong answer. The finale asks you to side with one of two characters, and each path closes the other. Neither is the canonical 'good' ending; they are two readings of the same story. Make a manual save before the final sequence if you want to view both.
Guide reference

The standing reference behind the route — items, abilities, collectibles, side-quests, and the systems you'll lean on throughout Clair Obscur: Expedition 33.

Items & equipment 8 tools · where, when, what it unlocks
Action Points (AP)Combat system Every battleThe core resource for skills. Basic attacks and successful parries generate AP; stronger skills spend it. Some Pictos refund AP on a perfect dodge.
DodgeDefence From the startThe safe defensive option with a wide timing window. Avoids damage; with the right Picto a perfect dodge also returns AP.
ParryDefence From the startA tight-window counter that negates damage and feeds the enemy's Break gauge. High risk, high reward; learn each attack's audiovisual tell.
JumpDefence From the startClears low sweeps and some ground attacks that a dodge cannot. Watch for the attacks the game flags as jumpable.
Free AimOffence From the startA ranged shot you can place manually on weak points and breakable parts — handy for chipping flyers and triggering Break.
PictosEquipment Found, bought and earned throughoutUp to three per character; each gives a stat boost and a passive effect. Win four battles to master one and learn its Lumina.
LuminasEquipment Mastered from PictosPassive effects, learned from mastered Pictos, that any character can equip from a shared point pool — the heart of build crafting.
Gradient AttacksCombat system Unlocked partway through the storyPowerful party gauge attacks added to the Battle Wheel. Also enables Gradient Counter, a defensive option against heavy enemy turns.
The journey · 13 chapters
1
Prologue

Lumière — The Final Festival

tutorialstoryLumière

Golden path

  1. Explore Lumière during the Expedition Festival and speak to the townsfolk to take in the world and meet the cast before departure.
  2. Follow the story to the Gommage, where the Paintress wakes and paints the next number, erasing everyone of that age.
  3. Work through the opening combat tutorial as Gustave — practise basic attacks, the timed dodge, and your first parry.
  4. Settle the tutorial duel against Maelle to learn parry timing against a real opponent.
  5. Board the ship and set sail with Expedition 33 toward the Continent.
Tip Spend the festival learning the tells. The prologue is the safest place to practise. Watch each attack's wind-up and sound cue now so parrying feels natural once real fights begin.

Completionist · this area

0 / 1 collected
2
Act I — Gustave

Spring Meadows

Act ILuneboss

Golden path

  1. Regroup after the disastrous landing and search for survivors, heading for the Indigo Tree as your first waypoint.
  2. Fight through the meadow's encounters to keep building your dodge-and-parry instincts against varied foes.
  3. Recruit Lune after meeting her in a cave — she brings elemental Stain magic that powers up your offence.
  4. Equip your first Pictos on both characters and begin mastering one so you start banking Luminas early.
  5. Defeat Évêque to clear the meadow and push deeper into Act I.
Do this now Start a Picto mastering now. Equip a Picto on each character before the next fights so you are already working toward your first Luminas as you travel.
Boss Évêque Spring Meadows

Carry a full stock of healing tints; this is the first real test of your defence, so expect to take a few hits while you learn the rhythm.

Top up before: Rest at the Expedition flag in Spring Meadows to refill tints and heal before approaching.

Opening pattern
SummaryÉvêque opens with slow, well-telegraphed melee swings. Dodge or parry each, then answer with Gustave's basic attacks to build AP.
Pressed phase
SummaryAs its health drops it chains faster combos. Lean on dodging the unfamiliar strings, parry the single heavy overhead, and spend banked AP on Lune's elemental skills to push the Break gauge.

Where to heal: Use healing tints freely in-battle, and retreat to the nearby Expedition flag to reset and re-equip.

Easier tactic: Forget parrying and just dodge everything — slower but far safer. Focus fire to Break Évêque, then unload your strongest skills during the Break window.

Retreat: You can reload from the last flag if the fight goes badly; nothing is lost.

Reward: Clears the path deeper into Act I and confirms your handle on the dodge-parry-Break loop.

Completionist · this area

0 / 1 collected
3
Act I — Gustave

Flying Waters & The Manor

Act IMaelleboss

Golden path

  1. Travel the Flying Waters toward the great anchor, using Noco's Hut as your rest and resupply point.
  2. Press into The Manor and rescue Maelle, who joins with her flexible combat stances.
  3. Defeat Bourgeon on the approach, parrying its rhythmic vine strings to Break it.
  4. Take on the Chromatic Troubadour as an optional but rewarding fight if your party is ready.
  5. Continue toward the Ancient Sanctuary once the region is clear.
Tip Maelle's stances reward aggression. Maelle shifts between stances that trade defence for damage. Once you trust your parries, her offensive stance pushes Break gauges fast.
Boss Bourgeon Flying Waters

Top up tints and bring a reviving item if you have one; Bourgeon hits harder than anything in Spring Meadows.

Top up before: Rest at the flag near Noco's Hut before the approach.

Grasping vines
SummaryBourgeon telegraphs wide sweeping vine attacks. Parry the rhythmic two-hit strings to feed Break; dodge the erratic lunges.
Bloom
SummaryWhen it blooms it gains an area attack that is easier to jump than dodge. Keep one character on healing duty and burst it down once Broken.

Where to heal: Heal with tints between its combos; reset at the Flying Waters flag.

Easier tactic: Equip Pictos that boost defence and AP-on-dodge, dodge everything, and win the attrition battle through Break windows.

Retreat: Reload from the last flag without penalty.

Reward: Opens the route onward through Flying Waters and rounds out your early party.

Completionist · this area

0 / 1 collected
4
Act I — Gustave

Ancient Sanctuary

Act Iexploration

Golden path

  1. Navigate the Ancient Sanctuary, solving its light-and-shadow traversal and clearing tougher encounters.
  2. Rotate a fresh Picto onto each character so you keep mastering Luminas as you fight.
  3. Pick up the Pictos and tints tucked along the Sanctuary's branching paths.
  4. Push through to the road toward Gestral Village.
Tip Re-check your Lumina loadout. By now you should have several Luminas learned. Spend a moment redistributing them — defence and AP passives early, damage once you can survive comfortably.

Completionist · this area

0 / 1 collected
5
Act I — Gustave

Gestral Village

Act IScielhub

Golden path

  1. Arrive at Gestral Village and meet its cheerful inhabitants, your friendliest hub of the act.
  2. Bring Sciel into the active party and learn her Foretell cards, which set up huge delayed payoffs.
  3. Try the village's minigames and challenges for rewards and a breather from combat.
  4. Stock up on tints and upgrades from the village before moving on.
  5. Head for Esquie's Nest when you are ready to continue.
Tip Sciel rewards planning. Sciel's strength is setting up Foretell now to detonate later. Pair her with characters that can stall a turn while her payoff builds.

Completionist · this area

0 / 1 collected
6
Act I — Gustave

Esquie's Nest

Act Itraversalworld map

Golden path

  1. Reach Esquie's Nest and befriend Esquie, the gentle creature who carries you across the world map.
  2. Use Esquie to swim and travel between regions, opening up backtracking to spots you could not reach before.
  3. Return to earlier areas for Pictos and chests that needed world-map access.
  4. Set course for the Stone Wave Cliffs to close out the act.
Do this now Backtrack now while it is convenient. The moment you gain Esquie's traversal, revisit earlier regions for the upgrades you had to leave behind — it is quicker to do this before the act finale than after.

Completionist · this area

0 / 1 collected
7
Act I — Gustave

Stone Wave Cliffs (Act I finale)

Act Ifinalestory
Recommended first Difficulty spikes here. Master a few more Luminas and upgrade your weapons before committing, because the act ends on a tough sequence.

Golden path

  1. Scale the Stone Wave Cliffs, fighting through the act's hardest standard encounters.
  2. Keep your party topped up and your Pictos mastered as the road narrows toward the summit.
  3. Push through the climactic story sequence that closes Act I and reshapes the Expedition.
  4. Let the act's events carry you into the change of leadership that opens Act II.
Heads up Finish your Act I errands first. Once the finale begins the act turns a corner you cannot walk back. Tidy up Gestral Village rewards and world-map chests before you climb.

Completionist · this area

0 / 1 collected
8
Act II — Verso

Forgotten Battlefield

Act IIVersostory

Golden path

  1. Begin Act II under new leadership and bring Verso into the party, whose Perfection rank rewards clean, escalating combos.
  2. Cross the Forgotten Battlefield, adjusting to the tougher Act II encounter design.
  3. Rebuild your Lumina loadout around your new line-up now that the roster has shifted.
  4. Follow Verso's lead toward his old acquaintance at Monoco's Station.
Tip Verso scales with clean play. Verso's Perfection rank climbs as he lands hits and avoids damage, unlocking stronger finishers. Reward good defence by keeping him in the fight.

Completionist · this area

0 / 1 collected
9
Act II — Verso

Monoco's Station

Act IIMonocoboss

Golden path

  1. Reach Monoco's Station and meet Verso's friend Monoco.
  2. Win the two-stage duel against Monoco, banking AP through the first bout for the second.
  3. Welcome Monoco as the party's final member and try his Bestial wheel of enemy-derived skills.
  4. Continue toward Old Lumière with your full roster in hand.
Tip Monoco learns from monsters. Monoco's kit draws on skills harvested from enemies you meet, so his options grow as you explore. Check his wheel after new regions for fresh tools.
Boss Monoco Monoco's Station

Come in with full tints and a mastered defensive Picto or two; this is a multi-stage fight.

Top up before: Rest before entering Monoco's Station — there is no top-up mid-fight.

First duel
SummaryMonoco fights with quick, animal-like strings. Read the wind-ups, parry the repeated patterns, and dodge anything new.
Second bout
SummaryAfter the first defeat a follow-up fight begins immediately. Keep AP in reserve from the first phase so you can open the second aggressively, then Break and finish.

Where to heal: Use tints throughout; there is no safe retreat once the duel starts, so manage HP proactively.

Easier tactic: Prioritise survival over damage in phase one, bank AP, and spend it all during a Break in phase two.

Retreat: If you fall, reload from before Monoco's Station and adjust your Pictos.

Reward: Monoco joins the party as its final member, bringing his Bestial wheel of enemy-derived skills.

Completionist · this area

0 / 1 collected
10
Act II — Verso

Old Lumière & Visages

Act IIexplorationstory

Golden path

  1. Explore Old Lumière, a haunting echo of the home city, and press on through the Visages.
  2. Handle the stronger Act II foes with your full party and a refined Lumina build.
  3. Take the optional detours through Sirène's surrounding area for Pictos and tougher optional fights.
  4. Master a final round of Luminas before you commit to the Monolith.
  5. Approach The Monolith when your party is ready for the act climax.
Heads up Gear up before the Monolith. The act climax is a real test. Upgrade your lead weapons, master your best Luminas across the party, and stock tints before you start the ascent.

Completionist · this area

0 / 1 collected
11
Act II — Verso

The Monolith (Act II climax)

Act IIbossfinale
Recommended first Only ascend with a well-levelled party, mastered Luminas and upgraded weapons. The Paintress is the toughest fight so far.

Golden path

  1. Ascend The Monolith, conserving resources through its escalating encounters.
  2. Face the Paintress, parrying her rhythmic channels and saving Gradient Attacks for her openings.
  3. Exploit every Break window to land your heaviest skills and end the act.
  4. Let the climax carry the story into its epilogue.
Tip Save Gradient Attacks for openings. Hold your party Gradient Attacks for the moment the Paintress is Broken or recovering, rather than firing them on cooldown — the burst lands far harder.
Boss The Paintress The Monolith

Arrive fully stocked and well levelled. Master your best Luminas across the whole party and upgrade your lead weapons first.

Top up before: Clear the optional Act II areas and rest before the Monolith ascent; this is the act climax.

Ascent
SummaryThe approach throws tougher standard encounters at you. Conserve tints and keep a Picto mastering as you climb.
The Paintress
SummaryShe layers elemental barrages with long, readable channels. Parry the rhythmic sequences, save Gradient Attacks for openings, and exploit each Break to land your heaviest skills.

Where to heal: Rotate a dedicated healer and use tints on cooldown; reset at the last flag before the ascent.

Easier tactic: Build for sustain — defensive Pictos, AP-on-dodge, and a revive in the bag — and win slowly through repeated Break windows.

Retreat: Reload from before the Monolith to re-spec if needed.

Reward: Ends Act II and turns the story toward Lumière for the finale.

Completionist · this area

0 / 1 collected
12
Epilogue — Alicia

The Manor

epiloguestory

Golden path

  1. Play through the quieter Manor epilogue, which recontextualises much of what came before.
  2. Take your time with the story beats and explore what the Manor opens up.
  3. Prepare your party and saves for the final act, which raises the difficulty sharply.
  4. Proceed when you are ready to return to Lumière for the finale.
Do this now Make a manual save before Act III. Keep a separate manual save now, before the finale, so you can revisit the build-up and view the alternate ending later without a full replay.

Completionist · this area

0 / 1 collected
13
Act III — Maëlle

Return to Lumière & Renoir

Act IIIfinal bossending
Recommended first Do the Act III side content and any postponed expeditions first. Rushing Renoir under-levelled is the most common way to hit a wall at the very end.

Golden path

  1. Return to Lumière for Act III and work toward the city centre and its crooked tower.
  2. Clear the act's optional content and level your party near the cap before the final approach.
  3. Confront Renoir, the final boss — dodge his unfamiliar strings, parry the patterns you know, and use Gradient Counters on his heaviest turns.
  4. Play out the final sequence when his health bottoms out and the story resolves the last blow.
  5. Make your ending choice between the two characters the finale offers — each closes the other, and neither is the 'wrong' one.
Missable Both endings, one save. The finale forks permanently. If you want to see both resolutions, reload your pre-finale manual save after the first; otherwise pick the one that speaks to you and let it stand.
Boss Renoir (final boss) Lumière — city centre

Only approach when your party is near the level cap with mastered Luminas and fully upgraded weapons. This is the hardest required fight in the game.

Top up before: Do the Act III side content and any postponed expeditions first — the screen-rant 'mistake' is rushing Renoir under-prepared.

Opening forms
SummaryRenoir cycles through fast, hard-hitting patterns with long combo strings. Dodge the unfamiliar sequences, parry the ones you recognise, and keep everyone topped up.
Escalation
SummaryHe adds wide arena attacks and pressure that punishes greed. Use Gradient Counters on his heaviest turns and only commit big damage during Break.
Final stand
SummaryNear the end he stops taking damage and takes to the sky; play out his next turn and the story resolves the blow for you, closing the fight.

Where to heal: Keep a permanent healer in the rotation and never let HP coast; reset at the last rest point to re-equip.

Easier tactic: Step back and grind a few levels, master more Luminas, and refine your build — preparation matters more here than execution.

Retreat: Reload from before the city-centre approach to adjust and try again.

Reward: Triggers the ending sequence and the choice between the two finales.

Completionist · this area

0 / 1 collected