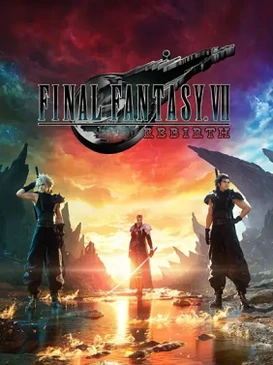
The second chapter of the Final Fantasy VII Remake trilogy takes Cloud and the party out of Midgar and across a vast open world — from the Grasslands to the Forgotten Capital — chasing Sephiroth through fourteen chapters of action combat, Synergy team-ups, sprawling region activities, and a card game you'll lose hours to.
The systems behind the journey — your seven-strong party and their roles, the combat and Synergy mechanics, Materia, Chadley's World Intel loop, every open-world region, the major minigames, and how Queen's Blood works.
| Magic Materia (green)Materia | Bought and found throughoutCasts spells — Fire/Blizzard/Thunder/Aero lines, Cure/Raise (Healing), Barrier, and more. | |
| Command Materia (yellow)Materia | Found and quest rewardsNon-magic abilities — Assess, Steal, Chakra, Item Master, Enemy Skill, ATB Boost. | |
| Support Materia (blue)Materia | Found and Chadley rewardsLinks to and augments another materia in a paired slot — Magnify, Elemental, Synergy, HP/MP Absorption. | |
| Summon Materia (red)Materia | Divine Intel summon shrines & ChadleyCalls a summon into battle — Ifrit, Titan, Phoenix, Alexander, Bahamut, and others. | |
| Independent Materia (purple)Materia | Found and boughtPassive boosts — HP Up, MP Up, Magic Up, ATB Assist, Auto-Cure, First Strike. | |
| Elemental (Support)Notable | Support materiaLinked to a Magic materia in a weapon adds that element to attacks; in armour, resists it. A cornerstone combo. | |
| Magnify (Support)Notable | Support materiaSpreads a linked spell to all targets at reduced power — superb for staggering groups and healing the party. | |
| HP Up / MP UpNotable | Independent materiaFlat survivability boosts — stack copies on bosses and Hard Mode. | |
| Chakra & PrayerNotable | Command materiaMP-free healing — invaluable on Hard Mode, where items are disabled. |
Seven playable fighters, each with a distinct role. You'll rotate three into your active party; build each one's materia and Folio around their strengths. (Cid and Vincent appear in the story but are not playable in Rebirth.)
| Cloud Strife | Balanced melee all-rounder — swap between fast Operator stance and heavy Punisher stance | Stance-swap; non-MP sword arts like Firebolt Blade and Triple Slash |
| Barret Wallace | Ranged tank — highest HP and Defence; hits airborne and distant foes reliably | Overcharge (big gun blast, fast ATB); Lifesaver to draw aggro and shield allies |
| Tifa Lockhart | Fast close-range bruiser — highest Speed; chains hits to ramp stagger damage | Unbridled Strength (upgrades her combo); Whirling Uppercut for air and staggered foes |
| Aerith Gainsborough | Premier spellcaster and healer — holds range and zones with wide-area magic | Arcane Ward (doubles spells cast from inside it); Radiant/Lustrous Ward protection |
| Red XIII | All-rounder — builds a Vengeance gauge by guarding, then enters an empowered mode | Vengeance Mode (boosted attack/speed, fast stagger); Sidewinder and self-healing strikes |
| Yuffie Kisaragi | Agile ranged-and-melee ninja — imbues her weapon to exploit elemental weaknesses | Elemental Ninjutsu (swap fire/ice/lightning/wind); Doppelganger damage-mirroring clone |
| Cait Sith | Gimmick/support — fights with a summonable Moogle mount and luck-based dice | Moogle Mount (ride/shield/aerial); dice rolls and Moogle Magic for random buffs |
The mechanics behind every fight — learn these and the bosses fall in line.
| ATB gauge | Real-time action fills an ATB gauge through attacks and blocks; spend segments to slow time and issue abilities, magic, and items. Carried over from Remake. | |
| Synergy Skills | Free paired moves with no ATB cost (boost a partner, build pressure). Using them charges the Synergy gauge toward an Ability. | |
| Synergy Abilities | Big two-character team-ups that cost ATB to trigger — heavy damage plus strong effects (raise Limit level, extend stagger, free MP, extra ATB). Unlocked through the Folio trees. | |
| Stagger & Pressure | Damage fills a stagger gauge; reaching it Staggers the enemy for a big-damage window. Exploiting weaknesses causes Pressure, which makes the gauge climb faster. | |
| Limit Breaks | A Limit gauge fills as you take and deal damage; full, it unleashes a powerful Limit Break. Synergy Abilities can temporarily raise the available Limit level mid-fight. | |
| Materia | Orbs slotted into weapons and armour in five colours: Magic (green) spells, Command (yellow) abilities, Support (blue) to link with other materia, Summon (red) to call summons, Independent (purple) passives. Materia levels up with AP. | |
| Folios (skill trees) | Per-character boards bought with SP from levelling — unlock new weapon abilities, stat boosts, non-MP elemental skills, and each character's Synergy Skills and Abilities. Replaces Remake's weapon-upgrade system. |
The repeatable region activities that fill the map, level your materia, and unlock summons. Towers first, always.
| Remnawave Towers (Activation Intel) | Activate the old towers to reveal the regional map and flag every other World Intel point — always do these first. | |
| Lifesprings (Expedition Intel) | Follow the cues to hidden magical springs that unlock pieces of the region's lore. | |
| Summon Shrines (Divine Intel) | Find three shrines per region to weaken and unlock that region's summon (Titan, Phoenix, Alexander, and more) for the Combat Simulator. | |
| Fiend Intel | Short skirmishes against special enemy variants, logged for Chadley and fought via the Combat Simulator. | |
| Classified / Excavation Intel | Dig up buried items on chocoboback for crafting recipes and materials, plus rare regional hunts. | |
| Protorelic (Phenomenon Intel) | A multi-part questline per region that culminates in a unique Protorelic reward. | |
| Chocobo Intel | Track and catch each region's unique chocobo through a stealth-pursuit minigame. | |
| Moogle Intel | Find Mogstools and play a moogle-catching minigame to raise Chocobo Emporium stock. |
The explorable regions and the chapter each opens in. Each has its own tower, intel set, summon, and chocobo with a unique traversal trick.
| Grasslands | The first open region, around Kalm and the Chocobo Ranch — your introduction to Chadley and World Intel. | Chapter 2 |
| Junon | Coastal beaches and marshes leading to Under Junon and the cannon-city, with the parade set-piece. | Chapter 3–4 |
| Corel | The largest span — desert and mountains housing Costa del Sol and the Gold Saucer. | Chapter 6 |
| Gongaga | Dense jungle with mushroom-springboard traversal and Zack/reactor story beats. | Chapter 9 |
| Cosmo Canyon | Red XIII's homeland — canyon terrain tied to planet lore and the Gi. | Chapter 10 |
| Nibel | The mountains around Nibelheim, central to the Sephiroth flashback and Mt. Nibel. | Chapter 11 |
| Meridian Ocean | Open-ocean traversal that connects the regions once the world fully opens. | Chapter 13 |
| Costa del Sol (hub) | Seaside resort in Corel with beach minigames and downtime. | Chapter 6 |
| Gold Saucer (hub) | The amusement-park hub in Corel — the densest cluster of minigames in the game. | Chapter 8 |
Rebirth is stuffed with minigames — these are the big ones. Many feed side-quest progress and rewards.
| Queen's Blood | The deep collectible card game played against opponents all over the world — has its own questline. | |
| Chocobo content | Catch each region's chocobo, then use mounts with special traversal (gliding, climbing, water). | |
| Fort Condor | A tower-defence strategy minigame placing units to defend the fort. | |
| Gears & Gambits | An auto-battler where you program robots' behaviour gambits to clear waves. | |
| Piano | A rhythm minigame matching notes with the sticks to earn ranks and rewards. | |
| 3D Brawler | A timing-based boxing minigame (e.g. against Jules), reworked to be fairer than the original. | |
| Chocobo Racing | Gold Saucer racing — pop balloons and use techniques to place first. | |
| Cactuar Crush | A musou-style arena where each party member mows down waves of cactuars. | |
| Galactic Saviors | An arcade-style space shooter in the Gold Saucer. |
Reward: Unique cards, strong combat rewards, and a dedicated cross-country questline · From Chapter 2 Link
A tutorial-era mechanical boss. Keep your guard up against its heavy slams.
Top up before: Rest at a bench or use a tent, refresh your materia loadout, and top up Potions/Phoenix Downs before the encounter.
Where to heal: Heal between phases with Cure or Potions.
Easier tactic: Target its weak points and punish the recovery after its big telegraphed attacks; Cast Assess (or check the foe) to read its current weakness, then match it — exploiting a weakness causes Pressure and builds the Stagger gauge far faster.
▲ thumbnail from YouTube's CDN · the player loads only when you press play
The first real open-region wall. Bring ranged options for when it rears or submerges.
Top up before: Rest at a bench or use a tent, refresh your materia loadout, and top up Potions/Phoenix Downs before the encounter.
Where to heal: Retreat to the marsh edge and heal; the arena is large.
Easier tactic: Lightning pressures it well — hit it as it surfaces and after its tail sweeps, then burst on stagger.
▲ thumbnail from YouTube's CDN · the player loads only when you press play
A heavy stone construct — durable but slow.
Top up before: Rest at a bench or use a tent, refresh your materia loadout, and top up Potions/Phoenix Downs before the encounter.
Where to heal: Keep one healer's ATB in reserve for its big swings.
Easier tactic: Exploit its elemental weakness to Pressure it, then stagger and focus fire; Cast Assess (or check the foe) to read its current weakness, then match it — exploiting a weakness causes Pressure and builds the Stagger gauge far faster.
▲ thumbnail from YouTube's CDN · the player loads only when you press play
Rebirth's take on the classic Bottomswell. It snatches party members out of the fight.
Top up before: Rest at a bench or use a tent, refresh your materia loadout, and top up Potions/Phoenix Downs before the encounter.
Where to heal: Free grabbed allies fast, then regroup and heal.
Easier tactic: Lightning hits it hard. Watch for the whirl that traps a character — break them out, then burst during stagger.
A SOLDIER rival who fights as a one-on-one motorcycle duel.
Top up before: Rest at a bench or use a tent, refresh your materia loadout, and top up Potions/Phoenix Downs before the encounter.
Where to heal: It's a duel — manage your own ATB and guard timing.
Easier tactic: Parry or dodge his charges and punish the overextension; keep the pressure on to stagger him.
▲ thumbnail from YouTube's CDN · the player loads only when you press play
A Jenova form that caps the sea voyage and shifts its elemental affinity.
Top up before: Rest at a bench or use a tent, refresh your materia loadout, and top up Potions/Phoenix Downs before the encounter.
Where to heal: Heal through its area attacks; keep a reviver ready.
Easier tactic: It changes weakness between phases — re-Assess often and match the element, then burst on stagger.
▲ thumbnail from YouTube's CDN · the player loads only when you press play
A tragic gunner duel tied to Barret's past.
Top up before: Rest at a bench or use a tent, refresh your materia loadout, and top up Potions/Phoenix Downs before the encounter.
Where to heal: Keep moving to avoid his ranged barrages, then close the gap.
Easier tactic: Dodge his gunfire and grenades, close in during reloads, and stagger him with sustained pressure.
▲ thumbnail from YouTube's CDN · the player loads only when you press play
An undead boss in the cave beneath Cosmo Canyon.
Top up before: Rest at a bench or use a tent, refresh your materia loadout, and top up Potions/Phoenix Downs before the encounter.
Where to heal: Heal normally — but remember healing magic damages the undead.
Easier tactic: As an undead, it takes damage from Cure/Raise — cast healing ON the boss, and lean on Fire to Pressure it.
▲ thumbnail from YouTube's CDN · the player loads only when you press play
A ferocious transformation boss during the Nibelheim sequence.
Top up before: Rest at a bench or use a tent, refresh your materia loadout, and top up Potions/Phoenix Downs before the encounter.
Where to heal: Guard its rushes and counter; keep the party spread.
Easier tactic: Block its lunges and elemental bursts, counter the openings, and burst it during Stagger.
▲ thumbnail from YouTube's CDN · the player loads only when you press play
Rufus Shinra duels Cloud one-on-one while his hound Darkstar interferes.
Top up before: Rest at a bench or use a tent, refresh your materia loadout, and top up Potions/Phoenix Downs before the encounter.
Where to heal: A solo duel for Cloud — guard timing is everything.
Easier tactic: Deal with Darkstar's harassment, then parry Rufus's gunshots and punish between his volleys.
▲ thumbnail from YouTube's CDN · the player loads only when you press play
A massive stone guardian of the temple with wide area attacks.
Top up before: Rest at a bench or use a tent, refresh your materia loadout, and top up Potions/Phoenix Downs before the encounter.
Where to heal: Spread the party to avoid its AoE; keep MP for healing.
Easier tactic: Keep characters apart to dodge its slams and quakes, exploit its weakness, and focus fire during stagger.
▲ thumbnail from YouTube's CDN · the player loads only when you press play
The penultimate Jenova form in the finale.
Top up before: Rest at a bench or use a tent, refresh your materia loadout, and top up Potions/Phoenix Downs before the encounter.
Where to heal: Bring full consumables — the finale runs long with no easy resupply.
Easier tactic: It rotates weaknesses and unleashes wide attacks — re-Assess each phase, cleanse status, and chain Synergy Abilities to extend staggers.
The multi-phase final battle, including party splits across groups.
Top up before: Rest at a bench or use a tent, refresh your materia loadout, and top up Potions/Phoenix Downs before the encounter.
Where to heal: There's no healing between phases beyond your own kit — stock revives for every group.
Easier tactic: Keep at least one reviver and one healer in each party split; exploit every Stagger and save Limits/Synergy for his most dangerous forms.
▲ thumbnail from YouTube's CDN · the player loads only when you press play