Fan guideNintendo SwitchGolden path + Noble strategiesSpoiler-safe
Pokémon Legends: Arceus
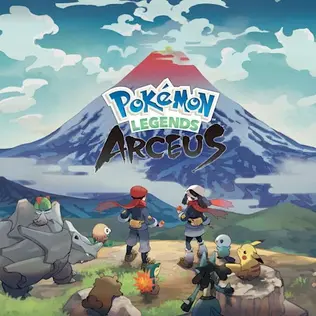
Travel to ancient Hisui — the Sinnoh region before it had a name. Join the Galaxy Expedition Team's Survey Corps, build the very first Pokédex, and quell five frenzied Noble Pokémon before a rift in space and time tears the world apart.
Golden-path progress0 / 8 sections
Ancient Hisui · Legends: Arceus golden path
1
Chapters 1–3
Jubilife Village & Obsidian Fieldlands
Starter PokémonCraftsmanship KitLord Kleavor
▾
Golden path
You arrive in ancient Hisui — the region that will one day become Sinnoh — summoned by a mysterious Pokémon. After a brief sequence you join the Galaxy Expedition Team's Survey Corps, tasked with building the very first Pokédex. Jubilife Village is your permanent base of operations.
Choose your starter Pokémon from Professor Laventon's three research subjects: Rowlet (Grass/Flying), Cyndaquil (Fire), or Oshawott (Water). All three eventually gain a Hisuian final evolution. Cyndaquil is the recommended choice — Hisuian Typhlosion's Ghost/Fire typing is broadly useful and it handles three of the five Noble fights well. Your choice is permanent.
Complete Chapters 1–2 in Jubilife Village to unlock the Craftsmanship Kit — your portable crafting system. Open it with the down arrow key at any time in the field. Craft five Poké Balls (Apricorn × 1 + Tumblestone × 1 each) to test the system. You will rely on crafting throughout the entire game — always gather ore and Apricorns as you pass them.
In the Obsidian Fieldlands, learn the three core catching approaches: throw a Ball from behind a Pokémon for a catch-rate bonus; throw from tall grass using the stealth mechanic (crouch by pressing B); or weaken in battle first before throwing. The Fieldlands has the game's full tutorial population — take your time here before moving on.
Collect Starly, Shinx, Geodude, Ponyta, Wurmple, and Budew during your Fieldlands survey — all are useful team members for the early Noble fights. At least one Geodude or Ponyta is strongly recommended for the Kleavor battle phase (Rock-type and Fire-type respectively).
After Chapter 2, talk to the Warden Lian to begin the Kleavor mission. Craft your Kleavor Balms (Dazzling Honey × 1 + Hearty Grains × 1 + Hopo Berry × 1) at the Craftworks before heading to Grandtree Arena. Craft at least 10. The arena is in the north-east of the Fieldlands.
Enter Grandtree Arena for the first Noble fight — Lord Kleavor. See the boss card below for the full strategy.
After calming Kleavor, return to Galaxy Hall in Jubilife Village. Commander Kamado promotes you and the Feather Ball recipe unlocks. Chapter 4 begins and the path to the Crimson Mirelands opens.
★Do this nowSubmit Research Tasks at Galaxy Hall after every Noble mission.Speaking to Professor Laventon at Galaxy Hall submits your Research Points and can raise your Star Rank. A higher Star Rank unlocks better Poké Ball recipes and area access. Do this after every major story beat — do not let Research Points build up unsubmitted.
💡TipStealth catching saves Poké Balls — learn it early.Crouch by pressing B, then crawl through tall grass toward any Pokémon. When the character crouches, a back-attack throw becomes available. A stealth back-throw uses one Ball and has a very high catch rate — even against strong Pokémon. This is the most efficient use of your Balls.
Craft at least 10 <strong>Kleavor Balms</strong> before entering the arena (recipe: Dazzling Honey × 1 + Hearty Grains × 1 + Hopo Berry × 1). Your battle Pokémon should be level 18–22. Bring a Rock-type or Fire-type for the battle phase.
Top up before: Stock Potions from the Craftworks before leaving Jubilife Village. The arena has no supply point.
Fight breakdown
Phase 1 — Balm throwing (dodge and throw)
TellKleavor telegraphs its Stone Axe slash with a brief wind-up raising both blades. Its aerial dive is telegraphed by it leaping backward before launching.
CounterFor the Stone Axe slash — roll sideways. For the aerial dive — sprint perpendicular to the direction it faces before leaping. After each missed attack, Kleavor pauses for about 1.5 seconds — this is your Balm window.
Damage windowThrow a Balm during every 1.5-second recovery pause. You need roughly eight to ten Balm hits to trigger the battle phase. Aim for the glowing orange wound on its body — direct hits land faster.
Phase 2 — Standard battle (weaken to trigger phase transition)
TellAfter enough Balm hits, Lord Kleavor becomes momentarily vulnerable — the arena darkens briefly. Send out your Pokémon for a standard battle. Kleavor uses X-Scissor and Stone Edge.
CounterUse a Rock-type or Fire-type move. Rock-type hits Kleavor for 2× (Bug-type weakness). Stone Edge from your own Pokémon, or Fire Fang from an early Shinx/Ponyta, is ideal.
Damage windowWin the battle phase and the fight returns to Balm throwing — Kleavor is easier to hit at this point. Repeat two or three cycles to fully calm the Noble.
If you're struggling
Where to heal: Exit the arena back to the Base Camp and rest. Kleavor fully resets — but so does your Balm count. Craft more before re-entering.
Easier tactic: A Budew or Roselia (found in the northern part of Obsidian Fieldlands) with Absorb can heal your Pokémon between phases. If your Pokémon are getting knocked out, over-level to 25 before the arena.
Retreat: You can exit and retry with no penalty. Craft extra Balms each time.
OptionalEvery region — Alpha Pokémon (large, glowing red eyes) spawn at fixed locations on the mapAlpha Pokémon have higher base stats than normal and often know moves they cannot normally have at that level. An Alpha caught early can anchor your team for several chapters.
To catch an Alpha without battling: craft <strong>Heavy Balls</strong> and <strong>Smoke Bombs</strong>. Toss a Smoke Bomb near the Alpha to trigger stealth, then sneak behind it and throw a Heavy Ball. Heavy Balls have a bonus catch rate when used against resting or unaware targets. If the Alpha is too high level for stealth, weaken it to low HP in battle first then use an Ultra Ball.
OptionalPokédex — accessed from the main menu; submit task completions at Galaxy Hall in Jubilife VillageEach Pokédex research level unlocks better gear: Star Rank 1→2 unlocks crafting, higher ranks unlock Ultra Balls, Leaden Balls, Gigaton Balls, and new areas. Star Rank 5 (requiring roughly 500 Research Points across all Pokémon) unlocks the post-game content.
Each Pokémon has ~10 Research Tasks (catch 1, catch 3, use move X, defeat with move Y, see it use agile style, etc.). After completing tasks in the field, return to Galaxy Hall and speak to Professor Laventon to submit them. Do not wait until after every area — submit at the end of each Noble mission to stay ahead.
OptionalJubilife Village notice board and NPCs throughout — 94 side requests in totalRequests reward crafting materials, rare Poké Balls, Grit items (raise Effort Levels), and Pokémon not available in the main story. Some requests are the only way to obtain certain Pokémon.
Check the notice board at Galaxy Hall after every main chapter. Requests flagged with a yellow star are story-relevant or unlock area access. Priority requests: Request 1 (Wurmple, unlocks early crafting), Request 37 (Abra, teleport convenience), and any request giving Grit Rock/Pebble (permanent stat boosts).
Completionist · this section
0 / 2 collected
✓
Starter Pokémon — Rowlet, Cyndaquil, or OshawottPermanent choice made during Chapter 1. The other two starters can be obtained post-game via Request.
✓
Feather Ball recipe — reward for calming KleavorUnlocked automatically after the Noble fight. Feather Balls fly farther and higher than standard Poké Balls.
Watch it instead
20:13:00
▶ Ninbanyan
Pokemon Legends Arceus - Longplay Full Game Walkthrough No Commentary
▲ thumbnail from YouTube's CDN · the player loads only when you press play
2
Chapters 4–5
Crimson Mirelands
Heavy BallLady LilligantAlpha encounters
▾
Golden path
Travel to the Crimson Mirelands — a wetland region rich with ancient ruins. The Mirelands Camp is near the gate; unlock it immediately on arrival so you have a fast-travel point.
The Heavy Ball recipe becomes available from the Craftworks around this chapter (requires Iron Chunks × 1 + Tumblestone × 1). Heavy Balls have a higher catch rate than standard Balls when the target is resting, unaware, or weakened — ideal for Alpha Pokémon catches. Craft ten before exploring further.
Catch Petilil (southern flower fields), Hippopotas (sandy dry areas), Yanma (near water), and Spheal (northern marsh edge). Petilil evolves into Hisuian Lilligant — the Noble you are about to face — making catching several Petilil a Research Task worth completing now.
Gather the Lilligant Balm ingredients in the Mirelands: Vivichoke (near the stone ruins on the east side), Dazzling Honey (bee-related Pokémon drops or nodes near flowers), and King's Leaf (large-leaf plants near waterways). Craft at least 10 Balms before advancing the chapter.
The Mirelands also contains the first Alpha Pokémon you may want to deliberately catch: an Alpha Budew near Diamond Heath has above-average IVs and provides a strong team member for the next two Noble fights. Approach from behind at night with a Heavy Ball after crouching through tall grass.
Head to Brava Arena in the south-east of the Mirelands for the second Noble fight. See the boss card below for Lady Lilligant's full strategy.
After calming Lady Lilligant, return to Galaxy Hall. The Basculegion ride mount unlocks — the first of five rideable Pokémon in the game. Basculegion allows water travel. Chapter 6 begins and the Cobalt Coastlands open.
💡TipGather Vivichoke near ruins — they are the hardest Balm ingredient to find.Vivichoke for Lady Lilligant's Balms only grows near the ancient stone ruins on the eastern edge of the Crimson Mirelands. Walk the ruins perimeter before entering the arena — a single gather run yields enough for 12–15 Balms.
Craft at least 10 <strong>Lilligant Balms</strong> (recipe: Vivichoke × 1 + Dazzling Honey × 1 + King's Leaf × 1 — all found in the Mirelands). Battle Pokémon level 30–34. Bring a Fire, Flying, Ice, or Poison-type for the battle phase.
Top up before: Gather Vivichoke from the ruins area of Crimson Mirelands — they are found near stone structures. Do not enter the arena without a full stack of Balms.
Fight breakdown
Phase 1 — Petal storm and spinning charge
TellLady Lilligant raises both arms to summon a petal vortex — this fires three rotating petal streams outward. Her spinning charge is telegraphed by her spinning in place for one second before shooting forward.
CounterFor the petal vortex — move to the gap between two petal streams (the streams are evenly spaced with safe corridors between them). For the spinning charge — sprint perpendicular immediately when she starts to spin.
Damage windowAfter each attack, Lady Lilligant has a 1–2 second recovery. Throw Balms continuously into the glowing pink flower on her head — direct hits to the flower count as enhanced hits.
Phase 2 — Pollen cloud (brief blindness window)
TellAt about 50% Balm progress, Lady Lilligant releases an expanding pollen cloud that covers the arena floor. The cloud appears as a spreading gold mist.
CounterThe pollen cloud inflicts a brief stumble on your character — keep moving. You cannot stop the cloud but you can minimise exposure by staying near the arena edges where the cloud dissipates faster.
Damage windowSame Balm-throwing windows after each attack. In the battle phase, use Fire, Flying, Ice, or Poison moves — all super-effective against Grass. Hisuian Lilligant is pure Grass-type.
If you're struggling
Where to heal: Exit to Mirelands Base Camp, craft more Balms, rest, return.
Easier tactic: The petal vortex gaps are easier to spot if you hold the camera steady — rotating it during the vortex makes the safe corridors harder to identify. Keep the camera fixed to Lilligant and move the character, not the view.
Heavy Ball recipe — available from Craftworks from Chapter 4Requires Iron Chunks + Tumblestone. Essential for Alpha Pokémon stealth catches.
✓
Basculegion ride mount — reward for calming Lady LilligantUnlocked automatically after the Noble fight. Allows water travel across all regions.
Watch it instead
20:13:00
▶ Ninbanyan
Pokemon Legends Arceus - Longplay Full Game Walkthrough No Commentary
▲ thumbnail from YouTube's CDN · the player loads only when you press play
3
Chapters 6–7
Cobalt Coastlands
Basculegion ridingWing BallLord Arcanine
▾
Golden path
Travel to the Cobalt Coastlands by boat from Jubilife Village. The region spans rocky sea cliffs, sandy coves, and island chains accessible only by Basculegion. Set up both the Crossing Slope Camp and the Beachside Camp on arrival — the region is large.
The Wing Ball recipe becomes available around Chapter 6 (Craftworks, requires Sky Tumblestone × 1 + Apricorn × 1). Wing Balls throw higher and farther in an arc — ideal for catching airborne Pokémon. Craft ten before exploring the island chains.
Catch Tentacool, Shellos (West Sea), Mantyke, Finneon, and Growlithe. Growlithe evolves into Hisuian Arcanine — the Noble you will face — and completing its Research Tasks now is efficient. An Alpha Gyarados patrols the central lake area — it is level 60 but catchable with Heavy Ball stealth from the water surface.
Gather the Arcanine Balm ingredients: Hearty Grains (common, scattered across rocky areas), Hopo Berry (pink berries on bushes throughout), and Razz Berry (found along clifftops and coastal path edges). Craft at least 12 Balms.
Firespit Island is reached by riding Basculegion north from the main coastline. Ride around the island perimeter until you find the beach landing — the island is the largest landmass in the region and the Arcanine arena is at its centre.
Face Lord Arcanine at Firespit Island. See the boss card below for the full strategy.
After calming Lord Arcanine, the Sneasler ride mount unlocks — a wall-climbing Pokémon that allows you to scale vertical cliff faces. This transforms exploration in the upcoming Coronet Highlands. Chapter 8 begins.
💡TipFirespit Island has no Base Camp — stock up before crossing.Once you ride Basculegion to Firespit Island, there is no camp to fast-travel from or rest at. Bring full Balms, full Potions, and a healthy party before the ride. If you need to restock, ride back to the main coastline.
Noble PokémonLord Arcanine — Frenzied NobleFirespit Island, Cobalt Coastlands
Preparation
Craft at least 12 <strong>Arcanine Balms</strong> (recipe: Hearty Grains × 1 + Hopo Berry × 1 + Razz Berry × 1 — Razz Berries grow along the Cobalt cliffs). Battle Pokémon level 36–40. Bring a Water, Ground, or Rock-type for the battle phase.
Top up before: Stock Hyper Potions at Craftworks before taking the Basculegion ride to Firespit Island. The island has no Base Camp — stock up before you cross.
Fight breakdown
Phase 1 — Ember breath sweeps
TellLord Arcanine opens its mouth and a visible heat shimmer appears for one second before the Ember stream fires. The stream sweeps left to right in a low arc.
CounterJump or roll over the Ember stream — it is ground-level and jumping clears it cleanly. After the sweep, Arcanine takes 1.5 seconds to close its mouth — throw Balms into the glowing wound on its chest.
Damage windowThe post-Ember recovery window is the most reliable throw opportunity. Arcanine also has a tackle charge — dodge by rolling to the side, then throw during the 1-second stumble after the charge misses.
Phase 2 — Fire Spin ring
TellLord Arcanine spins in place once and a Fire Spin ring erupts from the ground around it — a large-radius ring at mid-distance.
CounterStay either very close to Arcanine (inside the ring before it expands) or sprint to the arena edge (outside the ring). The ring occupies a mid-range band — do not stop in the middle distance.
Damage windowAfter the Fire Spin ring dissipates, Arcanine pauses for 2 seconds — the longest recovery window in the fight. Throw two to three Balms in rapid succession. In the battle phase, Water, Ground, or Rock moves are super-effective.
If you're struggling
Where to heal: Return by Basculegion to the Coastlands camp. The island resets on re-entry.
Easier tactic: Stay very close to Arcanine for most of the fight — inside the Fire Spin ring avoids all ring damage, and close range makes Balm throws more accurate. Only retreat when the tackle charge comes.
Wing Ball recipe — available from Craftworks, Chapter 6Best ball for catching Pokémon while they are airborne or at height. Sky Tumblestone + Apricorn.
✓
Sneasler ride mount — reward for calming Lord ArcanineWall-climbing mount. Essential for Coronet Highlands exploration.
Watch it instead
20:13:00
▶ Ninbanyan
Pokemon Legends Arceus - Longplay Full Game Walkthrough No Commentary
▲ thumbnail from YouTube's CDN · the player loads only when you press play
4
Chapters 8–9
Coronet Highlands
Sneasler climbingUltra BallLord Electrode
▾
Golden path
The Coronet Highlands span the high mountain range of Hisui, including Mount Coronet — the sacred mountain at the continent's heart. Sneasler's wall-climbing ability opens all vertical surfaces: scale cliff faces to reach ledges, ore deposits, and Pokémon not accessible from the ground.
The Ultra Ball becomes available from the Craftworks in Chapter 8 (requires Tumblestone × 1 + Iron Chunks × 1 + Apricorn × 1). Ultra Balls have roughly double the catch rate of a standard Poké Ball. Craft 20 before continuing — you will use them for the rest of the game.
The Jet Ball recipe also unlocks around this chapter — a Ball that travels fast in a flat line, ideal for catching Pokémon that flee immediately. Craft ten and keep them in reserve.
Catch Clefairy, Rufflet, Snorunt, Gligar, and Bronzor in the Highlands. Rufflet is important — it evolves into Hisuian Braviary, the flying ride mount that unlocks after the fourth Noble fight. Catching several Rufflet now completes its Research Tasks in advance.
Gather Electrode Balm ingredients: Dazzling Honey (bee Pokémon or honey nodes), Hopo Berry (pink berry bushes), and Medicinal Leek (tall green plants along the Clamberclaw path). Medicinal Leeks specifically grow near the cliff edges — gather on the approach to the arena. Craft at least 12 Balms.
Face Lord Electrode at Clamberclaw Cliffs. Hisuian Electrode is Grass/Electric — bring a Fire-type for the battle phase (Ground-type is blocked by Levitate). See the boss card below.
After calming Lord Electrode, the Braviary ride mount unlocks — aerial travel across every region. This is the most transformative mount in the game; you can now glide over the entire map and reach any area quickly. Chapter 10 begins and the Alabaster Icelands open.
★Do this nowCraft Ultra Balls immediately — they change everything.The moment Ultra Balls become available from the Craftworks, craft 20. Their catch rate is dramatically better than standard Balls. From Chapter 8 onward, you should be using Ultra Balls for all non-trivial catches.
Craft at least 12 <strong>Electrode Balms</strong> (recipe: Dazzling Honey × 1 + Hopo Berry × 1 + Medicinal Leek × 1 — Medicinal Leeks grow along the mountain path in Coronet Highlands). Battle Pokémon level 44–48. Bring a Ground-type or Fire-type — Hisuian Electrode is Grass/Electric.
Top up before: Gather Medicinal Leeks along the Clamberclaw path before entering the arena. They appear as tall green plants near cliff edges.
Fight breakdown
Phase 1 — Rollout and Thunder Wave scatter
TellLord Electrode lowers itself to the ground before rolling — the roll path is a straight line toward your character's current position. Thunder Wave scatter is telegraphed by a visible electrical crackle spreading across its surface for 0.5 seconds.
CounterFor Rollout — sprint sideways to leave the roll path. For Thunder Wave scatter — the electric bolts fire in a random radial spread; keep moving in any direction and most bolts miss.
Damage windowAfter Rollout, Electrode wobbles in place for 1.5 seconds — throw Balms directly into its face (the centre of its body). After a Thunder Wave scatter, there is a 1-second gap before the next attack — another Balm window.
Phase 2 — Self-Destruct pulse
TellAt roughly 60% Balm progress, Lord Electrode begins glowing white — this is a Self-Destruct wind-up. The glow intensifies for about 2 seconds before the blast fires.
CounterSprint to the arena edge the moment the white glow begins. The blast has a large central radius but dissipates quickly at the outer edge. Being at maximum distance from Electrode when it fires reduces damage to near zero.
Damage windowAfter the Self-Destruct, Lord Electrode is stunned for 3 seconds — the longest recovery in any Noble fight. Throw Balms aggressively during this window. In the battle phase, Ground-type moves do not affect Electric-types, but Hisuian Electrode is Grass/Electric — Ground is blocked; use Fire instead.
If you're struggling
Where to heal: Exit to the Highlands Base Camp at the mountain pass. Craft more Balms and return.
Easier tactic: The Self-Destruct wind-up is very readable. If you are caught in the blast radius repeatedly, practise watching for the initial white glow — it starts at least 2 seconds before detonation, which is enough time to reach the arena edge.
Retreat: Exit and retry freely.
Reward: Electrode calmed — Braviary ride mount unlocked (aerial travel across all regions); Mission 12 complete; Alabaster Icelands access opens
Optional · strengthen your team
OptionalCraftsmanship Kit (anywhere in the field) — materials gathered in every areaHigher-tier Poké Balls (Leaden, Gigaton) dramatically increase catch rate for strong Pokémon. Crafting your own balls costs far less than buying them — and the materials are everywhere.
Leaden Balls require Iron Chunks (found in ore deposits throughout Coronet Highlands and Alabaster Icelands) and Apricorns. Gigaton Balls need Black Tumblestone (Alabaster Icelands ore). Always gather ore deposits when you pass them — you can never have too many crafting materials.
Completionist · this section
0 / 2 collected
✓
Ultra Ball recipe — Craftworks, Chapter 8Best general-purpose Ball in the main story. Craft 20 immediately.
✓
Braviary ride mount — reward for calming Lord ElectrodeFlying mount. Enables aerial travel and gliding across all five regions.
Watch it instead
20:13:00
▶ Ninbanyan
Pokemon Legends Arceus - Longplay Full Game Walkthrough No Commentary
▲ thumbnail from YouTube's CDN · the player loads only when you press play
5
Chapters 10–11
Alabaster Icelands
Braviary flyingLord AvaluggIce/Rock weaknesses
▾
Golden path
Travel to the Alabaster Icelands — a vast frozen tundra at Hisui's northern edge. Fly by Braviary to scout the area from above before landing. Set up the two Base Camps (Snowfields Camp and Glacier Terrace Camp) on arrival.
Gather Avalugg Balm ingredients immediately: Crunchy Salt (ore deposits throughout the Icelands — plentiful), Hearty Grains (common), Hopo Berry (berry bushes near camp). Craft at least 15 Balms — Lord Avalugg requires more than any previous Noble.
Catch Snover, Swinub, Bergmite, Glaceon, and Mamoswine (via Swinub → Piloswine evolution with Ancient Power). Mamoswine is one of the strongest Pokémon available for the late-game story fights and the post-game. Piloswine learns Ancient Power via a Move Tutor in Jubilife — teach it before evolving.
The Black Tumblestone ore found in this region crafts Gigaton Balls — the highest-tier crafting Ball, with very high catch rate on Pokémon not in battle. Mine the Black Tumblestone veins along the central glacier before leaving the area permanently.
Face Lord Avalugg at Icepeak Arena — the furthest north point of the Icelands. This is the longest Noble fight. Bring Fighting, Fire, Steel, or Water coverage for the battle phase. See the boss card below.
After calming Lord Avalugg, all five Noble Pokémon have been calmed. Return to Galaxy Hall — Commander Kamado calls an emergency meeting. Chapter 12 begins: the lake guardians must be found.
★Do this nowMine Black Tumblestone here — it is this region only.Black Tumblestone is only found in the Alabaster Icelands ore deposits. It crafts Gigaton Balls, the strongest crafting Ball in the game. Mine every Black Tumblestone vein you see before advancing the story — you cannot easily return to farm it later.
Craft at least 15 <strong>Avalugg Balms</strong> (recipe: Crunchy Salt × 1 + Hearty Grains × 1 + Hopo Berry × 1 — Crunchy Salt is found in ore deposits throughout Alabaster Icelands). Battle Pokémon level 52–56. Bring a Fighting, Fire, Steel, or Water-type. Hisuian Avalugg is Ice/Rock.
Top up before: This is the longest Noble fight. Craft 15+ Balms minimum. Stock Full Restores or Max Potions if you have them — the battle phases can be intense.
Fight breakdown
Phase 1 — Ice Beam and Body Slam
TellLord Avalugg opens its ice-plated jaws for 1 second before firing a sustained Ice Beam in a straight line. Body Slam is telegraphed by it rearing back on its rear legs — a very obvious 1.5-second animation.
CounterFor Ice Beam — step sideways immediately when the jaws open. For Body Slam — roll to either side the moment the rear-leg animation begins. Avalugg is large and slow — every attack has generous dodge windows.
Damage windowAfter each Ice Beam, there is a 2-second head-lowering recovery — throw Balms into the glowing wound on its back. After Body Slam, there is a 2.5-second floor-contact pause — the best Balm window in the fight.
Phase 2 — Avalanche rush
TellLord Avalugg begins emitting a cold mist around its body — this signals an Avalanche rush where it charges forward leaving an ice trail. The mist appears 1 second before the charge launches.
CounterSprint perpendicular to the charge direction. The ice trail persists for about 3 seconds and slows movement — avoid stepping on it after the charge.
Damage windowAfter the Avalanche rush, Avalugg takes 3 seconds to turn around — the longest recovery in the fight. Throw multiple Balms rapidly. In the battle phase, Fighting, Fire, Steel, Water, or Rock moves are super-effective against Ice/Rock. Close-range Fighting moves (Close Combat, Brick Break) end the battle phase fastest.
If you're struggling
Where to heal: Exit to the Icelands Base Camp. Craft Balms, heal up, and return.
Easier tactic: Stay near Avalugg's flank rather than in front — the Ice Beam fires forward, so flanking avoids the most dangerous attack entirely. Body Slams and Avalanche rushes still hit from the flank but are more telegraphed and easier to dodge.
Retreat: Exit and retry. You need more Balms than any previous Noble — always leave the camp with 15+.
Reward: Avalugg calmed — all five Noble Pokémon calmed; Mission 14 complete; lake trial sequence unlocks
Completionist · this section
0 / 1 collected
✓
Black Tumblestone — Gigaton Ball material, Icelands onlyMine from ore deposits throughout the Alabaster Icelands. Craft Gigaton Balls at the Craftsmanship Kit.
Watch it instead
20:13:00
▶ Ninbanyan
Pokemon Legends Arceus - Longplay Full Game Walkthrough No Commentary
▲ thumbnail from YouTube's CDN · the player loads only when you press play
6
Chapter 12
The Lake Guardians
Uxie riddleMesprit riddleAzelf riddle
▾
Golden path
Chapter 12 sends you to find the three lake guardians of Hisui: Uxie at Lake Acuity (Alabaster Icelands), Mesprit at Lake Verity (Obsidian Fieldlands), and Azelf at Lake Valor (Crimson Mirelands). Fly to each lake on Braviary — each guardian is on a small island at the lake's centre.
Uxie's riddle (Lake Acuity): Uxie asks how many eyes the Pokémon on its picture scroll have. The answer corresponds to a specific sequence of Pokémon names Uxie shows you — count the eyes on each Pokémon in order and enter the total as a number sequence using the in-game number symbols. The answer is fixed per playthrough and tied to the Pokémon shown.
Mesprit's trial (Lake Verity): Mesprit challenges your strength with a battle. It is level 50 — bring a Pokémon around level 45–50. You are not attempting to catch Mesprit here; you only need to survive and deal enough damage for the story beat. Mesprit uses Swift, Lucky Chant, and Charm.
Azelf's trial (Lake Valor): Azelf sets a strength trial in which you must strike Azelf with a precise throw — it moves unpredictably across the lake. Use a Poké Ball (not to catch — the throw is scripted to miss) aimed at Azelf while it is momentarily stationary. The timing window is about one second.
After completing all three lake trials, return to Galaxy Hall in Jubilife Village. The story's final arc begins: a massive space-time rift has opened above Mount Coronet. Chapter 13 begins.
💡TipUxie's riddle answer is always the same — look at the Pokémon shown.Uxie shows you a scroll of Pokémon. Count each Pokémon's eyes in the order shown and enter the digit sequence. The Pokémon shown are always: Combee (3 eyes shown), Zubat (0 — no visible eyes), Unown (1), Honchkrow (2), Alakazam (4). The answer to input is 60131 on the number pad. Use this rather than counting if you are stuck.
Completionist · this section
0 / 3 collected
✓
Uxie — catchable post-game (Request 77)Not caught during Chapter 12. Returns to Lake Acuity as a catchable Pokémon in post-game.
✓
Mesprit — catchable post-game (Request 78)Returns to Lake Verity post-game.
✓
Azelf — catchable post-game (Request 79)Returns to Lake Valor post-game.
Watch it instead
20:13:00
▶ Ninbanyan
Pokemon Legends Arceus - Longplay Full Game Walkthrough No Commentary
▲ thumbnail from YouTube's CDN · the player loads only when you press play
7
Chapters 13–17
The Origin of Hisui
Dialga vs PalkiaSpace-time riftOrigin Forme
▾
Golden path
A massive space-time rift has opened above Mount Coronet. Chapters 13–17 send you back through all five regions to gather offerings before climbing to the rift. Each offering requires a scene in one of the five Noble areas — fast-travel via Braviary makes this quick.
The Pokémon Company's final areas: Each offering chapter is brief — a story scene followed by a battle with a Pokémon guardian at level 50–55. Your team should be level 55+ by this point. Bring Full Restores and a strong Fighting-type for the Ice-type guardians.
After gathering all offerings, climb to the Temple of Sinnoh at Mount Coronet's summit. A cutscene leads to a choice: you must select whether to face the time-distortion deity or the space-distortion deity — corresponding to Dialga (Temporal Pokémon) or Palkia (Spatial Pokémon). This affects which Origin Forme you battle and catch, but the story outcome is the same either way.
Battle the chosen deity at level 65. This is a standard Pokémon battle — no Balm throwing. Both Dialga and Palkia use Roar of Time or Spacial Rend respectively (very powerful STAB moves). Bring a Dark or Ghost-type to resist their attacks. Win the battle and you receive the Red Chain to calm the rift.
After calming the rift, Dialga or Palkia is catchable in their Origin Forme — the most powerful version of each Pokémon in the game. Use Ultra Balls or Leaden Balls at low HP. Do not skip this catch — Origin Forme Dialga/Palkia cannot be obtained any other way.
Credits roll. The story of Hisui is resolved. The post-game begins: return to Jubilife Village and speak to Professor Laventon to unlock post-game content — including the true final boss.
⚠Heads upCatch Origin Forme Dialga or Palkia before the credits end.After defeating the rift deity, you are given the chance to catch Origin Forme Dialga or Palkia. Do not skip it — they are catchable only at this specific moment. After the credits, only the Altered Forme versions return to the game. Use Ultra Balls and weaken to low HP before throwing.
Completionist · this section
0 / 1 collected
✓
Origin Forme Dialga OR Palkia — catchable at the rift (Chapter 17)Your choice at the Temple of Sinnoh determines which you encounter. The other can be caught post-game via a specific Request.
Watch it instead
20:13:00
▶ Ninbanyan
Pokemon Legends Arceus - Longplay Full Game Walkthrough No Commentary
▲ thumbnail from YouTube's CDN · the player loads only when you press play
8
Post-game
Volo, Giratina & Arceus
Volo — 6 Pokémon + GiratinaRequest 102Arceus
▾
👆
Recommended first Bring a team of level 65–70 Pokémon with diverse coverage and a full stock of Full Restores before speaking to Volo at Spear Pillar. There is no recovery between his six-Pokémon team and Giratina.
Golden path
After the credits, speak to Professor Laventon at Galaxy Hall. He tells you to complete the Pokédex to its fullest — this unlocks the true post-game. To access Request 102 (the Arceus quest), you must first: complete all 94 regular Requests, raise your Pokédex to a sufficient completion level (all Pokémon with at least Level 10 Research Points), and complete the main story. This takes several additional hours.
Volo appears at Spear Pillar on Mount Coronet once the above conditions are met. He reveals himself as an antagonist who has been manipulating events to obtain Arceus's power. He challenges you to a battle. This is the hardest trainer fight in the game — see the boss card below. His full team: Spiritomb, Roserade, Hisuian Arcanine, Hisuian Goodra, Garchomp, Togekiss. Then immediately Giratina (Origin Forme) without a break.
After defeating Volo and calming Giratina, Giratina is available to catch. Use Ultra Balls at low HP. Giratina Origin Forme has high HP but is catchable without the Origin Ball at this point.
Completing Request 102 (available after Volo's defeat and full Pokédex completion) leads you to the Crimson Mirelands for a final confrontation with Arceus itself. You receive the Origin Ball — a guaranteed-catch item — for this fight. The Arceus battle is a test of endurance at level 75.
Beyond the main story and Volo, the post-game contains: catching the three lake guardians at their lakes (Requests 77–79), a Regigigas encounter at Snowpoint Temple, catching the other Origin Forme Dialga or Palkia via their request, and completing all remaining Pokédex Research Tasks for the final Star Rank.
⚠Heads upVolo fights with six Pokémon then Giratina back-to-back — no healing.Volo is followed immediately by Giratina (Origin Forme) with no break to heal. You must defeat seven Pokémon in a row starting at full. Prepare a party of six level 65–70 Pokémon with Full Restores — this is not a casual fight. It is considered one of the hardest battles in the entire Pokémon series.
★Do this nowTeach Piloswine Ancient Power before evolving it into Mamoswine.Mamoswine (Ice/Ground) is one of the best Pokémon for the Volo and Giratina fights. But Piloswine only evolves into Mamoswine after learning Ancient Power — and Mamoswine cannot learn it. Visit the Move Tutor in Jubilife Village and teach Piloswine Ancient Power before evolving. A Mamoswine with Icicle Crash counter-picks Garchomp, both Hisuian Arcanine and Goodra, and Giratina.
This is arguably the hardest fight in Pokémon Legends: Arceus. Volo uses a full team of six, then Giratina (Origin Forme) immediately after with no heal break. Your full team must be level 65–70 minimum. Bring at minimum three Full Restores and a full party.
Top up before: Visit the Craftworks in Jubilife Village, buy Full Restores, and ensure all six party members are at full HP with fresh PP. There is no recovery between Volo's team and Giratina.
Fight breakdown
Volo — Six Pokémon gauntlet
TellVolo uses: Spiritomb, Roserade, Hisuian Arcanine, Hisuian Goodra, Garchomp, and then reveals a second Togekiss after you think the fight is over — his Pokémon all carry full PP and held items.
CounterVolo's team has no single type weakness to exploit across all six members. Prioritise his Garchomp (Dragon/Ground — Ice-type is 4× effective) and Hisuian Arcanine (Fire/Rock — Water or Ground moves). Spiritomb has no weaknesses — use your strongest neutral moves.
Damage windowUse Strong Style moves freely — Volo's AI does not use healing items, so aggressive offence wins. Keep at least two Pokémon healthy going into Giratina.
Giratina (Origin Forme) — immediately after Volo
TellGiratina Origin Forme is Ghost/Dragon. It uses Shadow Force (invulnerability for one turn then hits), Dragon Claw, and Ominous Wind. Shadow Force is telegraphed by Giratina fading from sight entirely for one turn.
CounterWhen Giratina vanishes (Shadow Force), switch to a Pokémon you are willing to absorb the hit with. Ghost and Dragon-type moves hit it neutrally — use Dark, Ghost, Ice, Dragon, or Fairy for super-effective hits.
Damage windowAfter Giratina uses Shadow Force and re-appears, it is not invulnerable — it will take damage normally. Lead every turn after a Shadow Force with your strongest Ice or Dragon move. Icicle Crash or Blizzard from a Mamoswine or Glaceon ends the fight fastest.
If you're struggling
Where to heal: You must heal between attempts by visiting any Base Camp after the fight ends. The fight fully resets on each attempt.
Easier tactic: The single best preparation is having a level 65+ Lucario (Fighting/Steel) — it handles Volo's Spiritomb (Dark-type — Fighting hits neutrally, Steel is immune to Poison), Hisuian Goodra (Steel/Dragon — Fighting is super-effective), and contributes well to the Giratina fight. Bring a second Ice-type sweeper for Garchomp and Giratina.
Retreat: This fight has no escape during the battle. If your team is wiped, it fully resets for the next attempt.
Reward: Giratina calmed — <span class="spoiler">origin story revealed; Request 102 unlocks the path to Arceus itself</span>
Completionist · this section
0 / 3 collected
✓
Giratina (Origin Forme) — catchable after defeating VoloGhost/Dragon. Use Ultra Balls at low HP immediately after the Volo sequence ends.
✓
Origin Ball — given for Request 102Guaranteed catch. Used to catch Arceus.
✓
Arceus — level 75, caught via Origin Ball in Request 102The title legendary. Requires full Pokédex completion + all 94 Requests + Volo defeated.
Watch it instead
20:13:00
▶ Ninbanyan
Pokemon Legends Arceus - Longplay Full Game Walkthrough No Commentary
▲ thumbnail from YouTube's CDN · the player loads only when you press play