Fan guideNintendo Switch / Nintendo Switch 2Golden path + boss strategiesSpoiler-safe
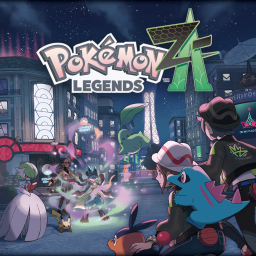
Pokémon Legends: Z-A
Lumiose City is being rebuilt — and its wild Pokémon are caught in the chaos. Catch Pokémon in real time, master Mega Evolution, and climb the Z-A Royale to uncover the truth behind the city's mysterious transformation in Game Freak's action-RPG set in the heart of Kalos.
Golden-path progress0 / 8 sections
Lumiose City · Z-A Royale golden path
1
Prologue
Lumiose City
Starter PokémonReal-time battlesHotel Z base
▾
Golden path
You arrive in Lumiose City, the famous circular city of the Kalos region, five years after the events of Pokémon X and Y. The city is under a sweeping urban redevelopment plan — buildings are being remade to coexist with wild Pokémon. Hotel Z is your base of operations for the entire game.
Choose your starter Pokémon during the opening sequence. Tepig (Fire-type) is the recommended choice for new players — it evolves into Emboar, which has a new Mega Evolution exclusive to this game and covers both Fire and Fighting matchups throughout the story. Your choice is permanent.
Complete Missions 1–4 (the Prologue tier) to establish yourself at Hotel Z and learn the core systems. Missions 1–4 cover recovering your travel bag, your first Pokémon catch, and your first introduction to the Lumiose redevelopment plan's conflicts with Rogue Mega Pokémon.
The battle system is real-time, not turn-based. Your Pokémon and the opponent move freely in a 3D arena. Press the attack button to use your selected move; press dodge to side-roll. Z-target an enemy by holding the targeting button, which locks your Pokémon's facing. If you are new to the system, spend ten minutes in any Wild Zone before advancing the story.
Catching Pokémon works like Pokémon Legends: Arceus — throw a Poké Ball directly at a wild Pokémon to catch it without battling, or weaken it first for a higher capture rate. Hold the throw button to aim; release to throw. Buy Poké Balls from the market district and remember that buying in sets of 10 grants free Premier Balls.
At Hotel Z, check the notice board after every main mission. Side missions flagged with a star icon are prerequisites for future main missions — clear them on sight to avoid blocking yourself later. The Canari Plush upgrader is also here: bring any Colorful Screws you find in Wild Zones and exchange them for passive team bonuses.
Begin collecting Colorful Screws as early as Mission 1. They are hidden collectibles — one to three per Wild Zone — and upgrade the Canari Plush system that replaces the traditional Exp. Share. Early screw collection accelerates team levelling throughout the entire game.
⚠Heads upName and appearance cannot be changed later.The character creator at the start of the game is the only opportunity to set your trainer's name and appearance. These cannot be changed at any point after you confirm.
★Do this nowStart collecting Colorful Screws immediately.From your first Wild Zone visit, scan every corner for glowing collectibles — these are Colorful Screws. Collecting them early and exchanging at the Hotel Z Canari Plush upgrader gives passive Exp. bonuses that compound across the entire game. Do not wait until later ranks to start.
Optional · strengthen your team
OptionalAll 20 Wild Zones across Lumiose City — small collectible screws hidden in the environmentColorful Screws upgrade the Canari Plush — a passive bonus system that replaces the traditional Exp. Share. Collecting screws is the primary way to accelerate team levelling.
There are 100 Colorful Screws total, one to three hidden in each Wild Zone. Screws glow faintly — look at the base of walls, behind market stalls, and on top of accessible ledges. Return completed sets to the Canari Plush upgrader at Hotel Z. Aim for at least 30 before Rank B.
OptionalAnywhere — raise friendship via walking, battles, and treatsSeveral Pokémon (Sylveon, Espeon, Umbreon, Togekiss, Lucario, and others) evolve via friendship. These are among the strongest Pokémon for the late-game Royale fights.
Walk with the target Pokémon in your party, feed it Berries and Poffins at Hotel Z, and win battles without it fainting. Use the Party Checker feature to monitor friendship progress. Note: the game does not flag friendship evolutions prominently — check which Pokémon you want to evolve early so you can start raising their bond before you need them.
OptionalHotel Z notice board — new side missions post regularlyExp., Mega Shards, Poké Balls, and story progression. Some side missions are prerequisites for main story missions — completing them avoids accidentally blocking yourself.
Check the Hotel Z notice board after every main mission and complete the flagged side missions before continuing. Side missions that are main-story prerequisites are marked with a star icon. The game has 119+ side missions total — do not feel pressured to clear them all, but do clear starred ones on sight.
Completionist · this section
0 / 1 collected
✓
Colorful Screws (100 total) — hidden across all 20 Wild ZonesGlow faintly in the environment. Found at the base of walls, behind market stalls, and on accessible ledges. Exchange at Hotel Z Canari Plush upgrader.
Watch it instead
15:36:00
▶ GamersPrey
Pokemon Legends Z-A FULL Gameplay Walkthrough (FULL GAME) 4K No Commentary
▲ thumbnail from YouTube's CDN · the player loads only when you press play
2
Rank V
The Royale Begins
Mega RingRoyale battles at nightRogue Megas
▾
Golden path
The Z-A Royale is a citywide ranked battle circuit — eleven trainers, each holding a rank from Z down to A. To climb the Royale you must defeat each trainer in order, starting with Zach (Rank Z), the lowest-ranked trainer. Find each trainer's location posted on the Prism Tower ranking board.
Critical rule: Royale Trainer battles only happen at night. If you arrive at a trainer's location during daylight, sit on any bench in the area and select 'Pass the time until night'. Every trainer waits at their posted location after dark. This single piece of information unblocks what is the most commonly asked question in the game.
Defeat Zach (Z), Yvon (Y), Xavi (X), and Rintaro (W) in order — these four do not use Mega Evolution and serve as calibration fights for the real-time battle system. All four are in the level 10–20 range. Defeat them by dodging their strongest attacks and striking during recovery windows.
In parallel with the early Royale fights, complete Missions 5–9. Each mission opens new Wild Zones and introduces Rogue Mega Pokémon — wild Pokémon that have Mega Evolved without a trainer and are disrupting the city. Rogue Megas are tough but drop valuable Mega Shards when defeated or caught.
Mission 9 — Chase That Mysterious Pokémon is the key unlock. Completing it earns the Mega Ring — a Key Stone bracelet that allows you and your Pokémon to Mega Evolve in battle. The Mega Gauge (the bar below your health) fills as you deal and take damage. When full, press the Mega Evolution button to transform your Pokémon.
With the Mega Ring in hand, return to Vinnie (Rank V) — the first Royale Trainer who uses Mega Evolution. He is significantly stronger than the four before him. Ensure your Pokémon are level 23–25 and that you have at least one solid answer to Dragon-type moves. See the boss card below for the full strategy.
After defeating Vinnie, check the map — new Wild Zones in the outer districts become accessible. Explore them before advancing to Rank F. Each new Zone adds Pokémon to your pool and has Colorful Screws to collect.
⚠Heads upRoyale Trainers only battle at night — use benches to advance time.Every Royale Trainer fight requires nighttime. Find any bench in the area — there is always one near the trainer's marked location — and select 'Pass the time until night'. This is not explained prominently in-game.
★Do this nowPre-fill your Mega Gauge before every Royale fight.The Mega Gauge carries between battles. Before facing any Royale Trainer, spend 5–10 minutes in a nearby Wild Zone fighting Pokémon. Arrive at each Trainer battle with a full or near-full gauge — this lets you Mega Evolve at the start rather than waiting mid-fight.
Royale BattleVinnie — Rank V Royale (Mega Drampa)Lumiose City — first Royale arena
Preparation
This is the first fight where your opponent uses Mega Evolution. Bring a full party of Pokémon in the mid-20s level range. Have at least two Potions or Super Potions.
Top up before: Buy Potions from the market district vendor before heading to the night battle. Replenish Poké Balls while you are there.
Fight breakdown
Phase 1 — Mega Drampa rushes
TellVinnie activates Mega Drampa immediately at the start of battle. Mega Drampa rears back slightly before every charge attack.
CounterDodge the charge by side-rolling at the last moment. The charge has a recovery window of about two seconds after the animation completes.
Damage windowAttack Mega Drampa during the charge recovery. Its Special Defence is higher than its Defence — use physical moves where possible. Target Pokémon with Fairy, Dragon, or Ice moves.
Phase 2 — Dragon Breath burst
TellMega Drampa draws in breath visibly — small motes of energy gather at its mouth for about one second before the burst fires.
CounterMove perpendicular to Mega Drampa's facing direction. The Dragon Breath burst fires in a straight cone — sidestepping removes all risk.
Damage windowSame physical-move window during recovery. Three to four solid hits end the fight. Using your own Mega Evolution here extends the stagger windows and makes the recovery period longer.
If you're struggling
Where to heal: Exit to the city street and use Potions, then return. Vinnie will wait.
Easier tactic: Bring a Fairy-type Pokémon — Mega Drampa is part Dragon and Fairy moves hit for 2× damage. Even a low-level Ralts or Snubbull makes this fight straightforward.
Retreat: You can forfeit and retry with no penalty beyond the time loss.
Reward: Rank V achieved — Mega Ring confirmed functional; access to Rank F Royale trainers
Completionist · this section
0 / 1 collected
✓
Mega Ring — earned at Mission 9 completionMandatory story reward. Cannot be missed.
Watch it instead
15:36:00
▶ GamersPrey
Pokemon Legends Z-A FULL Gameplay Walkthrough (FULL GAME) 4K No Commentary
▲ thumbnail from YouTube's CDN · the player loads only when you press play
3
Ranks F–E
Mega Shards & New Threats
Mega Shard ExchangeMega EelektrossMega Falinks
▾
Golden path
After Mission 10, a new vendor opens in the central market district — the Mega Shard Exchange. This is marked on the map with a gem icon. Bring the Mega Shards you have collected from Rogue Mega encounters and exchange them for Mega Stones. Prioritise your starter's Mega Stone and a coverage Mega Stone (Gengarite or Kangaskhanite are broadly useful).
Missions 10–19 span Ranks F and E. Each rank requires defeating the corresponding Royale Trainer: Canari (Rank F) with Mega Eelektross, then Ivor (Rank E) with Mega Falinks. Both fights are at night. Check the boss cards below for full strategies.
Between Canari and Ivor, continue farming Rogue Mega Pokémon in Wild Zones. The Rogue Megas that appear at your current rank level are the best source of Shards for the Exchange. Catching rather than defeating Rogue Megas yields more Shards per encounter and adds the Mega form to your Pokédex.
Check the Hotel Z notice board regularly. Several Rank F and E side missions are prerequisites for Rank D main missions — if the Rank D missions do not appear after beating Ivor, a starred side mission is blocking them. Clear all starred side missions before assuming progress is blocked.
By Mission 19, your team should be solidly level 40–47. If you are underlevelled, spend time in the outer Wild Zones fighting Rogue Megas and collecting Colorful Screws — the Canari Plush Exp. bonuses compound significantly with screws collected in the 20–60 range.
★Do this nowVisit the Mega Shard Exchange immediately after Mission 10.The Mega Shard Exchange opens after Mission 10 — a common miss. Exchange your Shards for your starter's Mega Stone first, then a secondary coverage Mega Stone. The Exchange vendor's stock expands after each Royale Trainer defeat, so return after Canari and Ivor.
Royale BattleCanari — Rank F Royale (Mega Eelektross)Lumiose City — mid-city district arena
Preparation
Canari's Mega Eelektross has no type weaknesses in its base form. Bring diverse coverage — Ground-types are immune to its Electric moves but watch for the secondary Water and Fire coverage. Level 30–33 recommended.
Top up before: Check the Mega Shard Exchange (it opens after Mission 10, one or two missions before this fight) — spend any Shards you have on a Mega Stone for your starter or a Fairy-type before this battle.
Fight breakdown
Phase 1 — Suction Cup lock
TellMega Eelektross attaches its suction-cup appendages to the ground before firing a radial electric burst. The attachment animation takes about one and a half seconds.
CounterWhen you see the attachment stance, dodge away and wait for the burst to dissipate. The burst covers a 5-metre radius around Eelektross.
Damage windowAfter the burst, Eelektross is briefly tangled in its own appendages. This is the primary damage window — use your highest-damage moves in this 2-second gap.
Phase 2 — Drain Punch chain
TellMega Eelektross closes range aggressively, glowing green — it is about to use a Drain Punch chain (three hits). The green glow appears about half a second before the first hit.
CounterBack away quickly and use a ranged move to interrupt it if possible. If you cannot interrupt, guard with your shield button to reduce damage.
Damage windowAfter the Drain Punch chain completes, Eelektross takes a recovery pause. Hit it with your Mega-Evolved Pokémon's strongest move here. Ground-type or Psychic-type coverage does well despite Eelektross having no weakness — high base power matters most.
If you're struggling
Where to heal: Exit the arena to the street and use items freely between attempts.
Easier tactic: Since Mega Eelektross has no type weakness, focus on high-power neutral coverage. A Pokémon with base Attack above 90 and a move with 90+ power will out-damage the Drain Punch healing. Tera... (no Tera in this game) — just use physical attackers and ignore type matchup entirely.
Retreat: No penalty for retreating and retrying.
Reward: Rank F achieved; Mega Shard Exchange vendor expands stock
Royale BattleIvor — Rank E Royale (Mega Falinks)Lumiose City — eastern district arena
Preparation
Falinks is a pure Fighting-type — bring Psychic, Flying, or Fairy-type Pokémon. Level 38–42 recommended. Ivor's Mega Falinks has increased Speed — have a faster lead or expect to take the first hit.
Top up before: Stock up on Hyper Potions if available; Ivor is a significant step up from Canari.
Fight breakdown
Phase 1 — Formation charge
TellMega Falinks lines up its six members into a tight formation before executing a linear charge. The formation lock takes about one second.
CounterMove laterally — the formation charge is a straight line. Once clear, you have two full seconds before the formation regroups.
Damage windowAfter the charge, the members are briefly scattered. Psychic-type moves that hit the main body while it is separated deal full damage. Two or three hits break the formation entirely and force a regrouping animation.
Phase 2 — Surround tactic
TellMega Falinks splits its members into two flanking groups. The main body pulses white before the surround begins.
CounterIdentify the main body (the larger front unit) and attack it exclusively. Hitting flanking members does not reduce Ivor's health total.
Damage windowStriking the main body during the surround tactic staggers the entire formation. Use your Mega-Evolved Pokémon's strongest Psychic or Flying move at this moment for maximum damage.
If you're struggling
Where to heal: Leave the arena, heal at Hotel Z (rest point), and return.
Easier tactic: A Psychic-type with Psychic or Psybeam is extremely efficient here. Gardevoir or its earlier form Kirlia, if available, trivialises the fight. Alternatively, any Flying-type with Wing Attack or Air Slash works well.
Retreat: Retry freely.
Reward: Rank E achieved; new Wild Zones unlocked in the north district
Optional · strengthen your team
OptionalMega Shard Exchange — unlocks after Mission 10, located in the central market district of Lumiose CityMega Stones for your team — each stone unlocks a specific Pokémon's Mega Evolution. Priority stones: Charizardite X (counters Grisham), Blastoisinite, Venusaurite, and your starter's Mega Stone.
Bring Mega Shards (dropped by Rogue Mega Pokémon in Wild Zones) to the exchange vendor. Each stone costs several shards of the matching type. Farm Rogue Megas in Wild Zones near your current rank — they reliably drop shards when defeated or captured.
Completionist · this section
0 / 1 collected
✓
Mega Stones — purchased from Mega Shard ExchangeUse Mega Shards dropped by Rogue Mega Pokémon to buy specific Mega Stones. Priority: starter Mega Stone first, then coverage types.
Watch it instead
15:36:00
▶ GamersPrey
Pokemon Legends Z-A FULL Gameplay Walkthrough (FULL GAME) 4K No Commentary
▲ thumbnail from YouTube's CDN · the player loads only when you press play
4
Rank D
Into the Sewers
Lumiose SewersMega ScolipedeUnderground zones
▾
Golden path
Rank D begins with the Lumiose Sewers becoming accessible — the underground network beneath the city opens around Mission 20. Sewer entrances are marked on the map (grate symbols). The Sewers contain several Wild Zones exclusive to this area and are the best mid-game location for Mega Shard farming.
Explore the first level of the Sewers before tackling Corbeau (Rank D). You will find Colorful Screws in the Sewer's alcoves and several Pokémon species not found in the surface zones, including some with high base stats useful for the later Royale fights.
Corbeau's arena is near the Sewers entrance. His Mega Scolipede is Bug/Poison — bring Fire, Ground, Flying, or Psychic-type coverage. Level 48–52 recommended. The boss card below covers the full fight strategy.
After defeating Corbeau, Missions 21–24 expand the Sewers further and introduce a new category of large Rogue Mega encounters — bigger, harder-hitting versions of previously seen forms. These give the best Mega Shard drop rates in the game so far. Spend time farming them before moving to Rank C.
By Mission 24, ensure you have the Mega Stones for your two main battling Pokémon from the Exchange. The Rank C and B fights ahead make heavy use of Fairy and Dragon-type Megas — having counter Mega Stones equipped saves significant healing costs.
💡TipSewers = best Mega Shard farm in the mid-game.Once the Lumiose Sewers open, spend 20–30 minutes farming Rogue Mega encounters here before advancing Rank D missions. The underground zones have a significantly higher Rogue Mega spawn rate than surface zones at the same rank level.
Royale BattleCorbeau — Rank D Royale (Mega Scolipede)Lumiose City — Sewers entrance arena
Preparation
Mega Scolipede is Bug/Poison — bring Ground, Fire, Flying, or Psychic-type Pokémon. Level 48–52 recommended. Corbeau's Scolipede is fast and hits hard; bring at least four Hyper Potions.
Top up before: The Lumiose Sewers open around Mission 20 — explore the first level for a Colorful Screw before the Corbeau fight to upgrade your Canari Plush.
Fight breakdown
Phase 1 — Poison rollout
TellMega Scolipede curls into a ball before rolling. The curl animation lasts about one second and a faint purple trail appears before launch.
CounterSide-roll at the last moment. The Poison rollout inflicts Badly Poisoned on contact — have Antidotes ready. The roll bounces off walls; watch the trajectory.
Damage windowScolipede exits the roll facing away from you — 1.5-second recovery window. Ground-type moves (Earthquake, Earth Power) are super-effective. Rock Slide also works well.
Phase 2 — Megahorn rush
TellMega Scolipede rears up on its back legs before a Megahorn lunge. The rear-up takes about half a second.
CounterDodge diagonally behind Scolipede. The Megahorn goes forward — moving behind it avoids all damage. If caught, the hit is Heavy but not a one-shot at level 50.
Damage windowStriking from behind during the Megahorn recovery is the safest window in the fight. Fire Blast or Fire Fang from a Fire-type deals 4× (double super-effective: Fire hits Bug and Poison both effectively). This is the fastest way to end Phase 2.
If you're struggling
Where to heal: Fast-travel to Hotel Z and rest — full heal. Return and retry.
Easier tactic: A Fire-type with a strong Fire move makes this fight dramatically shorter. Arcanine or Typhlosion (if you started with Cyndaquil) can two-shot Mega Scolipede.
Retreat: Retry without penalty.
Reward: Rank D achieved; Lumiose Sewers area expands
Completionist · this section
0 / 1 collected
✓
Colorful Screws (several) — in Sewer alcovesCheck every alcove and dead-end in the Sewer network. These are easy to miss due to the darker lighting.
Watch it instead
15:36:00
▶ GamersPrey
Pokemon Legends Z-A FULL Gameplay Walkthrough (FULL GAME) 4K No Commentary
▲ thumbnail from YouTube's CDN · the player loads only when you press play
5
Rank C
Rooftops and Royale
Rooftop Wild ZonesMega ClefableHeal Bell interruption
▾
Golden path
After defeating Corbeau, rooftop Wild Zones become accessible across Lumiose City — areas on top of the redeveloped buildings that are unique to this rank tier. Access them via roof-hatch ladders marked on the map. Rooftop zones have Pokémon from the upper-end of the game's pool and good Colorful Screw density.
Complete Missions 25–30. This section is the most story-heavy phase of the game before the climax — the Lumiose Redevelopment Plan encounters its first major crisis as Rogue Mega appearances accelerate citywide. Story missions involve both investigation and combat.
Target Jacinthe (Rank C) midway through this section. Her Mega Clefable is Fairy/Normal and has a healing move — see the boss card below for how to interrupt it. Bring Steel or Poison-type coverage and plan for a longer fight than previous Royale battles.
By Mission 30 your team should be level 55–59. If you started with Bulbasaur, your Mega Venusaur is an excellent answer to both Jacinthe (Poison typing) and Grisham ahead (Grass-type resists water moves). If you started with Tepig, your Mega Emboar handles Jacinthe well but needs support for Grisham.
Check the Hotel Z notice board before moving to Rank B. Several Rank B prerequisites are side missions that start in this rank tier — clearing them now avoids a forced side-mission detour later when you are eager to face Grisham.
💡TipInterrupt Heal Bell or the fight becomes a war of attrition.Jacinthe's Mega Clefable uses Heal Bell repeatedly. Landing any hit during the half-second wind-up animation before the bell rings cancels the heal entirely. Prioritise interruption over maximising damage output — each blocked Heal Bell is the equivalent of two extra attack turns.
Royale BattleJacinthe — Rank C Royale (Mega Clefable)Lumiose City — southern plaza arena
Preparation
Mega Clefable is Fairy/Normal — bring Steel or Poison-type Pokémon (Fairy is weak to both). Level 53–57 recommended. Jacinthe's Clefable uses Heal Bell frequently — her health pool is effectively larger than it appears.
Top up before: Stock at least five Hyper Potions and two Max Potions if available. This fight can run long due to the healing.
Fight breakdown
Phase 1 — Moonblast barrage
TellMega Clefable charges a crescent of lunar energy above its head — the charge glows bright pink for about one second before firing.
CounterSprint sideways during the charge and the Moonblast misses cleanly. The barrage fires three consecutive shots — dodge each individually.
Damage windowBetween Moonblast shots, Clefable pauses for 0.8 seconds. Land one Steel or Poison move per pause. Steel Wing, Iron Head, Sludge Bomb, or Poison Jab are ideal.
Phase 2 — Heal Bell interruption
TellMega Clefable closes its eyes and rings a bell visibly from its hand — this is Heal Bell, which removes status conditions and restores a portion of HP.
CounterInterrupt Heal Bell by landing a hit before the animation completes. The animation has a half-second wind-up before it becomes active. Prioritise interruption over damage — letting Heal Bell complete negates several turns of chip damage.
Damage windowAfter a failed Heal Bell, Clefable staggers briefly. Use your Mega-Evolved Pokémon's strongest move immediately. Repeated Heal Bell interruptions allow you to win a war of attrition.
If you're struggling
Where to heal: Fast-travel to Hotel Z, rest, and return.
Easier tactic: Bring a Poison-type with Poison Jab or Sludge Bomb. Mega Gengar or Mega Venusaur (if you started with Bulbasaur) makes this fight trivial. If you lack a Poison or Steel Pokémon, high-power neutral moves and aggressive interruption of Heal Bell still win.
Retreat: Retry freely.
Reward: Rank C achieved; rooftop Wild Zones accessible from here
Completionist · this section
0 / 1 collected
✓
Colorful Screws — rooftop Wild ZonesThe newly opened rooftop areas have a concentrated screw density. Sweep each rooftop zone for screws before moving on.
Watch it instead
15:36:00
▶ GamersPrey
Pokemon Legends Z-A FULL Gameplay Walkthrough (FULL GAME) 4K No Commentary
▲ thumbnail from YouTube's CDN · the player loads only when you press play
6
Rank B
The Hardest Fight
Mega Charizard XRock-type counterFlare Blitz dive
▾
Golden path
Rank B is the most difficult Royale tier before the finale. Grisham's Mega Charizard X is the hardest non-legendary fight in the game — it has high attack, speed, and two moves with large arenas of effect. Level 60–63 is the sweet spot. See the boss card below.
The most reliable counter to Mega Charizard X is a Rock-type Pokémon with Stone Edge or Rock Slide. Rock hits Fire/Dragon for 2× damage and is unaffected by Charizard's intimidation aura. Recommended Pokémon: Golem, Tyranitar (if available at this rank), Rhyperior, or Aerodactyl (also available by this point).
Missions 31–35 run in parallel with the Grisham fight. These missions involve investigating the acceleration of Rogue Mega appearances and several scenes at Prism Tower that foreshadow the Rank A climax. The missions hint that the redevelopment plan itself is connected to the legendary Pokémon Xerneas and Yveltal.
After defeating Grisham, Rogue Mega encounters across the city increase significantly in frequency and difficulty. This is the best time to farm Mega Shards for any final Mega Stones you need before Urbain. Spend time in the Sewers and rooftop zones to stock up.
Before moving to Rank A, ensure your full party of six is level 63–65, all have their best moves available, and your Mega Stone collection covers your two main Mega Pokémon. This is the last natural farming pause before the story accelerates dramatically toward the climax.
⚠Heads upExpect to retry Grisham — this is the designed difficulty wall.Grisham's Mega Charizard X is the acknowledged hardest mid-game fight in Pokémon Legends: Z-A. A retry or two is normal. The fight rewards preparation — a Rock-type Pokémon and a full Mega Gauge make a dramatic difference to the outcome.
Royale BattleGrisham — Rank B Royale (Mega Charizard X)Lumiose City — elevated arena, Rank B district
Preparation
Mega Charizard X is Fire/Dragon — bring Dragon, Ground, or Rock-type moves. This is the hardest Royale fight before the finale. Level 60–63 strongly recommended; bring five Max Potions.
Top up before: Farm Rogue Megas in the Sewers for Mega Shards and ensure your own starter's Mega Stone is in hand. If you started with Bulbasaur, acquire Charizardite X from the Mega Shard Exchange to understand the threat. Rock-type coverage (Stone Edge, Rock Slide) is the safest answer since it does not require a Dragon-type matchup.
Fight breakdown
Phase 1 — Outrage burst
TellMega Charizard X flares both wing-flames to full size and lets out a roar before a Dragon-type burst. The wing flare is a one-second tell.
CounterPut distance between you and Charizard the moment the wings flare. The Outrage burst has significant range but a blind spot directly below — if your Pokémon is small enough to be low to the ground, ducking below Charizard's chin avoids the hit.
Damage windowAfter Outrage, Charizard is briefly confused (the Outrage recoil effect) — this is a 2-second window. Rock-type moves here deal super-effective damage and the confusion extends your damage period. Keep distance to avoid the confusion-period random attacks.
Phase 2 — Flare Blitz dive
TellMega Charizard X ascends to about 10 metres and locks eyes on your Pokémon before a near-vertical Flare Blitz dive. The ascent takes 1.5 seconds.
CounterSprint horizontally while Charizard is ascending — the dive targets your position at time of lock-on, not your position on impact. If you move far enough during the 1.5-second ascent, the dive misses entirely.
Damage windowThe dive crater is the main damage window — Mega Charizard X is stunned on impact for 2.5 seconds. Land your heaviest Rock or Dragon attack. Grisham uses two to three Flare Blitz dives in Phase 2; consistent dodges and reliable craters end the fight efficiently.
If you're struggling
Where to heal: Fast-travel to Hotel Z. Rest, restore items, return. Grisham does not pursue you outside the arena.
Easier tactic: Rock-type is the most reliable counter — Stone Edge at 80+ base power from a Golem, Tyranitar, or Rhyperior is devastating. If you lack a Rock-type, any Ground-type move also hits Mega Charizard X (Fire/Dragon, so Ground is neutral but reliable). Avoid Dragon-type attacks — Charizard X resists Dragon in this Mega form.
Retreat: Retry without penalty. This fight is designed to be the Rank B wall — expect a retry or two.
Reward: Rank B achieved — Rank A challenge with Urbain unlocks; city-wide Rogue Mega frequency increases
Completionist · this section
0 / 1 collected
✓
Mega Shards (high drop rate) — Rogue Megas post-GrishamThe increased Rogue Mega frequency after Grisham's defeat is the best Shard farming window before the finale. Farm now if you still need Mega Stones.
Watch it instead
15:36:00
▶ GamersPrey
Pokemon Legends Z-A FULL Gameplay Walkthrough (FULL GAME) 4K No Commentary
▲ thumbnail from YouTube's CDN · the player loads only when you press play
Climb Prism Tower to face Urbain (Rank A) — the top-ranked trainer in the Z-A Royale. Urbain's team is built around a Mega Pokémon that is specifically typed to counter your starter. Lead with your non-starter coverage Pokémon and adapt once Urbain reveals his Mega. Full strategy in the boss card below.
After defeating Urbain, Mission 36 — Prism Tower's Dark Turn begins immediately. The legendary Pokémon Xerneas (Life Pokémon) and Yveltal (Destruction Pokémon) are awakened by the Lumiose Redevelopment Plan's deep construction work, and both begin threatening the city simultaneously.
Mission 37 resolves the immediate crisis — you battle both legendary Pokémon during the sequence. These story-mandated encounters are scripted at appropriate difficulty for level 63–65 Pokémon; you cannot catch Xerneas or Yveltal here — that comes in post-game. Focus on surviving the encounters and completing the story beats.
After Mission 37, the Lumiose Redevelopment Plan is concluded. Prism Tower is restored. The credits roll. The post-game content unlocks when you continue your save file.
★Do this nowPrepare everything before Prism Tower — no return during the climax.Before climbing Prism Tower for Urbain, visit Hotel Z: heal your full party, use all remaining Mega Shards at the Exchange, and stock Max Potions. The Mission 36 story sequence begins immediately after the Urbain fight. There is no break between the Royale finale and the legendary encounters.
Urbain uses a Mega Evolution that is specifically chosen to counter your starter. Bring a balanced team of five Pokémon that are not your starter, and reserve your starter with their Mega Stone for the final phase only. Level 64–65 recommended. Bring full Max Potion supply.
Top up before: Spend all remaining Mega Shards at the Exchange before this fight. Ensure your full party is healed at Hotel Z immediately before climbing Prism Tower.
Fight breakdown
Phase 1 — Counter-pick opener
TellUrbain reveals his Mega Pokémon at battle start — it is specifically typed to threaten your starter. The reveal cutscene shows the Mega Evolution immediately.
CounterDo not lead with your starter. Open with your best coverage Pokémon and assess Urbain's Mega type. Adapt your move selection to hit Urbain's Mega for super-effective damage from your non-starter Pokémon.
Damage windowUrbain's AI is aggressive but predictable — it always fires the highest-power move available. After each of Urbain's moves there is a 1-second recovery pause. Punish that pause every time with your strongest available attack.
Phase 2 — Urbain Mega-evolves (if not yet done)
TellIf Urbain's Pokémon has not already Mega Evolved by the halfway point of its health, Urbain triggers Mega Evolution manually. The gauge fills visibly — when it reaches full, the evolution is immediate.
CounterAttempt to burst Urbain's Pokémon before the gauge fills. Alternatively, pre-fill your own Mega Gauge and trigger your starter's Mega Evolution to match — starter-vs-starter Mega battles in Phase 2 are even fights.
Damage windowAfter Urbain's Mega Evolution, the Pokémon briefly poses. This 1.5-second pose window is free damage — land your Mega-starter's strongest move here to immediately establish pressure.
If you're struggling
Where to heal: Descend Prism Tower, fast-travel to Hotel Z, rest, return.
Easier tactic: Building a team around the three Pokémon that are strong against each starter's counter-type ensures you have a strong answer regardless of what Urbain brings. Consult the type chart before this fight specifically.
Retreat: Retry. After the Mission 36 story beat, the Prism Tower fight becomes accessible again.
Reward: Rank A achieved — Mission 36 'Prism Tower's Dark Turn' triggers immediately after; Xerneas and Yveltal awaken
Completionist · this section
0 / 1 collected
✓
Story resolution — Lumiose City redevelopment plan concludedAfter Mission 37, the main story ends and post-game begins.
Watch it instead
15:36:00
▶ GamersPrey
Pokemon Legends Z-A FULL Gameplay Walkthrough (FULL GAME) 4K No Commentary
▲ thumbnail from YouTube's CDN · the player loads only when you press play
8
Post-game
Catch the Legendaries
Xerneas & YveltalZygarde cellsMewtwo
▾
👆
Recommended first Post-game Pokémon are level 70+. Ensure your team is at minimum level 65 before attempting legendary encounters, and bring a large stock of Ultra Balls and Timer Balls.
Golden path
Post-game begins after completing Mission 37. Missions 38–42 cover the four legendary Pokémon encounters: Xerneas, Yveltal, Zygarde, and Mewtwo. Each mission becomes available sequentially after the previous is completed.
Xerneas and Yveltal (Missions 38–39) are now catchable in their dedicated arenas, reachable from Prism Tower after the credits. Both are level 70. Weaken them to low health (use Pokémon with moves that cannot knock out in one hit — False Swipe is ideal if you have it), then use Ultra Balls or Timer Balls after several turns.
Zygarde (Mission 40) requires completing a Zygarde Cell collection quest. Zygarde Cells are scattered across all Wild Zones and become visible post-game. Collect 50 cells to summon Zygarde's 50% Forme, then catch it. Collecting 100 cells reveals the Complete Forme location.
Mewtwo (Missions 41–42) is the final post-game legendary. It is accessed after completing the three previous legendary catches. Mewtwo is level 80 — the hardest catch in the game. Bring your fully Mega-Evolved team, Timer Balls (effectiveness increases with battle length), and False Swipe to avoid accidental knockouts.
With all four legendaries caught, Missions 38–42 are complete. Continue exploring the remaining Wild Zones, finishing side missions, and completing the Pokédex at your own pace — there is no further story content after Mission 42.
💡TipFalse Swipe prevents accidental knockouts on legendaries.False Swipe (a Normal-type move, available from the market) always leaves the target with at least 1 HP — it cannot knock out a Pokémon. Teach it to a fast Pokémon and use it to safely lower legendary health to the catch threshold. Essential for Mewtwo specifically.
💡TipTimer Balls are the best Poké Balls for legendaries.Timer Balls become more effective the more turns a battle has lasted. Start battles with Ultra Balls for the first three turns, then switch to Timer Balls from turn four onward — by turn ten, a Timer Ball is one of the most effective balls in the game. Bring at least 30.
Completionist · this section
0 / 4 collected
✓
Xerneas — Level 70, post-game Mission 38Fairy-type legendary. Appears in its dedicated arena near Prism Tower. Ultra Balls and Timer Balls recommended.
✓
Yveltal — Level 70, post-game Mission 39Dark/Flying-type legendary. Same arena approach as Xerneas. Bring Pokémon with Electric or Rock moves to weaken efficiently.
✓
Zygarde (50%) — Level 70, Mission 40 after 50 Zygarde CellsDragon/Ground-type. Collect 50 Zygarde Cells from Wild Zones to unlock. Complete Forme available at 100 cells.
✓
Mewtwo — Level 80, Mission 41–42Psychic-type. Hardest catch in the game. False Swipe + Timer Balls essential.
Watch it instead
15:36:00
▶ GamersPrey
Pokemon Legends Z-A FULL Gameplay Walkthrough (FULL GAME) 4K No Commentary
▲ thumbnail from YouTube's CDN · the player loads only when you press play