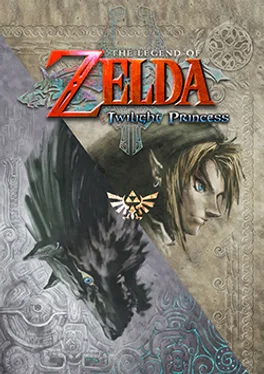
Browse/Zelda/The Legend of Zelda: Twilight Princess HD
Fan guideWii UGolden path + 100%Spoiler-safe
The Legend of Zelda: Twilight Princess HD
Descend from the sunlit fields of Ordon into a Hyrule swallowed by twilight — a complete golden-path and 100% guide for the HD remaster on Wii U, covering all 45 Heart Pieces, 24 Golden Bugs, and 60 Poe Souls.
Golden-path progress0 / 12 sections
Hyrule · golden path
1
Prologue
Ordon Village & Faron Province
Wolf tutorialTears of LightLantern
▾
Golden path
Complete Rusl's sword-training lesson on the ranch in the morning — follow the on-screen prompts. After training, herd all the goats into the pen using the C-stick on the Wii U GamePad: chase each goat in a wide arc and funnel them through the gate.Ordon
Fetch the cradle Uli dropped by the water: toss a piece of grass to summon the hawk, target the monkey across the bridge with the hawk to retrieve the cradle, then return it to Uli beside the spring.Ordon
Enter Sera's Sundries shop — the cat Sera's been moaning about is fishing at the pond. Catch a fish with your Fishing Rod and the cat will take it; Sera opens the shop and sells you the Slingshot for 30 rupees. Collect the slingshot.Ordon
Climb up to Link's treehouse and open the chest inside to receive the Wooden Sword. This unlocks after you have the Slingshot.Ordon
Shadow wolves raid Ordon — Link is dragged into the Twilight and transformed into a wolf. As a wolf, press X to activate Sense View and locate the glowing Tears of Light sources. Collect all 16 Tears of Light scattered across Faron Province to restore the Light Spirit Ordona.Faron Woods
After restoring Ordona, Link receives the Hero's Clothes and returns to human form. The fairy Midna joins as a guide. Speak with Coro the gate-keeper in Faron Woods and purchase the Lantern from him for 20 rupees — buy an extra bottle of Lantern Oil while you're there.Faron Woods
Use the Lantern to burn the large spider web blocking the southern path through Faron Woods. Follow the path north to reach the Forest Temple entrance.Faron Woods
★Do this nowBuy extra Lantern Oil from Coro.Do this now, before pushing south — the spider web consumes nearly a full bottle and you won't find more oil until Kakariko Village. One extra bottle from Coro is enough.
💡TipSense View reveals Poe Souls.As a wolf, hold X to activate Sense View. You will spot your first Poe Soul near the ruins in Faron Woods — defeat it to begin the 60-soul collection. Press A while locked on to bite and finish the glowing figure.
⬆Permanent upgradeWii U GamePad second screen.Twilight Princess HD uses the Wii U GamePad's touch screen as a permanent map and quick-item palette. Drag items directly to the D-pad slots for instant equipping without pausing. Open the Item screen with + to configure your loadout.
Completionist · this area
0 / 1 collected
✓
Poe Soul #1 — Faron Woods ruinsIn the ruins area just inside Faron Woods. Use wolf Sense View to see it glowing. Defeat and absorb it.
Watch it instead
25:40
▶ SourceSpy91
The Legend Of Zelda: Twilight Princess HD - 100% FULL GAME Walkthrough - No Commentary
▲ thumbnail from YouTube's CDN · the player loads only when you press play
2
Dungeon 1
Forest Temple
Gale BoomerangDiababaFused Shadow #1
▾
Golden path
Enter the Forest Temple from the northern end of Faron Woods. Follow the monkey that escapes from its cage — it leads you through the correct sequence of rooms. Use the Lantern to burn cobwebs that block doorways.Forest Temple
Free the caged monkeys as you progress — each freed monkey helps you cross gaps and reach new areas. There are eight monkeys in total; you don't need them all to proceed, but freeing each one makes traversal easier.Forest Temple
Reach the large room with the Ook midboss — an ape wielding a Bombling. Dodge his throws and use your Slingshot to stun him when he pauses on a post. When stunned, move in and sword-attack. Repeat until he drops. Chest appears: collect the Gale Boomerang.Forest Temple
The Gale Boomerang can strike multiple targets in sequence. Use it to spin the large windmill propellers in subsequent rooms, triggering platforms and unlocking doors. Collect the four Small Keys required for the boss door by exploring all blocked rooms — the Gale Boomerang reaches switches and items across gaps.Forest Temple
Unlock and enter the boss chamber. Defeat Diababa — see Boss breakdown below.Forest Temple
💡TipGale Boomerang targets up to five objects.Lock on up to five targets in sequence with the Gale Boomerang before releasing — the boomerang strikes them in order and returns. Use this to activate multiple switches in one throw and to collect items across water.
⚠Heads upDon't burn the web near Ook.There is one cobweb in the upper chamber that conceals a chest behind it — burn it with the Lantern to claim a Small Key before engaging Ook. You cannot easily return once the midboss fight starts.
BossDiababaForest Temple
Preparation
Enter with at least four hearts — Diababa's tentacle bites deal one full heart each. Stock a Red Potion from the shop near Kakariko if needed.
Top up before: Break all pots in the corridor before the boss door for red and green fairies.
Fight breakdown
Phase 1 — Twin Tentacles
TellTwo large plant tentacles rise from the murk and rear back before lunging.
CounterAim the Gale Boomerang at the Bomblings (bomb-carrying insects) that Ook releases from above, then curve the boomerang's path so it picks up a Bombling and delivers it to a tentacle's open mouth.
Damage windowAfter the tentacle is stunned by the explosion, sword-strike the exposed head rapidly until it submerges.
Phase 2 — Central Head
TellA giant mouth rises from the centre of the pit after both tentacles are destroyed; it inhales deeply before lunging across the arena.
CounterRepeat the Bombling trick — grab one with the Gale Boomerang and deliver it directly into the central mouth while it is open and stationary.
Damage windowOnce stunned by the explosion, Z-target the eye and unleash sword combos. Three rounds defeats her.
If you're struggling
Where to heal: Pots in the boss corridor respawn on re-entry — exit via the door that appeared, collect fairies from pots, re-enter.
Easier tactic: Stand near the arena edge opposite a tentacle. Draw a Bombling with the boomerang and let it fly straight — no curve needed from this angle.
Retreat: You can leave via the boss door to collect dropped pickups but cannot re-enter until you restart the fight from the last save.
Reward: Heart Container #1 and Fused Shadow fragment #1 — Midna explains their significance.
Completionist · this area
0 / 1 collected
✓
Heart Piece — Forest Temple monkey roomIn a chest in the room where all eight freed monkeys line up to form a bridge. Can only be reached by freeing all eight monkeys before the boss fight.
Watch it instead
54:00
▶ SourceSpy91
The Legend Of Zelda: Twilight Princess HD - 100% FULL GAME Walkthrough - No Commentary
▲ thumbnail from YouTube's CDN · the player loads only when you press play
3
Eldin Province
Eldin Province & Kakariko Village
Iron BootsHylian ShieldDeath Mountain
▾
Golden path
The Twilight spreads to Eldin Province. Link transforms to wolf again and must collect 16 Tears of Light across the province (Hyrule Field east, Castle Town, the Bridge of Eldin area). Use Sense View to locate each glowing tear.Kakariko
Restore Eldin's Light Spirit. Human form returns and Link enters Kakariko Village. King Bulblin's forces have kidnapped the children; a cutscene shows Colin held captive. Speak with healer Renado at the sanctuary.Kakariko
Visit Malo Mart — the shop run by the stern infant in Kakariko. Purchase the Hylian Shield here for 200 rupees; it is far more durable than the Wooden Shield and does not burn. This is optional but highly recommended before the Goron Mines.Kakariko
Speak with Mayor Bo at the largest house in Kakariko. He proposes a sumo-wrestling match. Use the left analogue stick to push and grab — force Bo out of the ring twice to win the Iron Boots. These magnetically attach Link to iron surfaces.Kakariko
Scale Death Mountain with the Gorons — the path requires the Iron Boots to resist the volcanic updrafts. Climb past the Goron rolling obstacles to reach the Goron Mines entrance at the summit.Kakariko
★Do this nowBuy the Hylian Shield before entering the Goron Mines.Do this now, while you're in Kakariko — Fyrus deals fire damage that destroys the Wooden Shield permanently mid-fight. The Hylian Shield is metal and immune to fire. 200 rupees from Malo Mart; collect them from grass, pots, and the Goron village chests.
💡TipSumo with Bo — grip-break technique.In the sumo match, let Bo charge first. The moment he grabs you, tap the A button rapidly to break his grip, then go on the offensive. Pushing from behind with the control stick at full deflection is the fastest way to eject him.
⚠MissableGolden Bug — Male Ant in Kakariko.A Male Ant (Golden Bug #1) is found on the south wall of Kakariko near Renado's sanctuary. Check now — later visits can miss it before a story cutscene triggers. Deliver bugs to Agitha in Castle Town for rewards (1 of 24 total).
Completionist · this area
0 / 2 collected
✓
Golden Bug — Male Ant (Kakariko south wall)On the south stone wall near Renado's sanctuary entrance. Grab with the <strong>A button</strong> while standing adjacent.
✓
Heart Piece — Kakariko WatchtowerClimb the watchtower in north Kakariko using the ladder — Heart Piece is on the roof platform.
Watch it instead
1:39:00
▶ SourceSpy91
The Legend Of Zelda: Twilight Princess HD - 100% FULL GAME Walkthrough - No Commentary
▲ thumbnail from YouTube's CDN · the player loads only when you press play
4
Dungeon 2
Goron Mines
Hero's BowMagnetic floorFyrus
▾
Golden path
Enter the Goron Mines from Death Mountain's summit. The first rooms use magnetic iron floors — equip the Iron Boots to walk on the ceiling. Alternate between boots on and off to navigate the magnetic sections efficiently.Goron Mines
Seek out the three Goron Elders sealed in separate wings of the mine — each holds one Key Shard. Defeat the Goron guards (Z-target and use a well-timed shield bash to stagger, then sword combo) to free each elder and collect the three Key Shards that combine into the Boss Key.Goron Mines
Find Dangoro, the Goron midboss, in the central magnetic chamber. Equip Iron Boots and fight on the ceiling: Dangoro charges — sidestep, then attack his glowing back crystal before he rolls. Defeat him to open the chest and receive the Hero's Bow.Goron Mines
Use the Hero's Bow to shoot rope-bridge anchors to lower crossings, and to hit eye switches on far walls that open doors in the mine's deeper sections. Switches glow orange — one arrow hit activates them.Goron Mines
Use the assembled Boss Key to unlock the boss chamber. Defeat Fyrus — see Boss breakdown below.Goron Mines
💡TipIron Boots switching on the GamePad.Assign Iron Boots to a D-pad slot via the GamePad touch screen — you will equip and unequip them dozens of times in this dungeon. Instant swapping without pausing is the main advantage TPHD has over the original.
⚠Heads upMagnetic ceilings can trap you.Equipping the Iron Boots while on the ceiling is safe; removing them causes Link to drop. Remove them only when directly above a platform or the floor below — a fall from the ceiling in the lava rooms is lethal.
BossFyrusGoron Mines
Preparation
Come in with six or more hearts. Fyrus's fire breath deals two hearts per second of contact. Bring one Red Potion.
Top up before: The antechamber before the boss door has a Goron Elder who restores your health for free.
Fight breakdown
Phase 1 — Crystal Shot
TellThe crystal on Fyrus's forehead pulses red. He stumbles in your direction trying to trample you.
CounterFire a Hero's Bow arrow into the glowing crystal on his forehead. He collapses to one knee.
Damage windowQuickly equip the Iron Boots, run to one of the chains trailing from his ankles, grab it, and back away (Iron Boots create the mass to pull). Fyrus tips forward and falls. Sword-attack the crystal while it glows on the ground.
Phase 2 — Fire Wall
TellFyrus stands, the crystal re-seals, and he begins spinning slowly with arms outstretched, creating a ring of fire.
CounterEquip Iron Boots to resist the spin's knockback, wait for him to slow, arrow the crystal again.
Damage windowRepeat chain pull and ground crystal attack. Three full repetitions end the fight.
If you're struggling
Where to heal: Pots on the arena perimeter contain hearts. Hug the wall when not attacking.
Easier tactic: Stay at mid-range — too close risks the trample, too far risks the fire breath arcs. Arrow the crystal from roughly three Epona-lengths away.
Retreat: None — the boss arena seals on entry. Dying returns you to the last save point.
Reward: Heart Container #2 and Fused Shadow fragment #2.
Completionist · this area
0 / 1 collected
✓
Heart Piece — Goron Mines upper lava roomIn a chest on a platform only reachable via magnetic ceiling traversal in the upper lava room. Walk the ceiling with Iron Boots equipped to the platform directly above, then drop.
Watch it instead
1:39:00
▶ SourceSpy91
The Legend Of Zelda: Twilight Princess HD - 100% FULL GAME Walkthrough - No Commentary
▲ thumbnail from YouTube's CDN · the player loads only when you press play
5
Lanayru Province
Lanayru Province & Zora's Domain
Zora ArmorWater BombsThaw the Domain
▾
Golden path
The Twilight swallows Lanayru Province — wolf form again. Collect 16 Tears of Light across Lanayru Province (Hyrule Field central and west, Lake Hylia area) to restore the Light Spirit Lanayru. The visions Lanayru shows after restoration reveal Ganondorf's history.Zora's Domain
Zora's Domain is frozen solid. Fill a pot from the hot spring near Death Mountain (carry it across Hyrule Field to Zora's Domain). Pour it into the frozen domain entrance to thaw the waterfall and restore the Zoras.Zora's Domain
At night in Kakariko graveyard, the spirit of Queen Rutela appears — she gives Link the Zora Armor as thanks for saving Prince Ralis. The Zora Armor allows unlimited underwater breathing and swimming.Kakariko
Purchase Water Bombs from the Zoras or from the merchant near Lake Hylia — these explode underwater. Dive into Lake Hylia (Zora Armor equipped) and bomb the large boulder sealing the Lakebed Temple entrance to open the dungeon.Lake Hylia
★Do this nowBring two pots of hot spring water.Do this before leaving Kakariko — carry a backup pot because it breaks if Link is knocked over by Bulblin riders on Hyrule Field. Fighting on horseback while carrying the pot will break it instantly.
💡TipLake Hylia restoration — drain resets after wolf phase.Lake Hylia is drained during the Lanayru Twilight wolf phase. After restoring Lanayru, Fyer (the cannon operator) launches Link back to the lake surface — speak to him to trigger the lake-refill cutscene.
⬆Permanent upgradeEmpty Bottle from Sera's cat reward.If you returned Sera's cat to her shop in the prologue, speak to Sera now — she rewards you with an Empty Bottle. This is the easiest first bottle to obtain and essential for carrying Lantern Oil, potions, and fairies going forward.
Completionist · this area
0 / 2 collected
✓
Heart Piece — Zora's Domain upper ledgeOn a ledge above the waterfall in the restored Zora's Domain. Dive in, swim up the waterfall current with Zora Armor, and climb the ledge.
✓
Golden Bug — Female Zora (Lanayru Province)Near the riverbank in Lanayru Province, south of Zora's Domain. Grab it as wolf during the tears collection phase.
Watch it instead
2:39:00
▶ SourceSpy91
The Legend Of Zelda: Twilight Princess HD - 100% FULL GAME Walkthrough - No Commentary
▲ thumbnail from YouTube's CDN · the player loads only when you press play
6
Dungeon 3
Lakebed Temple
ClawshotWater navigationMorpheel
▾
Golden path
Dive through the Lakebed Temple entrance with Zora Armor equipped. The dungeon is submerged — swimming is the primary mode of travel. Use the Iron Boots to sink to the floor in air-filled chambers to open doors and chests.Lakebed Temple
Navigate to the large central chamber with the Deku Toad midboss. It clings to the ceiling and drops tadpoles. Stun it with the Slingshot when it opens its mouth to roar, then sword attack from below. After three cycles the Deku Toad falls — collect the Clawshot from the chest.Lakebed Temple
The Clawshot can latch onto vines and grated ceilings throughout the temple. Use it to cross large water-filled rooms and to open water-wheel valves high on the walls — rotating these valves floods or drains sections of the dungeon, opening new routes.Lakebed Temple
Collect all Small Keys by solving the water-routing puzzles: rotate each room's central wheel-valve with the Clawshot to direct water flow. The correct rotation order for each room is: rotate until the staircase to the next door is submerged, cross, then rotate back.Lakebed Temple
Unlock and enter the flooded boss chamber. Defeat Morpheel — see Boss breakdown below.Lakebed Temple
💡TipMap the water wheel directions.Each valve rotates the room's water flow 90 degrees per hit. The dungeon map (check the GamePad) shows which doors are currently open. If you're lost, rotate the nearest valve twice to reverse the last change.
⚠Heads upOxygen timer in some chambers.A few sealed chambers have no air pockets and the Zora Armor does not protect against current damage in fast-moving water channels. Swim quickly through fast-water sections — being caught in the current deals persistent damage.
BossMorpheelLakebed Temple
Preparation
Eight or more hearts recommended — this is the first fight conducted entirely underwater. Morpheel's tail whip costs two hearts.
Top up before: Fairies are hidden in pots on the Lakebed Temple's final floor before the boss door.
Fight breakdown
Phase 1 — Eel Pit
TellMorpheel's body coils across the chamber floor. The exposed single eye at the base of her mass drifts slowly.
CounterEquip Iron Boots to sink to the floor. Lock on to Morpheel's eye and fire the Clawshot — Link is pulled through the water directly to it.
Damage windowSword-slash the eye rapidly while attached. She thrashes and releases you — repeat three times.
Phase 2 — Open Water
TellMorpheel extends her full serpentine form and cruises around the chamber. She will open her mouth wide before charging.
CounterRemove Iron Boots to swim freely. When Morpheel loops past, Clawshot onto her neck (the central eye). She pulls Link along; aim a sword strike at the eye while riding.
Damage windowMultiple hits while latched. She shakes Link off — repeat four or five loops to finish.
If you're struggling
Where to heal: Clams on the chamber floor drop hearts when opened with the Clawshot while wearing Iron Boots.
Easier tactic: In Phase 2, Clawshot from below — aim upward at her underside as she passes overhead. It is an easier angle than latching from the side.
Reward: Heart Container #3 and Fused Shadow fragment #3 — all three Fused Shadows collected.
Completionist · this area
0 / 1 collected
✓
Heart Piece — Lakebed Temple side roomIn a chest in a small side chamber accessible via a grated ceiling near the Clawshot chest room. Use the Clawshot to latch the ceiling grate and cross.
Watch it instead
1:13:00
▶ SourceSpy91
The Legend Of Zelda: Twilight Princess HD - 100% FULL GAME Walkthrough - No Commentary
▲ thumbnail from YouTube's CDN · the player loads only when you press play
7
Story Interlude
Midna's Fall, Sacred Grove & the Master Sword
Master SwordSkull Kid chaseZant confrontation
▾
Golden path
Zant appears at the three Light Spirit springs simultaneously. He shatters Midna's Fused Shadow helmet and curses her with a fragment of Twilight that is slowly killing her. He also transforms Link back into a wolf permanently — you cannot return to human form until Zelda intervenes.Hyrule Castle
As wolf, carry the dying Midna to Hyrule Castle. Sneak through the courtyard using Sense View to avoid guards — there are no combat requirements, just navigation. Reach Zelda's tower and enter her chamber.Hyrule Castle
Princess Zelda uses the power of the Triforce of Wisdom to restore Midna — but the effort leaves Zelda catatonic. Midna, now healed, explains that the Master Sword can break Zant's curse on Link and restore human form permanently.Hyrule Castle
Travel to the Sacred Grove in Faron Woods. Follow the sound of Skull Kid's horn — he will appear in small clearings and teleport away; pursue him through three separate clearing sequences. Each chase ends with Skull Kid calling in two Shadow Beasts — defeat them to proceed.Sacred Grove
Solve the stone guardian puzzle in the large circular clearing: push each of the two stone guardian statues into the correct position so their shadows match the outlined silhouettes on the ground. The door to the Pedestal of Time opens. Pull the Master Sword from its pedestal — Link returns to human form.Sacred Grove
Zant confronts the party at the three Light Spirit springs and reveals the Mirror of Twilight at Arbiter's Grounds in the Gerudo Desert — the only crossing between the light and dark worlds. The mirror is shattered. Recover the shards to proceed.Gerudo Desert
💡TipSkull Kid chase — listen for the horn.Skull Kid plays his horn to taunt you from each hiding spot. Stop moving and listen for the direction of the sound — it tells you which path in the clearing to take. His hiding spots rotate in a fixed pattern per clearing.
⚠Heads upSave before the guardian puzzle.There is no save point inside the Sacred Grove. Save in a nearby clearing before attempting the guardian puzzle — if you push a statue into the wrong position, you must leave the area and return to reset them.
Completionist · this area
0 / 1 collected
✓
Heart Piece — Sacred Grove (post-Master Sword)After drawing the Master Sword, a new chest appears in the upper Sacred Grove near the ruins. Reach it by climbing the vine-covered walls with the Clawshot.
Watch it instead
3:07:00
▶ SourceSpy91
The Legend Of Zelda: Twilight Princess HD - 100% FULL GAME Walkthrough - No Commentary
▲ thumbnail from YouTube's CDN · the player loads only when you press play
8
Dungeon 4
Gerudo Desert & Arbiter's Grounds
SpinnerMirror Shard #1Stallord
▾
👆
Recommended first You technically enter the desert before having the Master Sword if you skip ahead, but the dungeon cannot be completed without the full human-form Link. Complete the Sacred Grove section first.
Golden path
Collect Auru's Memo from the old man sitting atop the ruined watchtower at the south end of Lake Hylia. Ride or warp to Lake Hylia, climb the tower, and speak with him. Present the memo to Fyer at his cannon booth on the lakeshore — he launches Link to the Gerudo Desert.Lake Hylia
Cross the desert on Epona. Bulblin archer camps line the road — you can ride through them while striking with the sword, or clear them on foot. The Bulblin commander King Bulblin challenges Link on a narrow bridge; defeat him to proceed to Arbiter's Grounds.Gerudo Desert
Inside Arbiter's Grounds, defeat Death Sword (midboss) — a floating sword possessed by dark magic. Attack while it is visible; when it turns invisible, watch for footprints in the sand and strike as it rears. Collect the Spinner from the chest — a top-like device that rides special wall rails.Arbiter's Grounds
Use the Spinner to ride the wall rails that loop through the dungeon's deeper chambers. Launch from ramps to hit switches above the floor. The Spinner also destroys the spike-roller traps blocking corridors — ride into them to shatter them safely.Arbiter's Grounds
Collect the Boss Key and enter the large Spinner-rail arena. Defeat Stallord — see Boss breakdown below. A cutscene reveals the Mirror of Twilight and the role of the four Mirror Shards — the first shard is granted automatically.Arbiter's Grounds
★Do this nowStock up before entering the desert.Do this now, before speaking to Fyer — once launched to the Gerudo Desert there is no way back to a shop. Fill all potion bottles, equip the Hylian Shield, and top up your bomb supply. Arbiter's Grounds is the longest dungeon to this point.
💡TipSpinner momentum — keep it spinning.The Spinner has a momentum mechanic — it slows down on rails if Link doesn't continue pressing forward. Keep the control stick pushed forward constantly while rail-riding or you'll stop mid-section above a fatal drop.
BossStallordArbiter's Grounds
Preparation
Ten or more hearts strongly advised — Stallord's spine minions deal one heart each and the pillar obstacles in Phase 2 can chain-damage you.
Top up before: Pots in the Arbiter's Grounds corridor before the arena door contain hearts. Stock up on recovery items in Kakariko before tackling the desert.
Fight breakdown
Phase 1 — Spine Field
TellStallord's skeletal ribcage rises from the sand as smaller bone soldiers advance. The glowing gem at the base of the central pillar pulses.
CounterRide the Spinner on the rail that circles the outside of the arena. Slam into the emerging spine soldiers to destroy them, then drive the Spinner into the glowing base of the central pillar.
Damage windowEach successful pillar hit shatters one layer of the gem casing. Three hits shatter it entirely and the first phase ends.
Phase 2 — Skull Flight
TellStallord's skull detaches and launches into the air, breathing fire and swooping across the arena. Rotating stone pillars rise from the floor.
CounterStay on the Spinner rail to weave between the pillars. When Stallord's skull hovers low above the rail, launch off a ramp to collide with it mid-air.
Damage windowEach aerial collision deals damage. Avoid the fire breath by keeping to the opposite rail segment. Four to five solid hits end the fight.
If you're struggling
Where to heal: Sand pots around the arena perimeter contain hearts — hit them with the Spinner while passing.
Easier tactic: In Phase 2, use both rails — switch when fire pillars block one side. The skull follows a predictable oval loop; position yourself one ramp ahead of its current arc.
Retreat: Dying from the arena returns you to the last save; there is no mid-boss checkpoint.
Reward: Heart Container #4 and Mirror Shard #1 — the Mirror of Twilight's history is revealed in a cutscene.
Completionist · this area
0 / 1 collected
✓
Poe Soul — Arbiter's Grounds (entry room)Near the entrance of Arbiter's Grounds, only visible as wolf via Sense View. You must re-enter as wolf (use a shadow-world passage) to collect this.
Watch it instead
2:07:00
▶ SourceSpy91
The Legend Of Zelda: Twilight Princess HD - 100% FULL GAME Walkthrough - No Commentary
▲ thumbnail from YouTube's CDN · the player loads only when you press play
9
Dungeon 5
Snowpeak & Snowpeak Ruins
Ball and ChainReekfish trailBlizzeta
▾
Golden path
Find Ashei at the entrance to Snowpeak (north Zora's Domain area) — she sketches a drawing of a Yeti carrying a Reekfish. Accept Ashei's Sketch. Travel to Kakariko Village graveyard and show the sketch to Prince Ralis (the ill Zora child) — he gives you the Coral Earring bait.Kakariko
Return to the waterfall pool in Zora's Domain. Equip the Coral Earring to your Fishing Rod (swap it in the fishing interface). Cast into the large pool by the waterfall to catch a Reekfish. Return to wolf form to sniff the Reekfish and lock in its unique scent.Zora's Domain
Follow the wolf's Reekfish scent trail (yellow particles in Sense View) up the mountain behind Zora's Domain. The trail leads through the cave north of Zora's Domain and up the treacherous snow slopes of Snowpeak Mountain. Dodge Freezards and snowballs as you climb.Snowpeak Ruins
Reach Snowpeak Ruins — a crumbling mansion owned by the Yeti couple Yeto and Yeta. Yeto gives you a bowl of Yeta's soup (restores health). The dungeon structure is a mansion: find ingredients to improve the soup and find the Bedroom Key.Snowpeak Ruins
Defeat Darkhammer (midboss) — a heavy armoured enemy using a spiked ball. Wait for its attack swing, dodge, then run to grab the Ball and Chain from the chest that appears. Equip it immediately — it destroys the ice blocks that obstruct the mansion's rooms.Snowpeak Ruins
Find the Ordon Pumpkin (improves soup slightly) and the Ordon Goat Cheese (improves soup to Superb quality — restores eight hearts). Collect the Bedroom Key from the chest after clearing the main hall's ice puzzle. Unlock the boss bedroom and defeat Blizzeta — see Boss breakdown below.Snowpeak Ruins
★Do this nowCollect the Ordon Goat Cheese before the boss fight.The Superb Soup (made with Goat Cheese) restores eight hearts when you speak with Yeto in the dining room. Collect the cheese chest in the north wing of the mansion before fighting Blizzeta — it is the best in-dungeon heal available.
💡TipBall and Chain destroys ice blocks — and enemies.The Ball and Chain can be flung in any direction and destroys Ice Keese (frozen bats) in one hit. Swing it in a circle (hold Z + spin the control stick) for a wide-area attack in crowded rooms.
BossBlizzeta (Yeta)Snowpeak Ruins
Preparation
Twelve or more hearts — Blizzeta's ice-block crash deals two hearts and her final phase shards can hit repeatedly. Bring a Rare Chu Jelly if available.
Top up before: Speak with Yeto in the dining room before the boss door — the Superb Soup he offers restores eight hearts.
Fight breakdown
Phase 1 — Ice Block Descent
TellYeta, encased in a giant ice block, floats to the ceiling then positions directly above Link before dropping.
CounterWatch her shadow on the floor — roll away a moment before impact. The Mirror Shard embedded in the ice glows briefly after the crash.
Damage windowThrow the Ball and Chain at the Mirror Shard's reflection in the ice immediately after the crash while Yeta is momentarily dazed. Multiple hits needed.
Phase 2 — Ice Ball Orbit
TellThe block shatters and Yeta reforms around a smaller ice sphere. Six spiked ice shards orbit the sphere and she pursues Link across the arena.
CounterDodge the orbit and wait for a gap in the revolving shards. Throw the Ball and Chain into the orbit — it will shatter a shard on impact.
Damage windowOnce enough shards are cleared the Mirror Shard is exposed. Throw directly at it to land a hit. She rebuilds her orbit — repeat.
Phase 3 — Frenzied Pursuit
TellYeta's eyes glow red and she charges at high speed. A ring of ice spikes now revolves much faster.
CounterCircle-strafe continuously to avoid the charge. Target the glowing Mirror Shard embedded in her core when the shard gaps align.
Damage windowOne direct Ball and Chain hit to the core ends the fight. Yeto bursts in to comfort her.
If you're struggling
Where to heal: Ice pots around the arena contain hearts. Speak with Yeto (dining room) between attempts — Superb Soup restores hearts.
Easier tactic: In Phase 2, throw the Ball and Chain at the floor in front of Yeta rather than directly at her — it bounces up into the orbit and clears a shard safely.
Reward: Heart Container #5 and Mirror Shard #2.
Completionist · this area
0 / 2 collected
✓
Heart Piece — Snowpeak Ruins, ice-covered roomIn a chest behind an ice block in the north wing of the mansion. Destroy the block with the Ball and Chain.
✓
Golden Bug — Female Beetle (Faron Woods)Accessible now that you have the Ball and Chain — a Female Beetle is near a boulder in Faron Woods. Smash the boulder, collect the bug.
Watch it instead
1:55:00
▶ SourceSpy91
The Legend Of Zelda: Twilight Princess HD - 100% FULL GAME Walkthrough - No Commentary
▲ thumbnail from YouTube's CDN · the player loads only when you press play
10
Dungeon 6
Sacred Grove & Temple of Time
Dominion RodTime-shifted roomsArmogohma
▾
Golden path
Return to the Sacred Grove. Skull Kid reappears — defeat him in the chase sequence again (same pattern as before). In the lower clearing, two large stone guardian statues stand before a sealed door. Solve the guardian statue puzzle: push each statue to align with the shadow silhouettes on the floor, then enter the newly opened passage.Sacred Grove
The passage leads to the Temple of Time. The temple is a sprawling multi-level structure where ancient statues of the Goddess of Time dot every room. Navigate upward through the temple's ground, upper, and roof levels.Temple of Time
Defeat the Darknut guardian (mini-boss) — a heavily armoured knight. Use the Clawshot to pull off its cape (which slows it), then fight with the Master Sword in tight exchanges. Dodge its two-handed overhead swing, counter with a jump attack. Defeat to receive the Dominion Rod from the chest.Temple of Time
The Dominion Rod animates stone statues. Aim at any Goddess Statue and press B to take control — the statue mimics Link's movements. Use controlled statues to stand on floor switches, hold buttons, and reach chests that Link cannot access directly.Temple of Time
Collect the Boss Key by animating the large statue in the main hall and guiding it through the sealed gate to a pressure pad. Unlock and enter the boss chamber. Defeat Armogohma — see Boss breakdown below.Temple of Time
💡TipThe Darknut — strip armour first.The Darknut's heavy armour makes most attacks bounce off. Clawshot its cape to slow it, then target individual armour pieces with the Master Sword's back-slice. Once stripped to its tunic, it becomes much faster but takes full damage.
★Do this nowStatue puzzle shadow positions.The Sacred Grove statue puzzle changes between visits. When you enter the clearing, stop and observe the shadows on the floor — they show the target positions. The statues can only be pushed forward; plan your angle before each push.
BossArmogohmaTemple of Time
Preparation
Ten or more hearts. Armogohma's laser eye attack deals two hearts — the small spiderlings each deal a quarter heart on contact.
Top up before: Pots on the Temple of Time's final floor before the boss door contain fairies.
Fight breakdown
Phase 1 — Eye on the Ceiling
TellArmogohma clings to the ceiling, her giant eye tracking Link and charging a red laser beam.
CounterThe moment the eye opens fully to fire, aim the Hero's Bow and shoot directly into it. She crashes to the floor.
Damage windowUse the Dominion Rod on the stone statue in the room — it raises its hammer. Guide the statue to smash the dazed spider's eye on the floor with the hammer. Repeat.
Phase 2 — Spiderling Swarm
TellArmogohma splits into dozens of tiny spiderlings. One spiderling is slightly larger and darker — that is the real Armogohma.
CounterFire an arrow at the darkened spiderling to identify and stun it. Do not waste time on fakes.
Damage windowSword strikes to the stunned true spiderling. Two or three hits end the fight.
If you're struggling
Where to heal: Spiderlings drop hearts when defeated — clearing fakes does have some upside.
Easier tactic: In Phase 1, the statue's hammer range is generous — you don't need to be precise. Activate the statue and let it slowly walk toward Armogohma's crash point.
Reward: Heart Container #6 and Mirror Shard #3.
Completionist · this area
0 / 1 collected
✓
Heart Piece — Temple of Time roof platformOn a stone platform accessible from the exterior roof walkway. After reaching the roof during dungeon progression, look for a side ledge to the east.
Watch it instead
2:28:00
▶ SourceSpy91
The Legend Of Zelda: Twilight Princess HD - 100% FULL GAME Walkthrough - No Commentary
▲ thumbnail from YouTube's CDN · the player loads only when you press play
11
Dungeon 7
City in the Sky
Double ClawshotsAncient sky bookArgorok
▾
Golden path
Seek Shad in the Kakariko library (ground floor of the left building). Show him the Dominion Rod — he reveals it activates the owl statues using the Ancient Sky Book. Copy the sky inscription. You must now recharge the Dominion Rod (its power faded after the Temple of Time) by collecting sky characters inscribed on owl statues across Hyrule.Kakariko
Locate and activate six owl statues hidden across Hyrule (one each in: Kakariko, Eldin Province, Lanayru Province, Lake Hylia, Castle Town, and Hyrule Field). Each one is a stone owl figure — use the recharged Dominion Rod on each to copy its sky character inscription. Return to Shad when all six are collected.Lake Hylia
With the completed Ancient Sky Book, return to Lake Hylia and activate the owl statue beside Fyer's cannon. This unlocks a new cannon setting. Speak with Fyer — he launches Link into the sky toward the City in the Sky.Lake Hylia
The City in the Sky is a ruined floating metropolis. Cross gaps using the Clawshot to latch vine-covered walls and grated surfaces. Navigate to the central tower via a series of crumbling aqueducts.City in the Sky
Defeat Aeralfos (flying lizard midboss) — it dives and retreats, becoming invulnerable when airborne. Clawshot it while it glides low to pull it to the ground, then sword-combo while it's grounded. Repeat until defeated. Collect the Double Clawshots — you can now chain between two grapple points mid-air.City in the Sky
Use the Double Clawshots to chain between the Peahats (propeller plants) circling the outer platforms and reach the roof of the city's central tower. Unlock the boss chamber and defeat Argorok — see Boss breakdown below.City in the Sky
★Do this nowTrack all six owl statues before heading to Lake Hylia.Do this now, while exploring with the Dominion Rod — return to Lake Hylia only after all six characters are collected. Mark each statue on the GamePad map as you go. The Kakariko statue is inside the building where Shad stands and is easy to miss.
💡TipDouble Clawshots — infinite traversal.With Double Clawshots equipped in both B slots on the GamePad, press and hold B to latch, release to drop (then immediately press B again to re-latch). Chaining between Peahats mid-air requires this rhythm. Practice on the lower Peahats before the boss encounter.
BossArgorokCity in the Sky
Preparation
Fourteen or more hearts — Argorok's fire breath is a persistent hazard and the arena has no floor. Bring a Fairy in a bottle.
Top up before: Pots on the City in the Sky's upper platform before the boss door. A fairy is often found in a pot just before the bridge to the boss area.
Fight breakdown
Phase 1 — Armoured Dragon
TellArgorok circles the arena then hovers in place, spreading his wings before diving.
CounterClawshot onto one of the circling Peahats (plant-like propeller creatures). Swing to a second Peahat to gain altitude. When Argorok hovers, Clawshot to the glowing jewel on his tail.
Damage windowLink is dragged along the tail — Iron Boots on to hold, then sword-strike the tail jewel. He breaks free and repeats his circuit. Three tail hits crack the armour.
Phase 2 — Fire Breath from Above
TellArgorok rises higher — the Peahats now circle at different heights. He dives with a wide fire breath arc before ascending again.
CounterClawshot from low Peahat to high Peahat to match Argorok's new altitude. When he hovers, the jewel on his back is now exposed — Clawshot directly to his back.
Damage windowSword-strike his back jewel. He bucks Link off — repeat. Four back hits end the fight.
If you're struggling
Where to heal: There is no healing in the arena — bring a Fairy in a bottle as insurance before entering.
Easier tactic: In Phase 2, Clawshot to the highest Peahat first, hang, then immediately Clawshot to Argorok's back as he crests. Eliminates the need to chain multiple swings under fire breath pressure.
Reward: Heart Container #7 and Mirror Shard #4 — the Mirror of Twilight is restored.
Completionist · this area
0 / 1 collected
✓
Heart Piece — City in the Sky western aqueductOn a ledge off the western aqueduct path. Clawshot to the vine-covered wall to the left of the main path and shimmy along to the ledge.
Watch it instead
1:26:00
▶ SourceSpy91
The Legend Of Zelda: Twilight Princess HD - 100% FULL GAME Walkthrough - No Commentary
▲ thumbnail from YouTube's CDN · the player loads only when you press play
12
Finale
Palace of Twilight & Hyrule Castle
Light ArrowsZantGanondorfCredits
▾
Golden path
With all four Mirror Shards collected, the Mirror of Twilight is restored at Arbiter's Grounds. Step through the mirror — you enter the Twilight Realm. The Palace of Twilight rises before you: a vast, oppressive fortress suffused with Twilight energy.Palace of Twilight
Fight through the Palace of Twilight's two wings. Each wing contains a Sol — a glowing sphere of pure Light energy. The Sols are guarded by Phantom Zant enemies that teleport and shoot energy blasts. Destroy the Phantom Zants (sword or bow), collect both Sols, and slot them into the pedestals at the palace entrance.Palace of Twilight
With both Sols restored, the Master Sword absorbs their light — it now glows with Twilight-dispelling energy. Link can burn away Shadow Crystals blocking the palace's inner sanctum. Force through the sanctum to reach Zant's throne room.Palace of Twilight
Defeat Zant across six phases — see Boss breakdown below. Zant's defeat frees the Twilight Realm and restores Midna's true Twili form. A final revelation links Zant's power to Ganondorf — the true final enemy awaits in Hyrule.Palace of Twilight
Midna uses the power of the Fused Shadows to destroy the barrier around Hyrule Castle. March in. Fight through the castle tower: defeat re-animated Twilight creatures, solve an ascending puzzle to reach the castle roof, and collect Light Arrows from Zelda's spirit on the rooftop.Hyrule Castle
Defeat the four phases of Ganondorf: Puppet Zelda, Beast Ganon, the horseback chase across Hyrule Field, and the final sword duel — see Boss breakdown below. The credits roll after the final sword falls.Hyrule Castle
★Do this nowFully stock before stepping through the Mirror of Twilight.Do this now, before activating the mirror — the Palace of Twilight and Hyrule Castle run back-to-back with no opportunity to return. Enter with maximum health, at least two bottles of potions or Great Fairies, and 30+ arrows for Light Arrow use against Ganondorf.
⚠Heads upShadow Crystals — Master Sword required.The Shadow Crystals blocking the palace inner sanctum can only be destroyed by the light-charged Master Sword (after collecting both Sols). There is no bypass. If Link loses the light charge (it depletes in darkness over time), return to the Sols and recharge.
💡TipGanondorf's horseback phase — Zelda's aim.During the horseback chase, Zelda fires Light Arrows to support you — but you must steer Epona into position. Ride alongside Ganondorf at the same speed. When Zelda fires, the arrow's trajectory shows where to aim. The window opens for about three seconds each loop.
⬆Permanent upgrade100% completion — post-credits star.Completing the game with all 45 Heart Pieces, all 24 Golden Bugs delivered to Agitha, all 60 Poe Souls collected, and the Cave of Shadows cleared (Wolf Link + Wolf amiibo) marks the save file with a star (★) on the file select screen. The amiibo is required for the Cave of Shadows — this is the only missable content gated by physical purchase.
BossGanondorf — The Final BattleHyrule Castle
Preparation
Maximum hearts and two or more Recovery Hearts in bottles — four consecutive phases with no save between them. Use any remaining Great Fairy bottles here.
Top up before: Pots throughout Hyrule Castle corridors. A Fairy Fountain is accessible partway through the castle.
Fight breakdown
Phase 1 — Puppet Zelda
TellPossessed Zelda fires Light Arrows in long arcs. She is airborne and fast.
CounterDeflect an incoming Light Arrow back at Zelda by raising your shield at the moment of impact — she falls momentarily.
Damage windowClawshot Zelda toward you then sword-strike rapidly before she recovers. Three to four cycles free Zelda from Ganondorf's control.
Phase 2 — Beast Ganon
TellGanondorf transforms into the titanic boar beast. He stampedes across the darkened arena and fires blue orbs.
CounterAvoid the charge. Midna launches a Fused Shadow attack that staggers him — shoot a Light Arrow into his glowing forehead the moment the stagger begins.
Damage windowSword strikes to the forehead while he is down. Repeat until the beast collapses.
Phase 3 — Horseback Chase
TellGanondorf on horseback charges across Hyrule Field. Zelda rides alongside Link and passes him Light Arrows.
CounterRide Epona in parallel — steer so Link has a clear angle on Ganondorf. Accept Light Arrows from Zelda and aim carefully; Epona's gait makes timing essential.
Damage windowEach Light Arrow hit is a damage tick. Three to four hits knock him from his horse.
Phase 4 — Final Sword Duel
TellGanondorf stands alone in the field and challenges Link to a one-on-one sword fight. He telegraphs heavy overhead strikes.
CounterShield-bash to interrupt his charge, then counter. Alternatively — back-slice to get behind him cleanly.
Damage windowPersistent sword exchanges — the duel ends when Ganondorf's remaining power is drained. The Triforce of Power fades.
If you're struggling
Where to heal: During Phase 2, the arena edge has pots. During the horseback chase, Zelda occasionally drops recovery items if her Arrow count is full.
Easier tactic: In Phase 4, use the Mortal Draw (sheathe sword, press A right before Ganondorf's strike lands) — it deals enormous damage and bypasses his guard entirely.
Reward: Credits roll. Post-credits: save file gains a star to mark 100% completion. All Heart Containers: 20 hearts total.
Completionist · this area
0 / 1 collected
✓
Heart Piece — Hyrule Castle tower mid-level chestIn a chest behind a large Twilight crystal barricade partway up the castle tower. Destroy the barricade with the light-charged Master Sword.
Watch it instead
3:52:00
▶ SourceSpy91
The Legend Of Zelda: Twilight Princess HD - 100% FULL GAME Walkthrough - No Commentary
▲ thumbnail from YouTube's CDN · the player loads only when you press play