G Golden Path
Browse / Zelda / The Legend of Zelda: Majora's Mask
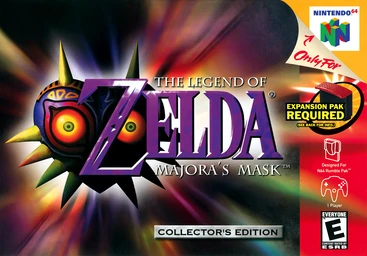
The Legend of Zelda: Majora's Mask box art
Fan guide Nintendo 64 Golden path + boss strategies Spoiler-safe

The Legend of Zelda: Majora's Mask

Three days. One falling moon. Trapped in the cursed land of Termina, Link relives the same 72 hours over and over — wearing the souls of the fallen as masks — to free four Giants and stop the Skull Kid before the moon falls.

Golden-path progress 0 / 6 sections

The Clock & the Notebook

Termina runs on a 72-hour loop. Start here: what the cycle keeps and wipes, the Bombers' Notebook timetable of who to help and when, then every mask, song, item and collectible behind the route.

The three-day cycle 72 hours · three in-game days (about 54 real minutes at normal speed)

Reset: Play the Song of Time to rewind to dawn on the First Day. This also saves your game.

You keep
  • Masks
  • Heart Containers & Heart Pieces
  • Weapons & the sword you've forged
  • Wallet, Bomb Bag & quiver upgrades
  • Bottles (but not their contents)
  • Dungeon maps, compasses & learned songs
  • Owl Statue save points
You lose
  • Rupees (bank them first)
  • Bombs, Bombchu, arrows, Deku Sticks & Nuts
  • Most one-cycle event items (deeds, letters, eggs, bottled potions)
  • Dungeon Small Keys & temporary progress inside a not-yet-cleared temple
Bend time
Song of TimeReset to the First Day and save.
Inverted Song of TimeSlow time to one-third speed for the rest of the cycle.
Song of Double TimeSkip forward to the next dawn or dusk.
Song of SoaringWarp to any Owl Statue you've activated — your fastest travel.

Defeating a temple boss is permanent across resets (the Giant stays freed), but the region's curse only lifts within a cycle you've cleared it in — so collect a region's time-sensitive pickups in the same loop you beat its temple.

Bombers' Notebook — who, where & when 21 timed events · masks & Heart Pieces
All Day 1 from ~1:40pm
Anju — Stock Pot InnBegins the Couple's Mask chain; Room Key
East Clock Town · Stock Pot Inn
Needs Claim a reservation, or wear Kafei's Mask after the postman delivers Kafei's letter
Anju runs the inn and anchors the game's longest sidequest, spanning all three days.
Day 1 ~10:00am–6:00pm
Kafei's Mask — Madame AromaKafei's Mask
East Clock Town · Mayor's Residence
Needs Agree to search for Madame Aroma's missing son
Madame Aroma lends the mask of her son Kafei to aid the search.
Night 1 12:00am–6:00am
Letter to Kafei — Anju at midnightLetter to Kafei
East Clock Town · Stock Pot Inn kitchen
Needs Show Anju Kafei's Mask; the postman delivers Kafei's letter ~1:40pm Day 1
Anju entrusts you with a letter for her missing fiancé.
Day 2 Before the ~9:00am pickup
Mail the Letter to KafeiTriggers Kafei's reply
Any Clock Town postbox
Needs Hold the Letter to Kafei
The postman collects the letter on his morning round and delivers it to Kafei.
Day 2 ~3:00pm–6:00pm
Kafei — Curiosity Shop back roomPendant of Memories
West Clock Town · Laundry Pool → Curiosity Shop hideout
Needs Mailed the letter; follow the masked child
Kafei, shrunk to a child by the Skull Kid, explains his stolen wedding mask and gives the pendant.
Day 2 or 3 ~10:00am–7:00pm
Give Pendant to AnjuAnju will wait rather than flee
East Clock Town · Stock Pot Inn
Needs Hold the Pendant of Memories
Kafei's pendant convinces Anju to stay in town despite the moon.
Final Day ~1:00pm–6:00pm
Special Delivery to MamaKeaton Mask + the delivery letter
West Clock Town · Curiosity Shop back room
Needs Anju & Kafei chain reached the Final Day
The Curiosity Shop owner asks you to carry a letter to Kafei's mother.
Final Day From ~6:00pm
Sakon's Hideout — recover the Sun's MaskRecovers the Sun's Mask
Ikana Canyon · Sakon's Hideout
Needs On the Anju & Kafei chain with Kafei
You and Kafei solve a switch-and-conveyor puzzle to grab the wedding mask before it is lost.
Final Night ~from 6:00pm (late-countdown reunion)
Couple's Mask — the reunionCouple's Mask
East Clock Town · Stock Pot Inn
Needs Completed the full chain including Sakon's Hideout
The reunited couple merge the Sun's and Moon's Masks into the Couple's Mask and give it to you.
Night 1 ~12:00am
Old Lady from the Bomb ShopBlast Mask
North Clock Town
Needs Strike the thief Sakon to make him drop the bombs (skip this if running the Anju & Kafei quest)
Stopping Sakon from robbing the bomb-shop lady earns the Blast Mask.
Night 1 or 2 ~6:00pm–6:00am
Guru-Guru — Bremen MaskBremen Mask
West Clock Town · Laundry Pool
Needs Approach as Hylian Link and hear the musician's confession
The music-box man gives you his Bremen Mask after his late-night confession.
Any day ~6:00am–8:00pm
Grog's chicks (Bremen march)Bunny Hood
Romani Ranch · Cucco Shack
Needs Wear the Bremen Mask and march so every chick follows and grows up
Raising Grog's chicks to adulthood earns the speed-boosting Bunny Hood.
Night 1 Aliens arrive ~2:30am; hold out to ~5:00am
Romani — alien defenceBottle of milk; opens the Romani's Mask chain
Romani Ranch · barn
Needs Agree to help Romani during the day; bring a bow
Shoot the invading 'ghosts' before they reach the barn and take the cows.
Night 2 Cart departs ~6:00pm
Cremia — milk runRomani's Mask
Milk Road, Romani Ranch → Clock Town
Needs Defend the ranch on Night 1 first
Guard Cremia's wagon, shooting the masked riders who attack on the road.
Any day ~6:00am–6:00pm
Gorman Brothers — horse raceGaro's Mask
Milk Road · Gorman Track
Needs Ride Epona and beat both brothers
Winning the racetrack on Epona earns Garo's Mask, needed to enter the Milk Bar.
Final Day Daytime, before he flees
Postman — Postman's HatPostman's Hat
West Clock Town · Post Office
Needs Deliver the Special Delivery to Mama so the Postman is freed from his schedule
Relieved of duty, the terrified Postman gives you his hat before fleeing the moon.
Any day Daytime
Swordsman — Expert CoursePiece of Heart
West Clock Town · Swordsman's School
Needs Cut all logs with jump attacks for a perfect 30
Acing the log-cutting course rewards a Heart Piece.
Any night ~12:00am–6:00am
Kamaro — Kamaro's MaskKamaro's Mask
Termina Field · mushroom rock north of town
Needs Play the Song of Healing for the dancing ghost
Healing the spirit of the dancer Kamaro yields his mask and dance.
Night 1 or 2 ~6:00pm onward
Rosa Sisters — the dancePiece of Heart
West Clock Town
Needs Wear Kamaro's Mask and perform the dance
Teaching the Rosa Sisters their routine earns a Heart Piece.
Any Any time
Shiro — Stone MaskStone Mask
Road to Ikana · invisible soldier
Needs Find the invisible Shiro with the Lens of Truth and give him a potion
Reviving the overlooked soldier grants the Stone Mask, which makes enemies ignore you.
Night 1 or 2 ~10:00pm–5:00am
Gorman Troupe — Circus Leader's MaskCircus Leader's Mask
East Clock Town · Milk Bar (Latte)
Needs Have Romani's Mask to enter; pass Toto's sound-check in all four forms
After the band's rehearsal succeeds, troupe leader Gorman gives you his mask.
Items & equipment 14 tools · where, when, what it unlocks
Deku MaskTransformation Deku Happy Mask Salesman, after the Song of HealingHop on water, launch from flower pads, fire bubbles.
Goron MaskTransformation Goron Song of Healing for Darmani's spirit, Goron GraveyardRoll at speed, punch, ground-pound, survive lava.
Zora MaskTransformation Zora Song of Healing for the dying Mikau, Great Bay CoastSwim fast, dive, throw fin boomerangs, raise an electric shield.
Fierce Deity's MaskTransformation Boss only Trade all 20 ordinary masks to the Moon ChildrenBecome the towering Fierce Deity and fire sword beams — usable on bosses.
Hero's BowWeapon Woodfall TempleShoot eye-switches and distant enemies; base for the three elemental arrows.
Fire ArrowsWeapon Snowhead TempleMelt ice and light frozen torches.
Ice ArrowsWeapon Great Bay TempleFreeze water and enemies into solid platforms.
Light ArrowsWeapon Stone Tower TempleFlip Stone Tower, pierce Gomess's cloak, and stagger Majora.
HookshotItem Pirates' Fortress, Great BayGrapple to targets and pull across gaps — opens far Heart Pieces.
Lens of TruthItem Hidden grotto near the Southern SwampReveals invisible platforms, walls, and Shiro (drains magic).
Powder KegItem Pass the Goron's big-bomb test (Mountain Village)Giant bombs that blow open the boulder to the Bomb Shop and Romani Ranch gate.
Pictograph BoxItem Swamp Tourist CenterPhotograph people and places for several side quests and Heart Pieces.
Great Fairy's SwordUpgrade Reunite the Great Fairy's stray fairies (Ikana)The strongest two-handed blade — far above the forged Gilded Sword.
Gilded SwordUpgrade Give the Razor Sword + a Gold Dust to the Mountain SmithyA permanent, unbreakable sword upgrade that survives resets.
Ocarina songs 12 songs · where learned and what they do
Song of Time Remembered once you recover the Ocarina of Time from the Skull Kid. Returns you to the dawn of the First Day — resets the three-day cycle and saves.
Inverted Song of Time Play the Song of Time's notes in reverse. Slows time to a third speed, stretching each cycle.
Song of Double Time Play each Song of Time note twice. Jumps time forward to the next dawn or dusk.
Song of Healing Taught by the Happy Mask Salesman after you regain the Ocarina. Soothes troubled spirits and lifts curses, often leaving a wearable mask behind.
Sonata of Awakening Taught by the imprisoned monkey in Deku Palace. Rouses sleeping things — raises Woodfall Temple and wakes certain characters.
Goron Lullaby Completed from the Goron Elder's baby in Goron Village (after the Elder's intro). Sends listeners to sleep — quiets Goron babies and the boulder blocking the Powder Keg, and Biggoron.
New Wave Bossa Nova Taught by the Zora egg larvae in the Marine Research Lab once all eggs are gathered. Summons the giant turtle to ferry you to the Great Bay Temple.
Elegy of Emptiness Taught by the King of Ikana after you defeat him in the Ancient Castle. Leaves a hollow statue of your current form to hold down switches in Stone Tower.
Oath to Order Learned by freeing the giant after each temple boss. Calls the four Giants; played atop the Clock Tower to catch the falling Moon.
Song of Soaring From a stone tablet near the Southern Swamp. Warps instantly to any Owl Statue you've activated.
Epona's Song Recalled with Romani at Romani Ranch. Calls Epona to your side and calms certain cows.
Song of Storms Taught by the ghost Flat beneath a grave in the Ikana Graveyard. Summons rain — fills dry wells and springs and reveals hidden grottoes.
Pieces of Heart 52 listed of 52

Four pieces make one Heart Container (bosses give a full container too). Many are gated behind a specific transformation, song, or mask, and several are tied to timed Bombers'-Notebook events — so plan which cycle you collect them in.

Post Office timing game Clock Town Post Office Stop the Postman's counter at exactly 10 seconds (Bunny Hood helps) Clock Town
Clock Tower ledge South Clock Town, upper ledge Give the Business Scrub the Moon's Tear, then launch from its Deku Flower Clock Town
Bank reward West Clock Town bank Deposit a running total of 5000 Rupees Clock Town
Stock Pot Inn toilet hand Stock Pot Inn restroom Reach the inn at night and give the hand a piece of paper Clock Town
Deku platform jump North Clock Town, near the slide As Deku Link, hop to the nearby tree Clock Town
Swordsman's School West Clock Town swordsman's school Score a perfect 30 in the Expert Course Clock Town
Deku Scrub Playground North Clock Town playground As Deku Link, win the float game all three days Clock Town
Honey & Darling's game West Clock Town Honey & Darling shop Win the minigame on three consecutive days Clock Town
Town Shooting Gallery East Clock Town shooting gallery Score a perfect 50 with the Hero's Bow Clock Town
Treasure-hunting game East Clock Town Treasure Chest Shop Win the game as Goron Link Clock Town
Rosa Sisters' dance West Clock Town at night Wear Kamaro's Mask and dance for the Rosa Sisters Clock Town
Grandma's long story Stock Pot Inn (Grandma's room) Wear the All-Night Mask through her Carnival tale Clock Town
Grandma's second story Stock Pot Inn (Grandma's room) Wear the All-Night Mask through her hide-and-seek tale Clock Town
Postman's postbox A Clock Town postbox Wear the Postman's Hat and check a postbox Clock Town
Couple's Mask reward Mayor's residence, East Clock Town Complete the Anju & Kafei quest, then wear the Couple's Mask in the office Clock Town
Keaton's quiz Hidden grass circle, Termina Field As Deku Link sink into the grass, wear the Keaton Mask, answer all five questions Termina Field
Peahat hole Termina Field (Milk Road hole) As Deku Link, drop in and defeat the Peahat Termina Field
Dodongo hole Northwest Termina Field hidden hole Defeat the two Dodongos inside Termina Field
Business Scrub cave Cave near the Astral Observatory path As Deku Link, haggle the Business Scrub down and pay 100 Rupees Termina Field
Gossip Stone match Four holes with Gossip Stones, Termina Field Play a learned area song until all four stones glow the same colour Termina Field
Beehive over water West Termina Field near Great Bay Blast the boulder, destroy the beehives, then dive as Zora to grab it Termina Field
Doggy Racetrack Romani Ranch dog racetrack Pick a winning dog (Mask of Truth helps) and earn 150 Rupees Romani Ranch
Southern Swamp vine tree Swamp path near Tingle As Deku Link, climb the vines by the tree Woodfall
Tourist Center roof Roof of the Swamp Tourist Center Advance the Title Deed chain, then float from a flower onto the roof Woodfall
Swamp Shooting Gallery Southern Swamp shooting gallery Score 2000+ with the Hero's Bow Woodfall
Pictograph contest Swamp Tourist Center Photograph the Deku King and show Koume Woodfall
Boat-cruise targets Swamp Tourist Center boat cruise After Woodfall, shoot the targets 20 times while sparing Koume Woodfall
Deku Palace garden Deku Palace inner garden As Deku Link reach the far end of the western monkey garden Woodfall
Woodfall flower chain Outside Woodfall Temple As Deku Link, float flower-to-flower around the rim and open the chest Woodfall
Mountain Village ledge Goron/Mountain Village ledge Advance the Title Deed chain, then float from a Deku Flower to the ledge Snowhead
Don Gero's frog choir Mountain Village pond As Goron, get Don Gero's Mask and gather all five frogs after spring returns Snowhead
Mountain river bottom River between Mountain & Goron Village After defeating Goht, dive to the riverbed as Zora Snowhead
Scarecrow platform Path to Snowhead Use the Scarecrow's Song and Hookshot to reach the high scarecrow Snowhead
Giant fish aquarium Marine Research Laboratory, Great Bay Bring four bottled fish to feed the tank until the big fish spits it out Great Bay
Zora Cape waterfall Easternmost Zora Cape As Zora, defeat the Like Like at the waterfall base Great Bay
Zora Hall piano duet Zora Hall As Zora, learn the bassist's part and play with the band Great Bay
Lulu's room ledge Zora Hall, above Lulu's room Complete the Title Deed chain, then float up as Deku Link Great Bay
Pirates' Fortress cell Pirates' Fortress As Goron hit the switch and roll into the closing cell Great Bay
Pinnacle Rock seahorse Pinnacle Rock, Great Bay Photograph a pirate for the Seahorse, then as Zora beat the Deep Pythons Great Bay
Magic bean platform Northeast Great Bay Coast Plant and water a Magic Bean, ride it up, then Hookshot across Great Bay
Beaver Brothers race Cave behind Zora Cape's waterfall As Zora, beat both beavers' time on the second race Great Bay
Fisherman's jumping game Great Bay Coast After defeating Gyorg, Hookshot ring-to-ring and score 20+ Great Bay
Oceanside Skulltula reward Oceanside Spider House Shoot the masks in the order the Stalchildren's clues give Great Bay
Sakon's Hideout flower Ikana Canyon Complete the final Title Deed chain, then float up as Deku Link Ikana
Graveyard Iron Knuckle Ikana Graveyard (Night 3 grave) Use the Captain's Hat and Lens of Truth, then defeat the Iron Knuckle Ikana
Beneath the Graveyard Ikana Graveyard dig site Use the Captain's Hat to command Stalchildren to dig Ikana
Spirit House (Poe Sisters) Ikana Canyon Spirit House Defeat the Poe Sisters with Ice Arrows without dropping below three hearts Ikana
Ikana Castle roof Ancient Castle of Ikana Shoot the crystal switch and float via Deku Flowers to the chest Ikana
Secret Shrine Hidden grotto in Ikana Clear the four hidden mini-boss rooms for the chest Ikana
Moon Deku trial The Moon — Deku child's room Trade masks to the Deku-mask child and clear his platforming trial Moon
Moon Goron trial The Moon — Goron child's room Trade masks to the Goron-mask child and clear his rolling trial Moon
Moon Zora trial The Moon — Zora child's room Trade masks to the Zora-mask child and clear his trial Moon
Masks 24 listed of 24

Twenty-four masks in all: four transformations (Deku, Goron, Zora, Fierce Deity) and twenty ordinary masks, most won from the souls and schedules of Termina's people. The twenty ordinary masks are the price of the Fierce Deity's Mask on the Moon.

Deku Mask From the Happy Mask Salesman after you recover the Ocarina and learn the Song of Healing. Become Deku Link — skip across water, launch from flower pads, fire bubbles.
Goron Mask Play the Song of Healing for Darmani's spirit at his grave in the Goron Graveyard. Become Goron Link — roll at speed, punch, ground-pound, and shrug off lava.
Zora Mask Play the Song of Healing for the dying Zora Mikau on Great Bay Coast. Become Zora Link — swim fast, dive, throw fin boomerangs, raise an electric shield.
Postman's Hat During the Anju & Kafei quest, hand the Postman the Special Delivery to Mama. Loot Clock Town's postboxes (and a Heart Piece).
All-Night Mask Buy from the Curiosity Shop late in the Anju & Kafei chain. Stay awake through the Old Lady's long bedtime stories.
Blast Mask Stop Sakon robbing the Old Lady in North Clock Town on the first night. Detonate a bomb blast on command without spending bombs (hurts you up close).
Stone Mask Use the Lens of Truth to find the invisible soldier Shiro on the road to Ikana and give him a potion. Turn invisible to most enemies, who simply ignore you.
Great Fairy's Mask Return the first Stray Fairy to the Great Fairy in North Clock Town. Draws nearby Stray Fairies toward you — eases collecting them in temples.
Keaton Mask Given during the Curiosity Shop / Kafei chain. Summons Keaton's rupee quiz from certain bushes; advances the Anju & Kafei quest.
Bremen Mask Talk to Guru-Guru at the Laundry Pool at night. March a line of baby Cuccos to raise them into adults.
Bunny Hood Raise all the chicks at the Cucco Shack with the Bremen Mask; Grog gives the hood. Greatly increases your running speed.
Don Gero's Mask As Goron Link, give Rock Sirloin to the hungry Goron in the Mountain Village. Reunites the frog choir; gathering all five frogs earns a Heart Piece.
Mask of Scents After rescuing the Deku Princess, win the Deku Butler's underground race. Sniff out hidden items and magic mushrooms.
Romani's Mask Defend Romani Ranch from the aliens (Day 1 night), then escort Cremia's milk wagon (Day 2 night). Proves Milk Bar membership — opens the Latte Milk Bar.
Circus Leader's Mask Wearing Romani's Mask, play the Ballad of the Wind Fish for Toto in the Milk Bar in all four forms. Calms Gorman; used in the Gorman troupe storyline.
Kamaro's Mask Play the Song of Healing for the ghost dancer Kamaro in northern Termina Field at night. Perform Kamaro's dance — shown to the Rosa Sisters for a Heart Piece.
Gibdo Mask Cure the cursed father in the Music Box House at the foot of Ikana with the Song of Healing. Gibdos and ReDeads beg for food instead of attacking, and will talk.
Garo's Mask As Goron Link, beat the Gorman Brothers in the Gorman Track horse race. Summons Garo Masters for hints; needed to progress through Ikana Canyon.
Captain's Hat Best Captain Keeta, the giant skeleton in the Ikana Graveyard. Commands Stalchildren, who obey you and open the way.
Giant's Mask In a chest revealed partway through the Twinmold boss arena, Stone Tower Temple. Grows Link giant-sized to fight Twinmold (drains magic while worn).
Mask of Truth Defeat every Gold Skulltula in the Swamp Spider House. Read Gossip Stones and talk to animals for hints.
Kafei's Mask From Madame Aroma at the Mayor's Residence when asked to find the missing Kafei. Shown around town to gather clues — starts the Anju & Kafei quest.
Couple's Mask Complete the Anju & Kafei quest and reunite them (the Pendant of Memories chain). Shown to the Mayor to settle the evacuation argument for a Heart Piece.
Fierce Deity's Mask Inside the Moon, give all 20 ordinary masks to the Moon Children to clear their trials. Become the towering Fierce Deity, firing sword beams — usable against the bosses.
Gold Skulltula Houses 2 listed of 2

Two cursed Spider Houses, 30 Gold Skulltula tokens each. Clear a house in a single visit to lift its curse for the reward.

Swamp Spider House (30 tokens) Mask of Truth (lifts the cursed man's curse) Use the Deku Mask to float to high webs; Bombs and the Hero's Bow reach the hidden tokens Woodfall
Oceanside Spider House (30 tokens) Giant's Wallet (5000-Rupee capacity) if cleared before the man closes up; otherwise a Gold Rupee Needs the Hero's Bow and explosives; some tokens need the Hookshot and light puzzles Great Bay
The Anju & Kafei reunion 9-step chain → Couple's Mask

Reward: Couple's Mask — and the game's most moving sidequest · All three days Link

  1. Anju — Stock Pot Inn All · Day 1 from ~1:40pm · East Clock Town · Stock Pot Inn Anju runs the inn and anchors the game's longest sidequest, spanning all three days.
  2. Kafei's Mask — Madame Aroma Day 1 · ~10:00am–6:00pm · East Clock Town · Mayor's Residence Madame Aroma lends the mask of her son Kafei to aid the search.
  3. Letter to Kafei — Anju at midnight Night 1 · 12:00am–6:00am · East Clock Town · Stock Pot Inn kitchen Anju entrusts you with a letter for her missing fiancé.
  4. Mail the Letter to Kafei Day 2 · Before the ~9:00am pickup · Any Clock Town postbox The postman collects the letter on his morning round and delivers it to Kafei.
  5. Kafei — Curiosity Shop back room Day 2 · ~3:00pm–6:00pm · West Clock Town · Laundry Pool → Curiosity Shop hideout Kafei, shrunk to a child by the Skull Kid, explains his stolen wedding mask and gives the pendant.
  6. Give Pendant to Anju Day 2 or 3 · ~10:00am–7:00pm · East Clock Town · Stock Pot Inn Kafei's pendant convinces Anju to stay in town despite the moon.
  7. Special Delivery to Mama Final Day · ~1:00pm–6:00pm · West Clock Town · Curiosity Shop back room The Curiosity Shop owner asks you to carry a letter to Kafei's mother.
  8. Sakon's Hideout — recover the Sun's Mask Final Day · From ~6:00pm · Ikana Canyon · Sakon's Hideout You and Kafei solve a switch-and-conveyor puzzle to grab the wedding mask before it is lost.
  9. Couple's Mask — the reunion Final Night · ~from 6:00pm (late-countdown reunion) · East Clock Town · Stock Pot Inn The reunited couple merge the Sun's and Moon's Masks into the Couple's Mask and give it to you.
Shops 5 shops · stock and prices
Trading PostWest Clock Town
Deku Shield30 R
Hero's Shield80 R
Bombs (5)25 R
Deku Nuts (5)15 R
Red Potion30 R
Bomb ShopWest Clock Town
Bombs (5)25 R
Bombchu (10)40 R
Bigger Bomb Bag90 R
Curiosity ShopWest Clock Town (back-alley, night)
Stolen goods / Blue Potionvaries
All-Night Mask500 R
Goron ShopGoron Village / Mountain Village
Bombs (5)25 R
Red Potion40 R
Rock Sirloin (Powder Keg)
Zora ShopZora Hall, Great Bay
Hero's Shield80 R
Red Potion30 R
Arrows (10)20 R
Termina · the three-day cycle
1
Prologue

Clock Town & the Three-Day Cycle

Deku curseSong of TimeDeku MaskBombers' Notebook
Objectives
  1. Chase the Skull Kid through the underground passage and lose your form to the curse
  2. Reach Clock Town and meet the Happy Mask Salesman
  3. Climb the Clock Tower at midnight on the Final Day and take back the Ocarina
  4. Learn the Song of Time to reset the three-day cycle
  5. Play the Song of Healing for the Salesman to lift the curse and gain the Deku Mask

Golden path

  1. Chase the Skull Kid down the forest chasm. He curses you into a Deku Scrub and steals the Ocarina, then flees into Clock Town. You arrive with the moon three days from falling.
  2. Find the Happy Mask Salesman in the Clock Tower. He'll lift the curse — but only if you bring back the Ocarina before the cycle ends. He teaches you the Song of Healing on the spot.
  3. Explore Clock Town's four quarters. Buy a Deku Flower route to the high ledges, join the Bombers' Secret Society (play hide-and-seek with the kids) to earn the Bombers' Notebook, and learn the town's rhythms.
  4. Survive to midnight on the Final Day. The Clock Tower platform opens — climb it and confront the Skull Kid. Knock the Ocarina of Time from his hands.
  5. Play the Song of Time (it returns in a flash of memory) to rewind to the First Day. Everything resets — but you keep the Ocarina.
  6. Return to the Happy Mask Salesman and play the Song of Healing. The curse seals into the Deku Mask, restoring Hylian Link. You can now transform at will — and the real quest, the four temples, begins.
Dungeon map — keyed contents 1 floors
Clock Town
  • S npc South — Clock Tower (opens midnight, Final Day)
  • W shop West — Trading Post, Bomb Shop, Curiosity Shop, Bank
  • N npc North — Great Fairy Fountain, playground, Sakon event
  • E npc East — Stock Pot Inn, Milk Bar, Mayor's Residence
Room-by-room & puzzle solutions 5 rooms
Underground Passage

Solve Follow the Skull Kid down the spiralling tunnel, crossing collapsing flower-lined platforms to the door where the curse takes hold.

Clock Tower Interior

Solve Meet the Happy Mask Salesman; he teaches the Song of Healing and gives you three days to recover the Ocarina.

Clock Town (the cycle)

Solve Explore the four quarters of Clock Town. The Clock Tower platform only opens at midnight on the Final Day, during the carnival countdown.

Clock Tower Rooftop

Solve At midnight on the Final Day, confront the Skull Kid. Hit him to knock the Ocarina free, then play the Song of Time to rewind to the First Day.

Back to the Salesman

Solve In human form again, replay the Song of Healing to seal the curse into the Deku Mask — now you can transform at will.

Watch it instead

10:00:00
▶ LongplayArchive
The Legend of Zelda: Majora's Mask — Full Longplay (N64)

▲ thumbnail from YouTube's CDN · the player loads only when you press play

2
Temple 1

Woodfall — the Southern Swamp

Deku flightHero's BowSonata of AwakeningOdolwa
Objectives
  1. Raise the temple from the swamp by playing the Sonata of Awakening before it
  2. Cleanse the poisoned water at its source
  3. Claim the Hero's Bow
  4. Collect the Boss Key and reach Odolwa
  5. Defeat Odolwa to free the first Giant

Golden path

  1. Head south to the Southern Swamp. The water is poisoned and the Deku King has jailed an innocent monkey. Take the boat cruise or Deku-hop upriver to Deku Palace.
  2. Sneak through the palace garden as Deku Link and reach the imprisoned monkey, who teaches you the Sonata of Awakening.
  3. Cross the swamp to the temple platform. Play the Sonata of Awakening before the great statue to raise Woodfall Temple from the marsh.
  4. Inside, win the Hero's Bow and use Deku-flower flight and eye-switches to reach the Boss Key. See the dungeon map and room solutions below.
  5. Defeat Odolwa to free the first Giant. The swamp's poison clears — collect the region's time-sensitive Heart Pieces this cycle.
  6. With the Giant freed, the Skull Kid's hold on Woodfall breaks. Warp back to Clock Town and turn toward the frozen mountains.
Dungeon map — keyed contents 2 floors
1F
  • 1 room Entrance — Deku Flowers over poison
  • 2 chest Dungeon Map
  • 3 chest Hero's Bow
  • 4 switch Eye-switches (shoot with the Bow)
Upper
  • 5 npc Gekko & Snapper mini-boss
  • 6 boss key Boss Key vault
  • 7 boss Odolwa's lair
Room-by-room & puzzle solutions 6 rooms
Entrance Hall

Solve Launch from the Deku Flowers to clear the poison pools and reach the side doors; light the torches to open the way.

Treasure Dungeon Map
Deku Flight Room

Solve Spin into a Deku Flower, take off, and glide between platforms, popping distant eye-switches and enemies with bubble shots.

Treasure Compass
Bow Chamber

Solve Cross the spinning blades and open the big chest for the Hero's Bow, then shoot the eye-switches to advance.

Treasure Hero's Bow
Torch Maze

Solve Carry flame on a Deku Stick or fire arrows to light each torch in sequence, raising platforms and unbarring doors.

Treasure Small Key
Gekko Mini-Boss

Solve Stun the Snapper that Gekko rides, then slash Gekko when he leaps off.

Enemies Gekko & Snapper
Boss Key Vault

Solve Shoot the eye-switch above the door to drop the bars, then take the Boss Key.

Treasure Boss Key
Boss Odolwa Woodfall Temple

Bring a full quiver and a few bottled fairies; Deku Nuts can stun the small adds.

Top up before: Refill hearts and magic at a Fairy Fountain or with bottled fairies before the boss door.

Odolwa
SummaryOdolwa guards behind his shield, so wait for him to drop his stance — while chanting, dancing, or winding up a swing — and fire an arrow to stun him, then rush in and slash. Shooting him mid-chant also cancels the moths and beetles he summons. Keep moving to dodge his jumping sword strikes.

Where to heal: Exit to the Woodfall Owl Statue and refill with the swamp's fairy fountain.

Easier tactic: Fire an arrow the instant he drops his guard to chant or dance — it both stuns him and cancels the bugs he summons.

Reward: First Giant freed; a Heart Container and a step toward the Oath to Order.

Watch it instead

10:00:00
▶ LongplayArchive
The Legend of Zelda: Majora's Mask — Full Longplay (N64)

▲ thumbnail from YouTube's CDN · the player loads only when you press play

3
Temple 2

Snowhead — the Mountain Village

Goron rollingFire ArrowsGoron LullabyGoht
Objectives
  1. Clear the ice columns choking the central pillar
  2. Win the Fire Arrows to melt ice and light frozen torches
  3. Raise the giant pillar to link the upper floors
  4. Collect the Boss Key and climb to the top
  5. Defeat Goht to free the second Giant and end the winter

Golden path

  1. Travel north into an unnatural winter. In the Goron Graveyard, play the Song of Healing for the hero Darmani's spirit to receive the Goron Mask.
  2. As Goron Link, soothe the crying Goron baby with the Goron Lullaby (learn it from the Elder's son), and pass the Goron's big-bomb test for the Powder Keg.
  3. Goron-roll up the ramp to Snowhead Temple at the mountain's peak, battling through the blizzard.
  4. Inside, clear the ice from the central pillar, win the Fire Arrows, and raise the giant column to link the floors. See the room solutions below.
  5. Defeat Goht to free the second Giant. Spring returns to the mountains — new paths, frogs, and Heart Pieces open up.
  6. With the thaw, the river to Great Bay flows again. Head for the coast.
Dungeon map — keyed contents 2 floors
Hub
  • 1 room Central pillar — Goron-punch the ice
  • 2 chest Dungeon Map / Compass
  • 3 chest Fire Arrows
Upper
  • 4 npc Wizzrobe mini-boss
  • 5 switch Raise the giant column (Fire Arrow torches)
  • 6 boss Goht's lair
Room-by-room & puzzle solutions 6 rooms
Central Pillar Hub

Solve Goron-punch the ice cylinders off the core pillar so you can later Goron-roll up its ramp to the higher floors.

Treasure Dungeon Map
Frozen Bridge

Solve Boost off a ramp with a Goron-roll to leap the gaps, or freeze the flow into ice platforms to cross.

Treasure Compass
Fire Arrow Chamber

Solve Clear the room's guardians and open the chest for the Fire Arrows, then thaw the nearby ice blocks.

Treasure Fire Arrows
Snowball Slope

Solve Fire-arrow or roll through the snowball-spawning slope to reach the stairs upward.

Treasure Small Key
Wizzrobe Mini-Boss

Solve Hit the teleporting Wizzrobe with an arrow each time it reappears until it falls.

Enemies Wizzrobe
Giant Pillar Mechanism

Solve Light the frozen torches with Fire Arrows and hit the switch to raise the central column, linking the top floors.

Treasure Boss Key
Boss Goht Snowhead Temple

Keep arrows and magic topped up — the Goron-roll spikes need magic, and you open with a Fire Arrow.

Top up before: Refill hearts and magic at a Fairy Fountain or with bottled fairies before the boss door.

Goht
SummaryMelt the frozen Goht with a Fire Arrow to start the fight, then put on the Goron Mask and roll after it around the circular arena, grabbing magic jars to keep your spikes out. Ram it or strike it mid-leap to knock it down, then pile on roll attacks. Dodge the falling stalactites and the rocks it hurls back.

Where to heal: Warp out to the Mountain Village fountain to refill magic and hearts.

Easier tactic: Grab the magic jars around the arena so your Goron spikes never run dry — a spiked roll knocks Goht down every time.

Reward: Second Giant freed; the eternal winter lifts and spring returns to the mountains.

Watch it instead

10:00:00
▶ LongplayArchive
The Legend of Zelda: Majora's Mask — Full Longplay (N64)

▲ thumbnail from YouTube's CDN · the player loads only when you press play

4
Temple 3

Great Bay — the Coast

Zora swimmingIce ArrowsNew Wave Bossa NovaGyorg
Objectives
  1. Redirect the temple's water with the central spigot valves
  2. Win the Ice Arrows to freeze water into platforms
  3. Route the coloured pipes so the great waterwheel turns
  4. Collect the Boss Key and reach the flooded arena
  5. Defeat Gyorg to free the third Giant

Golden path

  1. At Great Bay Coast, play the Song of Healing for the dying Zora guitarist Mikau to gain the Zora Mask.
  2. As Zora Link, recover the stolen Zora eggs from the Pirates' Fortress (grab the Hookshot there) and the sea. Bring them to the Marine Research Lab; the hatchlings teach you the New Wave Bossa Nova.
  3. Play it on the coast to summon the giant turtle, who ferries you to Great Bay Temple.
  4. Inside, turn the spigot valves to reroute the water, win the Ice Arrows, and freeze currents into platforms to turn the great waterwheel. See the room solutions below.
  5. Defeat Gyorg to free the third Giant and clear the poisoned bay.
  6. Three Giants freed. The last lies east, in the cursed kingdom of Ikana.
Dungeon map — keyed contents 2 floors
Hub
  • 1 switch Central spigot — quarter-turn to reroute water
  • 2 npc Wart mini-boss → Ice Arrows
  • 3 chest Dungeon Map / Compass
Pipes
  • 4 switch Red & green valve rooms (Ice Arrow platforms)
  • 5 boss key Boss Key (ice-block path)
  • 6 boss Gyorg's flooded arena
Room-by-room & puzzle solutions 6 rooms
Central Pipe Hub

Solve Stand on the middle platform and turn the spigot a quarter-turn to switch which coloured pipeline carries the water.

Treasure Dungeon Map
Wart Mini-Boss

Solve As Zora Link, destroy the floating eyeballs orbiting Wart, then attack the exposed core to win the Ice Arrows.

Treasure Ice Arrows
Red Pipe Room

Solve Freeze an Octorok's water spout into an ice block, climb to the spigot, and turn it so water runs the red line to the wheel.

Treasure Compass
Green Valve Room

Solve Fire Ice Arrows at the water jets to make platforms, then throw the green switch to send flow down the green pipes.

Treasure Small Key
Waterwheel Shaft

Solve With the wheel turning, ride the moving platforms and currents up the vertical shaft to the higher doors.

Enemies Desbreko
Boss Key Chamber

Solve Freeze the flowing water into a path of ice blocks to cross to the chest holding the Boss Key.

Treasure Boss Key
Boss Gyorg Great Bay Temple

Bring a full quiver — you stun Gyorg from the platform with arrows before diving as Zora.

Top up before: Refill hearts and magic at a Fairy Fountain or with bottled fairies before the boss door.

Gyorg
SummaryFrom the central platform, Z-target Gyorg as it surfaces and shoot it to stun it; it floats limp underwater for a moment. Quickly don the Zora Mask, dive, and hit it with the electric barrier or fin slashes for heavy damage before it recovers. Avoid being swallowed and shake off the small fish it spawns, refilling arrows from the platform jars between rounds.

Where to heal: Warp to the Great Bay Owl Statue and use the coast's fairy fountain.

Easier tactic: Never swim in open water while Gyorg is active — stun it from the platform first, then dive only to land the electric barrier.

Reward: Third Giant freed; the poisoned bay clears.

Watch it instead

10:00:00
▶ LongplayArchive
The Legend of Zelda: Majora's Mask — Full Longplay (N64)

▲ thumbnail from YouTube's CDN · the player loads only when you press play

5
Temple 4

Stone Tower — Ikana Canyon

Light ArrowsElegy of EmptinessTemple flippingTwinmold
Objectives
  1. Use the Elegy of Emptiness to leave statues on weighted switches
  2. Flip the temple upside-down with a Light Arrow on the sun-block
  3. Defeat Gomess for the Boss Key
  4. Win the Giant's Mask from an Eyegore
  5. Defeat Twinmold to free the final Giant

Golden path

  1. Enter the dead kingdom of Ikana. Restore the river with the Song of Storms, cure the Music Box House father (Gibdo Mask), and command the dead with the Captain's Hat and Garo's Mask.
  2. In the Ancient Castle of Ikana, defeat the King to learn the Elegy of Emptiness — it leaves a statue of your current form to hold down switches.
  3. Reach the Great Fairy nearby and reunite her stray fairies for the Great Fairy's Sword, then climb to Stone Tower Temple.
  4. Inside, drop Deku/Goron/Zora/Link statues on switch puzzles, win the Light Arrows, and shoot the red sun-block to flip the entire temple upside-down. Win the Giant's Mask in the boss arena. See the room solutions below.
  5. Defeat Twinmold with the Giant's Mask to free the fourth and final Giant.
  6. All four Giants are freed. Return to Clock Town for the Final Day and the Carnival of Time.
Dungeon map — keyed contents 2 floors
Normal
  • 1 switch Elegy statue switch halls
  • 2 chest Dungeon Map / Compass
  • 3 switch Red sun-block — Light Arrow to flip the temple
Inverted
  • 4 npc Gomess (Light Arrows pierce his cloak) → Boss Key
  • 5 item Eyegore → Giant's Mask
  • 6 boss Twinmold's desert arena
Room-by-room & puzzle solutions 6 rooms
Multi-Switch Halls

Solve Play the Elegy of Emptiness to drop Deku, Goron, Zora and Link statues onto separate floor switches at once, opening the barred doors.

Treasure Dungeon Map
Sun-Block Entrance

Solve Shoot the glowing red sun emblem above the doorway with a Light Arrow to invert the whole temple — ceilings become floors.

Treasure Compass
Inverted Spike Rooms

Solve Navigate the flipped geometry, using Light Arrows on covered sun-switches to clear darkness and toggle sections.

Treasure Small Key
Gomess Chamber

Solve Light the room and scatter Gomess's bat swarm; only Light Arrows pierce his cloak to stun him, then finish with the sword.

Treasure Boss Key
Eyegore Room

Solve Shoot the Eyegore's eye to freeze it, then attack the body. Defeating it yields the Giant's Mask.

Treasure Giant's Mask
Final Ascent

Solve Combine inversion flips and Elegy statues to reach the boss door, then enter the desert arena.

Enemies Garo, Armos
Boss Twinmold Stone Tower Temple

Stock magic to the brim — the Giant's Mask drains it constantly. Grab jars between grapples.

Top up before: Refill hearts and magic at a Fairy Fountain or with bottled fairies before the boss door.

Twinmold
SummaryTwinmold is a pair of colossal sand serpents, one red and one blue. Put on the Giant's Mask to grow to their scale, then grapple and punch their bodies or seize a passing tail and slam it. Manage the mask's magic drain by grabbing magic jars, and focus one worm down at a time until both are destroyed.

Where to heal: Warp to the Stone Tower / Ikana Owl Statue to refill before re-entering.

Easier tactic: Focus one serpent at a time: grab its tail and slam it, ignoring the other until the first is gone.

Reward: Final Giant freed — all four can now be called with the Oath to Order.

Watch it instead

10:00:00
▶ LongplayArchive
The Legend of Zelda: Majora's Mask — Full Longplay (N64)

▲ thumbnail from YouTube's CDN · the player loads only when you press play

6
Finale

The Moon & Majora

Oath to OrderFierce Deity's MaskMajora — 3 forms
Recommended first Free all four Giants first. The Fierce Deity's Mask is optional — but trading your 20 ordinary masks to the Moon Children makes the final fight trivial, so collect the masks before the last cycle.
Objectives
  1. Free all four Giants and play the Oath to Order atop the Clock Tower
  2. Optional: trade all 20 ordinary masks to the Moon Children for the Fierce Deity's Mask
  3. Defeat Majora's Mask
  4. Defeat Majora's Incarnation
  5. Defeat Majora's Wrath

Golden path

  1. On the Final Night, climb the Clock Tower and play the Oath to Order. The four Giants answer and catch the falling moon — and Majora's Mask abandons the Skull Kid, pulling Link inside the moon.
  2. On the moon's quiet grassy field, four masked children offer hide-and-seek trials. Optional but worth it: trade all 20 ordinary masks across the four children to earn the Fierce Deity's Mask from the lonely child by the tree.
  3. Enter the final battle. Majora's Mask hovers and lashes tentacles — shoot or beam it.
  4. Majora's Incarnation sprouts legs and sprints — chase it down with arrows or sword beams.
  5. Majora's Wrath flails whip-like arms — stun it and pound it. With the Fierce Deity's Mask each form falls in seconds.
  6. Majora is undone. The Giants set the moon back, the Skull Kid is freed, and dawn finally breaks over a saved Termina. The Happy Mask Salesman departs with his mask — and Link rides on.
Room-by-room & puzzle solutions 2 rooms
Atop the Clock Tower

Solve On the Final Night, play the Oath to Order to summon the four Giants, who catch the moon and force the mask to abandon the Skull Kid.

The Moon's Field

Solve Speak to the four masked children to play their hide-and-seek mini-dungeons; trade all 20 ordinary masks for the Fierce Deity's Mask before facing the lone child.

Boss Majora's Mask The Moon

If you have the Fierce Deity's Mask, bring full magic. Otherwise bring full arrows, bottled fairies, and the Zora and Goron masks.

Top up before: Refill hearts and magic at a Fairy Fountain or with bottled fairies before the boss door.

Majora's Mask
SummaryThree forms in a row. Majora's Mask hovers and lashes cord-like tentacles — shoot or strike it. Majora's Incarnation sprouts limbs and sprints around the room — chase it with arrows or sword beams. Majora's Wrath flails whip-like tentacle arms — stun it with arrows, dodge the whips, and pound it down. The Fierce Deity's Mask trivialises every phase, ending each in seconds with sword beams.

Where to heal: There is no healing mid-fight beyond bottled fairies — stock three before entering.

Easier tactic: Trade all 20 ordinary masks to the Moon Children for the Fierce Deity's Mask; its sword beams shred every one of Majora's three forms in seconds.

Reward: Majora is undone, the Giants halt the moon, and Termina is saved.

Watch it instead

10:00:00
▶ LongplayArchive
The Legend of Zelda: Majora's Mask — Full Longplay (N64)

▲ thumbnail from YouTube's CDN · the player loads only when you press play