G Golden Path
Browse / Zelda / The Legend of Zelda: Ocarina of Time
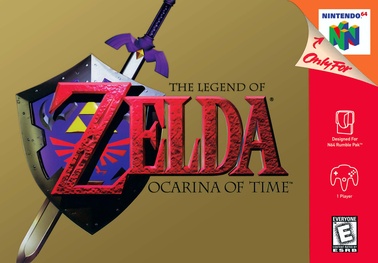
The Legend of Zelda: Ocarina of Time box art
Fan guide Nintendo 64 Golden path + boss strategies Spoiler-safe

The Legend of Zelda: Ocarina of Time

Link grows from a child in Kokiri Forest to the Hero of Time — collect the three Spiritual Stones, draw the Master Sword, and reunite the shattered Triforce in Nintendo's landmark 3D adventure.

Golden-path progress 0 / 10 sections

Adventurer's Reference

The standing back-matter behind the route — every progression item, all twelve Ocarina songs, the collectibles and what each one needs, the Biggoron trade, and the shops.

Items & equipment 27 tools · where, when, what it unlocks
Kokiri SwordSword Child Training-centre maze behind the Hole of 'Z', Kokiri ForestYour starting blade; Mido bars the Deku Tree until you hold a sword and shield.
Master SwordSword Adult Pedestal of Time, Temple of Time (after the three Spiritual Stones)Pulls Link seven years forward and back; the adult-era default blade.
Giant's KnifeSword Adult Bought from Medigoron, Goron City (200 R)Two-handed; shatters after a few hits — a stepping stone to Biggoron's Sword.
Biggoron's SwordSword Adult End of the adult trading sequence (Biggoron, Death Mountain)Two-handed, unbreakable, double the Master Sword's damage.
Deku ShieldShield Child Kokiri Shop (40 R) or found in dungeonsWooden — blocks Deku Scrub nuts, but burns and is eaten by fire.
Hylian ShieldShield Either Bazaar (Market/Kakariko, 60–80 R) or the GraveyardIron shield; required as adult and against fire enemies.
Mirror ShieldShield Adult Spirit TempleReflects light and magic — aims sunbeams and bounces boss attacks.
Fairy SlingshotC-Item Child Boss-key chest, Great Deku TreeFires Deku Seeds at switches, eyes and ropes; the child's ranged tool.
Fairy BowC-Item Adult Big chest, Forest TempleThe adult's ranged weapon; gains Fire, Ice and Light Arrow upgrades.
BoomerangC-Item Child Big chest, Inside Jabu-Jabu's BellyStuns enemies and retrieves distant items and switches.
Bombs / Bomb BagC-Item Either Dodongo's Cavern (Bomb Bag from a Goron)Blows open cracked walls and bombable floors throughout Hyrule.
BombchuC-Item Either Bought / found; key in Spirit TempleSelf-propelled bombs that climb walls and ceilings to far switches.
HookshotC-Item Adult Win Dampé's race in his grave, Kakariko GraveyardGrapples to wooden/targets and pulls Link across gaps — opens the Forest Temple.
LongshotC-Item Adult Big chest, Water TempleDouble-range Hookshot; reaches far targets and distant Heart Pieces.
Megaton HammerC-Item Adult Big chest, Fire TempleSmashes rusted switches and black blocks; pounds the Dodongo statue path.
Lens of TruthC-Item Either Bottom of the Well, Kakariko (as child)Reveals invisible platforms, walls, Poes and Wallmasters (drains Magic).
Iron BootsBoots Adult Ice Cavern, Zora's FountainSink and walk underwater; anchor against wind. Core to the Water Temple.
Hover BootsBoots Adult Shadow TempleFloat briefly over gaps and frictionless floors.
Goron TunicTunic Adult Link the Goron (Darunia's son), Goron City — or bought (200 R)Survive the heat of Death Mountain Crater and the Fire Temple.
Zora TunicTunic Adult King Zora, after thawing him with Blue Fire — or bought (300 R)Breathe underwater indefinitely; required for the Water Temple.
Silver GauntletsUpgrade Adult Spirit Temple (child era)Lift the silver boulders blocking Spirit Temple and the Desert Colossus.
Golden GauntletsUpgrade Adult Ganon's CastleLift the giant pillars in Ganon's Castle and Death Mountain.
Silver Scale / Gold ScaleUpgrade Either Zora's Domain diving game / Lake Hylia fishing (Gold)Dive deeper underwater; the Gold Scale reaches the deepest Heart Pieces.
Din's FireMagic Either Great Fairy, Hyrule Castle courtyard (child)A ring of flame — lights every torch in a room at once and damages all around you.
Farore's WindMagic Either Great Fairy, Zora's Fountain (child)Sets a warp point inside a dungeon to teleport back to.
Nayru's LoveMagic Either Great Fairy, Desert Colossus (adult)A protective shield that blocks all damage for a time.
Light ArrowsC-Item Adult Temple of Time (after the five medallions), via ZeldaHoly arrows that stun Ganondorf and clear the dark barriers in Ganon's Castle.
Ocarina songs 12 songs · where learned and what they do
Zelda's Lullaby Taught by Impa after meeting Princess Zelda (child) Royal-family proof — opens gates, spawns Triforce platforms, soothes Epona's mother and reveals secrets at Triforce marks.
Epona's Song Taught by Malon at Lon Lon Ranch (child) Calls Epona across Hyrule Field (adult); makes ranch cows give milk.
Saria's Song Saria in the Sacred Forest Meadow (child) Call Saria for hints; makes the Lost Woods Skull Kid dance; lifts the Goron's gloom.
Sun's Song Composer Brothers' grave, Kakariko Graveyard (child) Flips day and night instantly; freezes ReDead and Gibdo in place.
Song of Time Taught by the Ocarina cutscene at Hyrule Castle (child) Removes blue Time Blocks; opens the Door of Time with the three Stones.
Song of Storms Windmill man, Kakariko (adult) — taught to your child self Summons rain; spins the windmill; drains the well; grows the Frog Chorus reward.
Minuet of Forest Sheik, Sacred Forest Meadow Warp to the Forest Temple entrance.
Bolero of Fire Sheik, Death Mountain Crater Warp to the Fire Temple / crater.
Serenade of Water Sheik, frozen Lake Hylia Warp to the Water Temple at Lake Hylia.
Requiem of Spirit Sheik, Desert Colossus (reached as child via the Haunted Wasteland) Warp to the Spirit Temple — the trick that lets you do its child-era half.
Nocturne of Shadow Triggered in Kakariko after the Forest Temple Warp to the Shadow Temple / Graveyard.
Prelude of Light Sheik, Temple of Time Warp back to the Temple of Time — your hub for swapping eras.
Pieces of Heart 36 listed of 36

Four pieces make one Heart Container. Bosses give a full container on top of these. Many are gated behind the Magic Bean leaves you plant as a child and ride as an adult, so plant beans early.

Death Mountain Crater — wall niche Hidden niche in the crater wall; climb down to spot it Goron Tunic (Adult preferred) Either
Death Mountain Crater — ash cone In plain sight atop the left ash cone Magic Bean leaf Adult
Death Mountain Trail Above the entrance to Dodongo's Cavern Magic Bean leaf Adult
Desert Colossus — arch On top of the arch before the Spirit Temple entrance Magic Bean leaf Adult
Gerudo Valley — behind the waterfall Niche behind the main fall; swim behind it for a ladder Magic Bean leaf Either
Gerudo Valley — river crate Crate on the ledges over the river Longshot (Child: cucco) Adult
Gerudo's Fortress — archery Prize in the Horseback Archery range Epona Adult
Gerudo's Fortress — rooftop Chest on the highest roof of the Thieves' Hideout Hookshot Adult
Goron City — spinning vase Light the torches, then bomb the spinning vase Bombs Child
Graveyard — Dampé race Beat Dampé's ghost in a minute or less Longshot Adult
Graveyard — gravedigging tour Prize in the Heart-Pounding Gravedigging Tour Child
Graveyard — bean crate Crate on a shelf above the Magic Bean leaf Magic Bean leaf Adult
Graveyard — ReDead grave Play Sun's Song in the unmarked grave with the lone ReDead Sun's Song Either
Market — Bombchu Bowling Prize at the Bombchu Bowling Alley Child
Market — Richard the dog Return the Pooch Lady's dog at night Night only Child
Market — Treasure Box game Win the Treasure Box Shop game Lens of Truth Child
Hyrule Field — Lake Hylia fences Hidden hole between four fences near Lake Hylia; buy for 10 R Stone of Agony Either
Hyrule Field — pond hole Deep in a pond hole near the lone tree Iron Boots or Gold Scale Adult
Ice Cavern — red ice Frozen in red ice in a side room Bottle of Blue Fire Adult
Kakariko — Skulltula House Reward after collecting 50 Gold Skulltula Tokens 50 Skulltulas Either
Kakariko — cow stall In the cow's stall Either
Kakariko — windmill ledge On a ledge inside the Windmill Either
Kakariko — potion shop roof Talk to the man at the top of Granny's Potion Shop Longshot Adult
Lake Hylia — lab dive Dive to the bottom of the Lakeside Lab Gold Scale Adult
Lake Hylia — fishing Catch a 10-pound fish in the Fishing Pond Either
Lake Hylia — lab balcony On the balcony atop the Lakeside Laboratory Magic Bean leaf Adult
Lon Lon Ranch — storage shed Move the boxes in the shed to find a hidden room Child
Lost Woods — Skull Kid Play Saria's Song to the lone Skull Kid Saria's Song Child
Lost Woods — jam session Match the two Skull Kids' tune Ocarina Child
Zora's Domain — torches Light the four torches, then look behind the waterfall Deku Stick Child
Zora's Fountain — iceberg On a lone iceberg Adult
Zora's Fountain — lake bottom On the bottom of the fountain lake Iron Boots + Zora Tunic Adult
Zora's River — bug game Bug-Catching Game after growing the frogs The six 'gray-note' songs Child
Zora's River — lofty platform High platform in the central river section Either
Zora's River — cucco float Use a cucco to glide to a platform near the falls Cucco Child
Zora's River — Frog Chorus Play Song of Storms to the Frog Chorus Song of Storms Child
Gold Skulltulas 12 listed of 100

Smash the golden spiders for Tokens and turn them in at the House of Skulltula in Kakariko. Rewards land at 10/20/30/40/50 tokens (the 50-token prize is a Heart Piece). Many need the Boomerang, Hookshot, Bombs or a bean leaf to reach — counts below sum to 100 by region.

Inside the Great Deku Tree Dungeon — webs and walls Slingshot / Deku Stick Child
Dodongo's Cavern Dungeon — walls and vines Bombs / Slingshot Either
Inside Jabu-Jabu's Belly Dungeon — high walls Boomerang Child
Forest Temple Dungeon — courtyards and walls Hookshot / Bow Adult
Fire Temple Dungeon — pillars and grates Hookshot / Hammer Adult
Water Temple Dungeon — pillars and walls Longshot Adult
Shadow & Spirit Temples, Bottom of the Well Dungeons — hidden walls Lens of Truth / Hookshot Either
Kokiri Forest, Lost Woods & Sacred Meadow Trees, walls and night spawns Boomerang / Hookshot Either
Kakariko, Graveyard & Death Mountain Walls, soft soil and night spawns Bombs / Hookshot / bean Either
Hyrule Field, Lon Lon, Castle & Market Soft soil, trees and walls Boomerang / Bombs Either
Zora's River, Domain & Fountain Walls, vines and ice Hookshot / bean Either
Lake Hylia, Gerudo Valley, Fortress, Wasteland & Colossus Walls, crates and soft soil Hookshot / bean / Bombs Either
Great Fairy upgrades 6 listed of 6

Play the matching song at a cracked wall or boulder, then enter. Three give magic spells; three upgrade your magic meter, defence or spin attack.

Din's Fire Hyrule Castle courtyard — bomb the wall behind the vines Bombs, Zelda's Lullaby Child
Farore's Wind Zora's Fountain — bomb the wall Bombs, Zelda's Lullaby Child
Nayru's Love Desert Colossus — bomb the wall by the Spirit Temple Bombs, Zelda's Lullaby Adult
Magic Meter (double) Death Mountain Crater — Bolero of Fire by the cracked wall Bombs / Hammer Either
Spin Attack upgrade Death Mountain Trail — boulder near the top Magic, Zelda's Lullaby Child
Double Defence (half damage) Behind the Great Fairy's Fountain near Ganon's Castle Golden Gauntlets-era access Adult
The Biggoron's Sword trade 10-step chain → Biggoron's Sword

Reward: Biggoron's Sword — unbreakable, two-handed, double the Master Sword's damage · Adult Link

  1. Pocket Egg Adult From the Cucco Lady in Kakariko; wait for it to hatch into a Cucco.
  2. Wake Talon Cucco Use the Cucco to wake the sleeping Talon at Lon Lon Ranch; he gives you Cojiro (the blue cucco).
  3. Odd Mushroom Cojiro Show Cojiro to the Lost Woods stump man for the Odd Mushroom — a 3-minute timer starts.
  4. Odd Potion 3-min timer Rush the mushroom to Granny at the Kakariko Potion Shop before time runs out.
  5. Poacher's Saw Take the potion back to the Lost Woods man, now a Kokiri girl, for the Saw.
  6. Broken Goron's Sword Give the Saw to Biggoron's brother (Darunia's Goron on the Trail / the carpenter boss) for the broken blade.
  7. Prescription Show the broken sword to King Zora for a Prescription.
  8. Eyeball Frog 2-min timer Take the prescription to the Lake Hylia scientist — a 2-minute timer; he hands you the Eyeball Frog.
  9. World's Finest Eyedrops 4-min timer Rush the frog to Death Mountain's Biggoron, then carry the Eyedrops back down — a 4-minute timer.
  10. Claim Check → Biggoron's Sword Give the eyedrops to Biggoron for a Claim Check; wait three days (play Sun's Song) and trade it back for the sword.
Shops 6 shops · stock and prices
Kokiri ShopKokiri Forest
Deku Shield40 R
Deku Nuts (5)15 R
Deku Stick10 R
Arrows (10)20 R
Recovery Heart10 R
Castle Town BazaarHyrule Market
Hylian Shield80 R
Bombs (5)35 R
Deku Nuts (5)15 R
Arrows (10)20 R
Recovery Heart10 R
Kakariko Bazaar / Potion ShopKakariko Village
Hylian Shield80 R
Bombs (5)35 R
Red Potion30 R
Green Potion30 R
Goron ShopGoron City
Bombs (5)35 R
Red Potion40 R
Bomb Bag refill
Zora ShopZora's Domain
Hylian Shield80 R
Arrows (10)20 R
Red Potion30 R
Bombchu ShopHyrule Market (back alley, night)
Bombchu (10)99 R
Bombchu (5)60 R
Hyrule · main story
1
Dungeon 1

Great Deku Tree

Kokiri SwordSlingshotSaria's Song
Objectives
  1. Find the Fairy Slingshot
  2. Burn through the web to the basement
  3. Defeat the three Deku Scrubs in the right order
  4. Defeat Queen Gohma
  5. Claim the Kokiri's Emerald

Golden path

  1. You begin inside Kokiri Forest. Talk to Navi (the fairy hovering by your bed) — she leads you to the Great Deku Tree, but Mido blocks the path and demands a sword and shield first.
  2. Find the Kokiri Sword in the training maze behind the village. Locate the small round tunnel in the north-east corner of the fence (look for the crawlspace hole in the rock wall), crawl through, and follow the maze to the chest.
  3. Buy the Deku Shield from the Kokiri Shop for 40 rupees — the shop is in the building on the left as you face north. If you are short on rupees, cut the grass patches and break the pots around the village. Equip both the sword and shield immediately.
  4. Before leaving the village, head into the Lost Woods (the tunnel in the north-east). Take the first left, then go straight to the Sacred Forest Meadow. Saria is sitting on the stump — she teaches you Saria's Song. You need this to open Dodongo's Cavern later, so learn it now.
  5. Show Mido your sword and shield. He lets you pass. Follow the path to the Great Deku Tree and speak to it to open the dungeon entrance.
  6. Inside the Great Deku Tree, collect the Fairy Slingshot from the chest on the first floor — push the block into the wall alcove beneath the chest platform, climb up, and open it. The Slingshot is your primary ranged tool for this dungeon. Assign it to a C button.
  7. The central puzzle: the first basement is flooded. Find the web floor — look down from the upper level to see the large spiderweb covering the basement entrance. Jump down onto it from the vine walls to break through into the water below. Drain the basement by climbing to the upper level and burning the web over the drain spout with a Deku Stick.
  8. Deku Sticks are carried by the Business Scrubs in the floor pots — deflect their nut projectiles back at them with a shield bash (hold R) to stun them and buy one. Light a Deku Stick on a wall torch to carry a flame through the dungeon.
  9. The eye switches on the walls open locked doors. Z-target the switches and shoot them with the Slingshot — a hit turns the eye open. For the switch above the basement drain, climb the vines on the east wall, then shoot the eye directly across.
  10. Climb to the upper chamber and burn the large web sealing the basement passage by lighting a Deku Stick from the floor torch and running to the web before the stick burns out — you have roughly three seconds.
  11. Boss — Queen Gohma: see the boss card below for the full strategy.
  12. After defeating Queen Gohma, collect the Heart Container and step into the blue warp. The Great Deku Tree gives you the Spiritual Stone of the Forest and tells you to find Princess Zelda in Hyrule Castle. Leave Kokiri Forest via the log tunnel exit to the south.
Dungeon map — keyed contents 3 floors
1F
  • 1 room Main hall — Deku Babas; ladder up the vines
  • 2 chest Dungeon Map chest
  • 3 chest Fairy Slingshot (boss-key-style chest)
  • 4 switch Ladder eye-switch — shoot to drop the climb
2F / 3F
  • 5 secret Central web — drop or burn through to B1
  • 6 item Wall torches for lighting Deku Sticks
B1
  • 7 npc Three Deku Scrubs — order puzzle
  • 8 boss Queen Gohma's lair
Room-by-room & puzzle solutions 6 rooms
Main Hall

Solve Climb the vines to the upper ring. Watch for Deku Babas — Z-target and slash. A Skulltula clings to the back wall; hit it with a Deku Nut or the Slingshot once you have it.

Enemies Deku Babas, Gold Skulltula
Treasure Dungeon Map
Slingshot Room

Solve Shoot the eye-switch above the ladder with a Deku Seed to lower the climb, then open the chest for the Fairy Slingshot — your key tool for the rest of the dungeon.

Treasure Fairy Slingshot
The Web Floor

Solve Light a Deku Stick at a wall torch and jump from the upper ledge onto the centre of the great web. The flame burns it away and drops you to the basement.

Basement Ring

Solve Cross the spiked-log moat by timing your run between the rolling logs, or hookshot-free by walking the thin ledges. Shoot the gold Skulltulas blocking the side alcoves.

Enemies Deku Scrubs, Skulltulas
Three Scrubs Room

Solve Deflect each Deku Scrub's nut with your shield to stun it. The leftmost scrub tells you the order — hit them 2, then 3, then 1 — and the door ahead opens.

Enemies Deku Scrubs ×3
Gohma's Lair

Solve When Queen Gohma's eye glows red, stun it with a Slingshot seed, then rush in with sword slashes. Drop her climbing gohma larvae fast before they hatch. See the boss card.

Enemies Queen Gohma
Do this now Learn Saria's Song before you leave the forest. You will need Saria's Song to persuade Darunia to open Dodongo's Cavern. Learn it from Saria in the Sacred Forest Meadow (first left in the Lost Woods, then straight ahead) before exiting Kokiri Forest — it saves a long detour trip later.
Boss Queen Gohma Great Deku Tree — basement

Bring a full set of Deku Nuts if you have them — they can stun Gohma briefly. At minimum you need the Slingshot and the Kokiri Sword.

Top up before: Green Deku Bubbles in the room before the boss door restore a half-heart each. Pop several before entering.

Phase 1 — Ceiling drop
TellQueen Gohma clings to the ceiling and her large eye turns bright red just before she drops.
CounterThe moment the eye turns red, Z-target her and fire the Slingshot at the eye. A direct hit causes her to drop to the floor stunned.
Damage windowWhile stunned on the floor, run in and slash the eye with the Kokiri Sword as many times as possible — three to four hits. She rises back to the ceiling after a few seconds.
Phase 2 — Larva hatch
TellAfter taking enough damage, Gohma climbs the ceiling and lays three egg sacs that begin hatching into Gohma Larvae.
CounterShoot the eggs with the Slingshot before they hatch to destroy them. Then shoot Gohma's eye again the moment it turns red to bring her down.
Damage windowSame sword strike window as Phase 1. Approximately six eye hits total end the fight.

Where to heal: Exit to the room before the boss door and pop the green bubbles on the vines — they respawn each re-entry.

Easier tactic: Stay in the centre of the room and let Gohma come to you. Z-targeting the eye ensures the Slingshot won't miss when the colour changes.

Retreat: Dying restarts you at the boss door with Gohma fully healed.

Reward: Heart Container + Spiritual Stone of the Forest
Optional · strengthen your character
Optional House of Skulltula, Kakariko Village — the cursed family inside the large house on the right Tokens → Adult Wallet (200R) at 10, Stone of Agony at 20, Giant Wallet (500R) at 30, Bombchu (10) at 40, Piece of Heart at 50

Destroy Gold Skulltulas (golden spiders — slash or use the Boomerang/Hookshot to collect the token) and return tokens to the family in Kakariko Village. Skulltulas only appear at night in outdoor areas. The Giant Wallet (30 tokens) is strongly recommended before the Water Temple.

Completionist · this area

0 / 2 collected

Watch it instead

5:12:00
▶ Game Master TV
The Legend of Zelda: Ocarina of Time — Full Game Walkthrough / Longplay (N64) 1080p

▲ thumbnail from YouTube's CDN · the player loads only when you press play

2
Dungeon 2

Dodongo's Cavern

Meet ZeldaZelda's LetterBomb Bag
Objectives
  1. Acquire the Bomb Bag
  2. Open the giant Dodongo-skull door
  3. Light the eye torches to raise the stairs
  4. Defeat King Dodongo
  5. Earn the Goron's Ruby

Golden path

  1. Cross Hyrule Field heading north. The drawbridge of Hyrule Castle Town is ahead — enter the market through the main gate and follow the path north to the castle courtyard.
  2. At the castle drawbridge, Malon is standing outside — she gives you an Odd Egg and teaches you Epona's Song. Remember both for later. Sneak past the guards in the castle courtyard (move only when their backs are turned) to reach the inner passage.
  3. Peer through the left window of the passage ahead and you will see Princess Zelda. She tells you about Ganondorf and asks you to collect the three Spiritual Stones. Zelda's attendant Impa escorts you out of the castle and teaches you Zelda's Lullaby. Zelda throws her Ocarina to you as you flee — you learn the Song of Time.
  4. Return to the market, exit east, and walk north to Kakariko Village. The gate guard at the base of Death Mountain Trail blocks the path — show him Zelda's Letter (in your inventory) and he lets you pass.
  5. Climb Death Mountain Trail to Goron City carved into the mountainside. Find Darunia in his sealed chamber — play Saria's Song on the Ocarina to cheer him up. He opens the door to Dodongo's Cavern and gives you the Goron Bracelet, which lets you pick up bomb flowers.
  6. Head back down to the lower face of Death Mountain. The entrance to Dodongo's Cavern is sealed by a giant boulder. A Bomb Flower grows just above the entrance on the right ledge — pick it up with A (Goron Bracelet required) and throw it at the boulder to blast it open.
  7. Inside the cavern, collect the Bomb Bag from the chest in the first side room — bomb the cracked wall on the left shortly after the entrance to reveal the chest. Equip Bombs to a C button. Use bombs to destroy cracked walls throughout the dungeon.
  8. The central puzzle: two giant stone lizard heads on the north wall have open mouths. Roll a bomb into each mouth to detonate it — both must be triggered to lower the central platform and reveal the staircase. Stand at the bottom lip of each mouth and roll the bomb with the B button while walking forward.
  9. The upper floor has a large skull-shaped platform that rotates. Push the Armos statue onto the eye-switch in the floor to trigger the platform rotation and reveal the door to the boss anteroom.
  10. Boss — King Dodongo: see the boss card below.
  11. Darunia gives you the Spiritual Stone of Fire outside. Next destination: Zora's Domain for the third and final Spiritual Stone.
Dungeon map — keyed contents 2 floors
1F
  • 1 switch Bomb the dust over the entrance bridge
  • 2 chest Bomb Bag (defeat the Lizalfos pair)
  • 3 switch Eye torches — light to raise the staircase
2F
  • 4 room Bombable walls and Beamos statue
  • 5 switch Big skull door — light both eye torches
  • 6 boss King Dodongo's lava chamber
Room-by-room & puzzle solutions 6 rooms
Entrance Bridge

Solve Bomb the cracked wall above the lobby (a bomb flower is nearby as a child) to drop the bridge and open the way in.

Enemies Baby Dodongos
Lizalfos Room

Solve Z-target one Lizalfos at a time and back-slash after it lunges. Clearing both reveals the chest holding the Bomb Bag.

Enemies Lizalfos ×2
Treasure Bomb Bag
Staircase Room

Solve Two unlit torches flank the room. Light a Deku Stick and run to each, or use a single torch and the Slingshot-free dash — the giant staircase rises so you can reach the upper floor.

Beamos Corridor

Solve The Beamos's eye is invulnerable to the sword. Drop a bomb at its base to destroy it, then bomb the cracked side wall for a shortcut.

Enemies Beamos
Skull Door Antechamber

Solve The huge Dodongo-skull door is sealed until both its eye-torches burn. Light them and the mouth opens into the boss room.

King Dodongo's Chamber

Solve When the King inhales to breathe fire, throw — or shield-deflect — a bomb into its open mouth. It curls up stunned; pile on sword hits. Repeat. See the boss card.

Enemies King Dodongo
Do this now Upgrade your Bomb Bag immediately. With bombs in hand, drop a bomb into the spinning urn on the lower floor of Goron City (visible from the city's upper ledges — drop down to it). The lid pops open for a prize; cycle the prizes until you win the Bigger Bomb Bag (20→30 bombs). It saves rationing through the rest of the child dungeons.
Boss King Dodongo Dodongo's Cavern — lava arena

Bring at least four heart containers. The lava ring around the arena is fatal — never back-step toward the edge.

Top up before: Break the small pots in the antechamber outside the boss door — one contains a fairy.

Phase 1 — Open-mouth inhale
TellKing Dodongo opens his mouth wide and inhales for two seconds before breathing fire. The inhale is the exact window you want.
CounterThe moment his mouth opens, throw a Bomb directly into it (Z-target his face and press B to throw short). Do not roll the bomb — you need a direct throw into the open mouth.
Damage windowThe bomb detonates inside and stuns King Dodongo. Run behind him immediately and slash his tail with the Kokiri Sword — two to three hits before he recovers.
Phase 2 — Rolling charge
TellAfter half health, King Dodongo tucks into a ball and begins rolling across the arena at speed.
CounterSide-roll out of the rolling path. He bounces off the far wall and pauses briefly — this is your bomb window. Step in range and wait for the mouth-open inhale on resumption.
Damage windowSame as Phase 1. Four to five tail hits total end the fight.

Where to heal: Re-enter the boss room after dying — the fairy pot outside respawns.

Easier tactic: Z-target his nose (near the mouth) before throwing. This ensures the bomb trajectory is aimed down into the open mouth rather than deflecting off his forehead.

Retreat: Dying resets to the boss door. King Dodongo's health fully resets.

Reward: Heart Container + Spiritual Stone of Fire
Optional · strengthen your character
Optional Goron City (child) — spin the large urn with bombs; Hyrule Castle Town Bombchu Bowling Bomb Bag capacity 20 → 30 → 40

Bigger Bomb Bag (20→30): as Child Link, place a bomb inside the spinning urn in Goron City — the lid pops open for a prize (bag upgrade or Piece of Heart). Biggest Bomb Bag (30→40): Bombchu Bowling in Castle Town, win on the bag-prize round.

Completionist · this area

0 / 2 collected

Watch it instead

5:12:00
▶ Game Master TV
The Legend of Zelda: Ocarina of Time — Full Game Walkthrough / Longplay (N64) 1080p

▲ thumbnail from YouTube's CDN · the player loads only when you press play

3
Dungeon 3

Inside Jabu-Jabu's Belly

Zora's DomainRuto's LetterBoomerang
Objectives
  1. Escort Princess Ruto through the belly
  2. Find the Boomerang
  3. Destroy the electric tentacles
  4. Defeat Barinade
  5. Receive Zora's Sapphire

Golden path

  1. Head to Zora's River — from Hyrule Castle Town, exit the market north, then take the right fork north-east toward the river path. Follow the river uphill to the waterfall. Play Zelda's Lullaby on the Triforce symbol in front of the waterfall to open the passage to Zora's Domain.
  2. Inside Zora's Domain, King Zora sits blocking the passage to Zora's Fountain. In the fountain pool behind the domain's waterfall you'll find a bottle floating — fish it out. Inside is Princess Ruto's Letter. Show it to King Zora — he slides aside to let you through. The bottle is yours to keep.
  3. Enter Zora's Fountain. Lord Jabu-Jabu — a giant fish deity — floats in the water. To enter him, catch a fish in the bottle (use an empty bottle near the shallow water at the domain entrance), then stand in front of Jabu-Jabu and release the fish. He swallows you along with it.
  4. Inside the belly, the dungeon is largely water-based but navigable on foot. Find Princess Ruto — she is on a raised platform and refuses to move until you carry her. Pick her up with A and carry her to key switches: standing on pressure plates with Ruto in your arms activates them.
  5. Collect the Boomerang from the large chest in the central room — navigate the tentacle-lined passages past the switch-triggered platforms to reach it. Assign it to a C button immediately.
  6. The Boomerang stuns all enemies and triggers eye switches from a distance. It also collects items automatically on the return path — aim it at distant Small Keys, collectibles, and enemy tokens.
  7. The final puzzle before the boss: carry Ruto to the central shaft, place her on the rising platform, and use the Boomerang to activate the switch above the ceiling opening. Both must be triggered to lower the boss door.
  8. Boss — Barinade: see the boss card below.
  9. After Barinade, Princess Ruto gives you the Spiritual Stone of Water (and also proposes marriage, which Link cannot decline). Head back to Hyrule Castle Town — all three Spiritual Stones are in hand.
Dungeon map — keyed contents 2 floors
1F
  • 1 npc Ruto — carry and throw her onto switches
  • 2 chest Boomerang
  • 3 switch Cow-mouth gates — Boomerang the eye-switches
B1
  • 4 room Tentacle rooms — red, green, white
  • 5 boss Barinade's chamber
Room-by-room & puzzle solutions 5 rooms
Entry Pool

Solve Pick up Princess Ruto and throw her onto the high platform's switch to open the way. You'll be carrying or fetching her for much of the dungeon.

Enemies Stingers, Octoroks
Boomerang Room

Solve Drop down to the lower platform and open the chest for the Boomerang. From now on, Boomerang the cow-faced 'eye' switches to open the barred doors.

Treasure Boomerang
Red Tentacle Room

Solve Boomerang the glowing tip of the red Biri tentacle, then run in and finish it with the sword. Each colour-coded tentacle you clear weakens Barinade.

Enemies Biri, tentacle
Green & White Tentacle Rooms

Solve Repeat the Boomerang-then-sword pattern on the green and white tentacles. Use Ruto on the floor switches to reach the ones across gaps.

Barinade's Chamber

Solve Boomerang the stalk to cut Barinade free of the ceiling, sever its jellyfish ring with more throws, then slash the core. Keep moving to dodge its spin. See the boss card.

Enemies Barinade
Tip Carry Ruto to solve puzzles — she is the key. Many of Jabu-Jabu's switches require weight — Link alone is not heavy enough. Pick up Princess Ruto with A and stand on the pressure plates with her in your arms. She will complain loudly but the doors will open.
Boss Barinade Inside Jabu-Jabu's Belly — electric chamber

The Anemones (jellyfish) deal electric damage if they touch you. Keep moving at all times.

Top up before: Green jelly pods line the approach corridor — slash them for small hearts before entering the boss room.

Phase 1 — Sever the tentacles
TellBarinade spins its ring of Anemones and fires bolts of electricity. Its three ceiling tentacles hold it suspended — these must go first.
CounterZ-target the tentacles and throw the Boomerang at each one. The Boomerang stuns them on contact. Hit all three to drop Barinade to the floor.
Damage windowWith all three tentacles severed and Barinade on the floor, Z-target its nucleus (the orange glowing core at the centre) and throw the Boomerang at the nucleus itself to stun it briefly.
Phase 2 — Nucleus exposed
TellAfter the tentacles are cut, Barinade disperses its Anemone ring and sends them spinning outward. It glows orange before reforming them.
CounterThrow the Boomerang at the dispersed Anemones to destroy them — this extends the stun window. Then Z-target the nucleus and slash it with the sword.
Damage windowEach Boomerang hit on the nucleus followed by sword slashes — four or five cycles end the fight. Never stop moving between Boomerang throws.

Where to heal: The corridor before the boss has restorative pods. Exit and re-enter to make them respawn.

Easier tactic: In Phase 2 focus on destroying the Anemones first — fewer free-floating jellyfish means fewer interruptions during your sword window.

Retreat: Dying resets the fight. Barinade regenerates its tentacles and full health.

Reward: Heart Container + Spiritual Stone of Water

Completionist · this area

0 / 2 collected

Watch it instead

5:12:00
▶ Game Master TV
The Legend of Zelda: Ocarina of Time — Full Game Walkthrough / Longplay (N64) 1080p

▲ thumbnail from YouTube's CDN · the player loads only when you press play

4
Interlude

Temple of Time

Three Spiritual StonesSong of TimeSeven years
Objectives
  1. Gather the three Spiritual Stones
  2. Learn the Song of Time
  3. Open the Door of Time
  4. Draw the Master Sword

Golden path

  1. Return to Hyrule Castle Town with all three Spiritual Stones. As you approach the market, a cutscene triggers — Ganondorf is chasing Princess Zelda and Impa on horseback. Zelda throws her Ocarina into the moat as she flees. Dive into the moat and retrieve it — this is the Ocarina of Time. You also learn the Song of Time from Zelda's memory.
  2. Go to the Temple of Time in the north-west corner of the market. Walk up the stone path to the temple entrance and enter. Place all three Spiritual Stones on the altar, then play the Song of Time on the Ocarina. The Door of Time at the far end of the nave grinds open.
  3. Walk through the Door of Time to the Sacred Realm chamber. The Master Sword waits in a stone pedestal at the centre. Approach and press A to draw it. Link is pulled into the Sacred Realm and sealed for seven years while his body matures. Ganondorf takes the Triforce of Power in the interim.
  4. You wake up as Adult Link inside the Temple of Time. Sheik (a mysterious Sheikah warrior) is waiting — Sheik will teach you warp songs at the entrance of each adult dungeon. Exit the temple to find Hyrule Castle Town in ruins and the world changed.
  5. Talk to Sheik outside the Temple of Time. He teaches you the Prelude of Light, which warps you back here from anywhere. Immediately head to Lon Lon Ranch in the centre of Hyrule Field and get Epona — she transforms overworld travel for the rest of the game.
  6. To get Epona: enter Lon Lon Ranch and talk to Malon in the corral. Play Epona's Song (learned from Malon as a child) to call Epona. Pay Ingo 10 rupees to ride her. Challenge Ingo to a race (50 rupees), win twice to claim Epona permanently, then jump the ranch fence to escape.
  7. Now head to Kokiri Forest. The entrance to the Lost Woods leads to the Sacred Forest Meadow. Sheik is waiting there — he teaches you the Minuet of Forest, which warps you directly to the Forest Temple entrance. The Forest Temple is the first adult dungeon.
Room-by-room & puzzle solutions 2 rooms
The Altar

Solve Place the Kokiri's Emerald, Goron's Ruby and Zora's Sapphire on the altar and play the Song of Time. The Door of Time grinds open.

Pedestal of Time

Solve Pull the Master Sword from its pedestal. Link is sealed for seven years and wakes as an adult — the game's central time mechanic begins here.

Treasure Master Sword
Do this now Get Epona before starting any adult dungeon. Without Epona, crossing Gerudo Valley (required for Spirit Temple) is gated behind a Longshot skip. With Epona, every area in the overworld is freely accessible. The ranch is in the centre of Hyrule Field — take this detour immediately after leaving the Temple of Time.
Tip Warp songs save enormous time — learn them as you go. Sheik teaches a new warp song at the entrance to each adult dungeon. Once learned, each song teleports you to that dungeon's entrance from anywhere in the world. Always talk to Sheik before entering each dungeon to collect the song first.

Completionist · this area

0 / 1 collected

Watch it instead

5:12:00
▶ Game Master TV
The Legend of Zelda: Ocarina of Time — Full Game Walkthrough / Longplay (N64) 1080p

▲ thumbnail from YouTube's CDN · the player loads only when you press play

5
Dungeon 4

Forest Temple

HookshotHero's BowTwisted corridors
Objectives
  1. Reach the temple with the Hookshot
  2. Free the four Poe Sisters and restore the twisted hall
  3. Find the Fairy Bow
  4. Defeat Phantom Ganon
  5. Claim the Forest Medallion

Golden path

  1. Warp to the Sacred Forest Meadow with the Minuet of Forest or travel on foot through the Lost Woods. Sheik greets you and teaches you the Minuet of Forest warp song if you have not learned it yet. Climb the ivy wall at the end of the meadow corridor to enter the Forest Temple.
  2. The temple's central mechanic is twisted corridors — several hallways rotate when triggered by switches, changing which doors connect. Methodically clear each room and note which corridors you have rotated before moving on.
  3. Find the Hookshot in a chest in the central basement — it is in the room with the large well, accessible via a long vine climb on the east wall. The Hookshot fires a retractable claw that grabs wooden targets, treasure chests, and enemies; it can also be used to pull Link across gaps.
  4. Find the Hero's Bow in the north-west corridor on the upper floor. The bow is required for many adult enemies and is critical for the boss fight ahead — collect it before the boss door even if the corridor requires an extra key.
  5. There are four Stalfos Knight miniboss encounters scattered through the temple — two on the main floor, two near the boss area. Z-target and jump attack to stun them, then follow up with sword combos. They counter-roll after a few hits — wait for them to stop before striking again.
  6. The boss door is in the north-east room after the final twisted corridor — you need the Boss Key from the chest in the large central atrium (drop from the highest ledge to a lower platform and hookshot across to reach it).
  7. Boss — Phantom Ganon: see the boss card below.
  8. After the fight, a short cutscene shows Ganondorf dismissing Phantom Ganon from above. Sheik appears and gives you the Forest Medallion. The next destination is Death Mountain Crater for the Fire Temple.
Dungeon map — keyed contents 2 floors
1F
  • 1 room Central twisted corridor (untwist via the basement)
  • 2 npc Four Poe Sisters — paintings in side rooms
  • 3 chest Fairy Bow
B1 / upper
  • 4 switch Elevator well — raise/lower with the floor puzzle
  • 5 room Twisted-corridor controls (set the hall straight)
  • 6 boss Phantom Ganon's room
Room-by-room & puzzle solutions 6 rooms
Courtyard Entrance

Solve Hookshot the high branch or the vines to climb in. Inside, four wall torches with coloured flames hint at the Poe puzzle to come.

Poe Sisters' Paintings

Solve Each Poe hides in a painting and flits between frames. Watch which frame she settles in and strike it. Defeating all four refills the well and unlocks the elevator.

Enemies Poe Sisters ×4
Bow Room

Solve Cross the floor-tile trap and open the big chest for the Fairy Bow. Shoot the eye-switches around the temple to spin doors and hit far targets.

Treasure Fairy Bow
Twisted Corridor

Solve The hallway is wrenched 90°. Find the wall-switch in the basement and strike it to set the corridor straight, so the doors line up and you can walk through.

Elevator Well

Solve Once all four Poe torches burn the right colour, the central elevator descends. Ride it to the boss door — save at the blue warp first.

Phantom Ganon's Room

Solve Phantom Ganon rides out of the paintings. Watch which picture the real one charges from and shoot him with an arrow, then volley his energy ball back with sword strikes. See the boss card.

Enemies Phantom Ganon
Heads up Four Poe Sisters must be defeated for the main path. Four spectral Poe Sisters — Amy, Joelle, Beth, and Meg — haunt the temple and must each be defeated in their portrait rooms to unlock the central staircase. After knocking a Poe's lantern out, the Poe becomes vulnerable; Z-target and slash before she relights. Meg is the hardest — she clones herself into four copies; focus on the one that moves normally.
Boss Phantom Ganon Forest Temple — portrait gallery

Bring at least six heart containers. The energy-ball volley phase in Phase 2 can drain health quickly if you mistime the swing.

Top up before: Fairy in a pot two rooms before the boss door, on the left wall of the blue-lit corridor.

Phase 1 — False portraits
TellTwo identical Phantom Ganons appear in the painted portraits. One is the real one — it glows faintly as it charges. The fake one is duller.
CounterWatch the portraits carefully as both Phantom Ganons charge out. The fake dissolves with one hit. The real one gallops at you — shoot it with a bow arrow while it is still on its horse to dismount it.
Damage windowOnce dismounted, Phantom Ganon stumbles. Rush in and hit him with the Master Sword before he recovers — three to four sword hits.
Phase 2 — Energy volley
TellPhantom Ganon floats and charges a dark energy ball — he rocks back slightly before releasing it.
CounterZ-target him and swing the sword as the ball arrives to bat it back. Keep volleying — he will miss eventually.
Damage windowWhen he fails to return the ball and is staggered, rush in with the sword for three or four hits. If he recovers to horse form, repeat from Phase 1.

Where to heal: Exit the boss room — the fairy pot in the blue corridor respawns.

Easier tactic: For Phase 1, if you cannot tell the portraits apart: wait. The real Phantom Ganon always emerges second. Shoot the first to confirm it is the fake (it shatters), then prepare for the real one immediately.

Retreat: Dying resets the fight with Phantom Ganon at full health.

Reward: Heart Container + Forest Medallion
Optional · strengthen your character
Optional Begins at Cucco Lady in Kakariko Village — then a ten-stage trading chain Biggoron's Sword — two-handed blade dealing 4× Kokiri Sword damage; does not break

As Adult Link, trade: Pocket Egg (hatch → Cucco → wake Talon on Lon Lon Ranch) → Odd Mushroom (Granny in Kakariko, 3-minute timer) → Odd Potion → Poacher's Saw → Broken Goron Sword → Prescription → Eyeball Frog (2-minute timer) → World's Finest Eyedrops (4-minute timer) → Claim Check → Biggoron's Sword after 3 days (play Song of Sun repeatedly to pass time). Each timed trade requires immediate travel; use Epona and warp songs.

Optional Lon Lon Ranch — central Hyrule Field, large ranch south of the market Epona — fastest overworld travel; required to get across Gerudo Valley without the Longshot

As Adult Link, enter Lon Lon Ranch and talk to Malon. Play Epona's Song (learned from Malon as a child) on the Ocarina to call Epona. Pay Ingo 10 rupees to ride, then challenge him to two races. Win the second race to win Epona permanently — jump the fence to escape.

Completionist · this area

0 / 1 collected

Watch it instead

5:12:00
▶ Game Master TV
The Legend of Zelda: Ocarina of Time — Full Game Walkthrough / Longplay (N64) 1080p

▲ thumbnail from YouTube's CDN · the player loads only when you press play

6
Dungeon 5

Fire Temple

Goron's TunicMegaton HammerRescue Gorons
Objectives
  1. Wear the Goron Tunic against the heat
  2. Free the trapped Gorons behind barred cells
  3. Find the Megaton Hammer
  4. Defeat Volvagia
  5. Claim the Fire Medallion

Golden path

  1. Travel to Death Mountain Crater — climb Death Mountain Trail past Goron City and scale to the crater rim. You need Goron's Tunic to survive the extreme heat; buy it from Goron City's shop for 200 rupees or receive it free from Darunia's son (talk to him at the crater entrance after playing Saria's Song).
  2. Sheik greets you at the crater entrance and teaches you the Bolero of Fire warp song, which teleports you directly to the crater. Enter the Fire Temple through the passage at the base of the interior crater wall.
  3. The temple holds imprisoned Gorons in locked cells — freeing them is optional but each Goron provides hints and some drop Small Keys. The main progression path requires freeing only two or three; the rest are genuinely optional.
  4. Collect the Megaton Hammer from the chest in the upper-floor hammer room — navigate the lava platforms to the east wing, cross the rolling boulders in the large room by timing between their paths, and find the chest on the far side platform.
  5. The Megaton Hammer destroys Rusted Switches (orange switches that the sword cannot activate) and Stalfos-variant enemies throughout the temple. It also smashes the orange blocks in the lava rooms that block access to lower areas.
  6. Use the Hammer to activate the rusty switches behind flame walls — look for steam vents on the floor before flame walls; use a bomb on the vent to temporarily extinguish the flames, then run through and hammer the switch before it relights.
  7. Boss — Volvagia: see the boss card below.
  8. After Volvagia, Darunia appears and gives you the Fire Medallion. The next destination is the Water Temple at Lake Hylia — but first, you need the Iron Boots and Zora's Tunic from the Ice Cavern.
Dungeon map — keyed contents 2 floors
1F
  • 1 npc Caged Gorons — free for hints and a Bomb-Bag upgrade
  • 2 small key Locked cells — keys behind fire mazes
Upper
  • 3 chest Megaton Hammer
  • 4 switch Rusted switches — only the Hammer works
  • 5 boss Volvagia's lair
Room-by-room & puzzle solutions 6 rooms
Heat Lobby

Solve Without the Goron Tunic the heat drains hearts steadily — equip it before entering. Cross to the first locked door using the small key from the side maze.

Goron Cells

Solve Each barred cell holds a captive Goron. Free them for hints and gratitude; one path's reward chain leads toward a Bomb-Bag upgrade. Several cells hide small keys.

Enemies Fire Keese, Torch Slugs
Fire Maze

Solve Walls of flame block the corridors and drop on a timer. Dash through the gaps between bursts; light a Deku Stick is pointless here — speed and timing carry you.

Enemies Flare Dancer
Flare Dancer Room

Solve Strike the Flare Dancer's exposed core to scatter it, then chase the fleeing flame and hit it again before it rebuilds. Winning lowers a barrier toward the Hammer.

Enemies Flare Dancer
Megaton Hammer Room

Solve Open the big chest for the Megaton Hammer. From here, pound the rusted switches and black blocks that the sword can't touch.

Treasure Megaton Hammer
Volvagia's Lair

Solve The dragon dives among the lava holes. Watch which hole its head pops from, Hammer it on the head, then slash while it's stunned. Dodge the falling rocks. See the boss card.

Enemies Volvagia
Do this now Get Goron's Tunic before entering. Without Goron's Tunic, Link loses one heart per second inside the crater. The tunic is available for 200 rupees at Goron City's shop, or free from Link the Goron (Darunia's son) at the crater entrance if you play Saria's Song to him. Get it before entering the temple.
Boss Volvagia Fire Temple — summit arena

Bring at least seven heart containers and Goron's Tunic. The fire pillar rooms inside the temple drain health rapidly without the tunic.

Top up before: Break the pots along the left wall of the antechamber — one contains a fairy.

Phase 1 — Hole eruption
TellVolvagia chooses a floor hole and the rocks near it begin to shake just before she surfaces.
CounterWatch all the holes while avoiding Volvagia's flame trails. When she erupts and hovers with her head low, she pauses for about two seconds.
Damage windowStrike the hovering head with the Megaton Hammer — one or two hits per eruption. Back away before she dives back down.
Phase 2 — Airborne rockfall
TellAfter enough hammer hits, Volvagia flies to the ceiling and begins shaking her head violently — a shower of rocks rains down.
CounterRun in wide circles constantly during the rockfall — standing still is fatal. Equip the Bow and shoot her from range when she descends briefly between circles.
Damage windowWhen she descends to hover after the rockfall, land one Megaton Hammer hit. Then she dives back into the holes for another eruption phase. Approximately six Hammer hits total end the fight.

Where to heal: No mid-fight safe healing. Use a fairy or potion before entering the boss room.

Easier tactic: In Phase 1, position yourself between two holes — if the wrong one erupts, you have time to sidestep to the active one. Z-targeting the head the moment she surfaces makes the Hammer swing almost automatic.

Retreat: Dying restarts at the boss door with Volvagia fully healed.

Reward: Heart Container + Fire Medallion

Completionist · this area

0 / 1 collected

Watch it instead

5:12:00
▶ Game Master TV
The Legend of Zelda: Ocarina of Time — Full Game Walkthrough / Longplay (N64) 1080p

▲ thumbnail from YouTube's CDN · the player loads only when you press play

7
Dungeon 6

Water Temple

Iron BootsWater levelsLongshot
Objectives
  1. Raise and lower the water with Serenade of Water at three levels
  2. Find the Longshot
  3. Defeat your shadow, Dark Link
  4. Defeat Morpha
  5. Claim the Water Medallion

Golden path

  1. Before the Water Temple, complete the Ice Cavern in Zora's Fountain (adult Link). Zora's Fountain is now frozen — Jabu-Jabu's frozen form fills most of the area. Enter the Ice Cavern at the far wall (no key required) to collect the Iron Boots and a bottle of Blue Fire.
  2. Use the Blue Fire (bottled from a blue wall flame inside the Ice Cavern) to melt the red ice blocking the passage to King Zora — he is frozen in his chair. Thaw him and he gives you the Zora's Tunic, which allows unlimited underwater breathing. Sheik teaches you the Serenade of Water at the Ice Cavern exit.
  3. Warp to Lake Hylia with the Serenade of Water. Equip Iron Boots and Zora's Tunic. Walk into the lake and sink to the underwater platform at the centre — the Water Temple entrance is sealed by a Triforce symbol. Play Zelda's Lullaby to unseal it.
  4. The temple's central mechanic: three water levels (low, mid, high) control which passages are accessible. The hookshot targets are only reachable at certain levels. Change the water level by finding and playing the Song of Time on specific Stone of Time blocks in the temple's central tower. Map out which level each wing requires before changing levels repeatedly.
  5. The recommended order: raise to high level first, clear the upper rings of the tower and collect the Small Keys from the upper wing rooms, then lower to mid level for the Longshot room, then drain to low level for the bottom passages.
  6. Collect the Longshot from the chest in the basement — it is in the room past the darklink encounter. The Longshot is a range-doubled Hookshot; it can grab targets the Hookshot cannot reach, including the distant wooden peg targets in the upper tower.
  7. Dark Link is a mid-dungeon miniboss — your shadow self. He mimics your attacks exactly. Effective techniques: use the Megaton Hammer (he cannot parry it), or back into the corner of the room and Z-target him — he can be stabbed with the Master Sword if you hold the Z-target and repeatedly press A without moving.
  8. The boss door is in the central tower's highest accessible point at maximum water level. You need the Boss Key from a chest that is only reachable at low water level with the Longshot. Drain the water, Longshot to the high chest platform, collect the Boss Key, then raise water to high before re-entering the central tower.
  9. Boss — Morpha: see the boss card below.
  10. After Morpha, Ruto appears and gives you the Water Medallion. Leave via the blue warp — you emerge at Lake Hylia, which is now refilled to its proper level.
Dungeon map — keyed contents 3 floors
3F (high water)
  • 1 switch Triforce block — play Serenade to set water level
  • 2 room Central pillar — water level rotates access
2F (mid water)
  • 3 chest Longshot
  • 4 npc Dark Link's illusory room
1F / B1 (low water)
  • 5 switch Drained passages and currents
  • 6 boss Morpha's chamber
Room-by-room & puzzle solutions 6 rooms
Central Pillar

Solve The whole temple revolves around water height. Stand on a Triforce tile and play Serenade of Water to raise or lower the lake, opening different doors at each of the three levels.

Iron Boots Routine

Solve Equip Iron Boots to sink to submerged switches and Hookshot targets, then unequip to float and swim. Pause the moment you enter each room to decide whether the boots go on.

Longshot Room

Solve Lower the water, cross the central room and open the big chest for the Longshot — double-range Hookshot, needed to finish the temple and reach far Heart Pieces.

Treasure Longshot
Dark Link Arena

Solve Your shadow mirrors your moves and parries spam attacks. Bait a jump attack and counter, or use Din's Fire / the Megaton Hammer (it can't be blocked) to break the mirror. See the boss card note.

Enemies Dark Link
Whirlpool & Current Rooms

Solve In the low-water basement, Longshot across the gaps and use Iron Boots to walk against the currents toward the boss key and the central tower.

Morpha's Chamber

Solve Morpha's vulnerable nucleus darts between water cells. Longshot the red core to yank it onto dry tile, then slash it before it dissolves back into the water. See the boss card.

Enemies Morpha
Heads up Map the Small Keys before changing water levels. The Water Temple has nine locked doors and only nine Small Keys — each is in a specific room at a specific water level. Changing the level without first collecting all keys accessible at the current level means re-navigating every level transition again. Check every wing before turning the water.
Tip Swap Iron Boots at every transition. On the N64 version, Iron Boots are in the Equipment subscreen (Start → C-right Equipment panel). Every time you sink to the floor or need to rise, pause and toggle them. Building this habit from the first room eliminates most of the Water Temple's infamous frustration.
Boss Morpha Water Temple — central chamber

Bring at least eight heart containers. Morpha deals contact damage and the water environment restricts movement.

Top up before: Break the pots in the small room adjoining the boss chamber — one contains a fairy. Equip the Longshot before entering.

Phase 1 — Nucleus in the tentacle
TellMorpha extends a water pseudopod toward Link. The small, dark nucleus cell is visible inside the translucent tentacle.
CounterZ-target the nucleus inside the tentacle and fire the Longshot at it. The hook grabs the nucleus and yanks it across the room toward Link.
Damage windowWith the nucleus pulled close, slash it with the Master Sword repeatedly — five to six hits. Morpha will reform the tentacle each time; keep using the Longshot to re-grab the nucleus.
Phase 2 — Two tentacles
TellAfter half health, Morpha splits and generates a second pseudopod. Both track Link simultaneously.
CounterUse the corner walls to separate the tentacles — back into a corner so only one tentacle can reach you at a time. Then Longshot the nucleus of the nearer one.
Damage windowSame as Phase 1. Focus on one nucleus entirely before engaging the second. Approximately twelve total nucleus hits across both phases end the fight.

Where to heal: Use a fairy or potion. The adjoining room pot respawns after re-entering.

Easier tactic: The corner strategy for Phase 2 is essential — attempting to fight in the open water with two tentacles active is very difficult. Find a corner and let Morpha come to you.

Retreat: Dying resets to the boss door. Full health reset.

Reward: Heart Container + Water Medallion
Optional · strengthen your character
Optional Zora's Fountain — behind Jabu-Jabu's now-frozen form as Adult Link Iron Boots (required for Water Temple) + Blue Fire (to thaw King Zora) + Serenade of Water warp song

As Adult Link, Zora's Fountain is frozen. Enter the Ice Cavern at the back wall (no key required). Navigate ice-block puzzles and collect Blue Fire (bottled from a wall flame) to thaw the Red Ice in King Zora's passage. Iron Boots are in a chest near the end. The Serenade of Water is taught by Sheik at the exit.

Completionist · this area

0 / 1 collected

Watch it instead

5:12:00
▶ Game Master TV
The Legend of Zelda: Ocarina of Time — Full Game Walkthrough / Longplay (N64) 1080p

▲ thumbnail from YouTube's CDN · the player loads only when you press play

8
Dungeon 7

Shadow Temple

Lens of TruthHover BootsBongo Bongo
Objectives
  1. Equip the Lens of Truth to reveal the false walls
  2. Find the Hover Boots
  3. Ferry across the underground river
  4. Defeat Bongo Bongo
  5. Claim the Shadow Medallion

Golden path

  1. Before the Shadow Temple, collect the Lens of Truth — it is required to see invisible enemies and platforms inside the temple. Enter the Bottom of the Well in Kakariko Village as child Link: play the Song of Storms (learned from the windmill man in Kakariko as adult) to drain the well as a child. Use the Ocarina Time-travel system at the Temple of Time to switch ages.
  2. Inside the Bottom of the Well (child), navigate the shallow labyrinth to the Lens of Truth chest in the centre room — use the Boomerang to unlock the door to reach it. Return to adult Link via the Temple of Time after collecting it.
  3. Return to Kakariko Village as Adult Link. A cutscene triggers at the village — a shadow creature escapes from the well and kills a guard. Sheik appears and teaches you the Nocturne of Shadow warp song. The Shadow Temple entrance is behind the large boulder in the graveyard (bomb it open or Hookshot past it).
  4. Keep the Lens of Truth active throughout the Shadow Temple — it reveals hidden doors, invisible platforms above pits, invisible enemies, and the true paths through fake walls. The magic cost is significant; collect as many magic refills from pots as possible.
  5. Collect the Hover Boots from the chest in the mid-temple hover corridor. They let Link walk on air briefly (approximately two seconds) before dropping — use them to cross gaps where no hookshot target is available.
  6. The Dead Hand is the mid-dungeon miniboss — a pale creature with hands emerging from the floor. Let the hands grab Link to draw Dead Hand close, then slash its spotted head rapidly. It retreats and re-ambushes — repeat three times to defeat it.
  7. The Longshot is required to cross several gap sections in the second half of the temple. Identify the wooden ceiling targets with the Lens active and fire the Longshot at them to swing across.
  8. Boss — Bongo Bongo: see the boss card below.
  9. Impa appears after the fight and gives you the Shadow Medallion. The final adult dungeon is the Spirit Temple — travel to the Haunted Wasteland via Gerudo Valley.
Dungeon map — keyed contents 2 floors
Upper
  • 1 secret Invisible paths — use the Lens of Truth
  • 2 chest Hover Boots
Lower
  • 3 switch Wind-blade traps and guillotines
  • 4 npc Ferry — play Zelda's Lullaby at the Triforce
  • 5 boss Bongo Bongo's drum pit
Room-by-room & puzzle solutions 5 rooms
False Wall Corridor

Solve Hold up the Lens of Truth to see invisible floors, fake walls and hidden chests. Magic drains while it's active, so flick it on to scout, then move with it off.

Hover Boots Room

Solve Open the chest for the Hover Boots, then use them to drift across the gap to a switch you couldn't otherwise reach.

Treasure Hover Boots
Spinning Scythe Hall

Solve Giant guillotines and spinning blades sweep the corridor. Time your dash past each, and use the Hover Boots to cross the bottomless stretches.

Enemies Wallmasters, Gibdos
The Ferry

Solve Stand on the boat with the Triforce mark and play Zelda's Lullaby; the ferry carries you down the underground river. Shoot the eye-switches and torches en route to keep moving.

Bongo Bongo's Pit

Solve Use the Lens to see the invisible drum surface and the boss's hands. Shoot each hand with an arrow to stun Bongo Bongo, then strike its glowing eye. See the boss card.

Enemies Bongo Bongo
Do this now Get the Lens of Truth before entering. The Shadow Temple without the Lens of Truth is nearly impossible — over half the floor is invisible pits and fake walls. Collect it from the Bottom of the Well in Kakariko (drain it as Child Link using the Song of Storms, collected from the Windmill man in Kakariko as Adult Link first). The time-travel loop is: adult to Kakariko, learn Song of Storms from windmill man → play Song of Time → revert to child → drain well → collect Lens → return to adult.
Boss Bongo Bongo Shadow Temple — drum platform

Bring at least nine heart containers. The elastic drum platform affects movement — Hover Boots greatly stabilise your footing.

Top up before: Break the pot in the antechamber before the boss door — fairy inside.

Phase 1 — Pin the hands
TellTwo disembodied hands pound the drum in alternating strikes, inching toward Link. The main body is invisible without the Lens of Truth.
CounterEquip the Bow. Z-target each hand and shoot it with an arrow to pin it flat against the drum surface. Both hands must be pinned within a few seconds of each other.
Damage windowWhen both hands are pinned, Bongo Bongo's invisible eye floats briefly into view at chest height. Shoot the eye with an arrow to stun the body — then activate the Lens of Truth and rush in with the Master Sword while it is stunned.
Phase 2 — Charge and grab
TellOnce the body is partially visible (use Lens of Truth), Bongo Bongo charges directly at Link in a straight line — eye glows just before the charge.
CounterZ-target the eye and shoot it with an arrow as it charges to stop the charge cold. If it grabs Link, mash A to break free.
Damage windowAfter an arrow stun, Bongo Bongo floats low to the drum — rush in with the Master Sword for multiple hits. Hover Boots prevent the platform bounce from disrupting your swing timing. Approximately eight arrow hits across both phases end the fight.

Where to heal: Fairy pot in the antechamber — exits and re-entry respawns it.

Easier tactic: Keep the Lens of Truth active throughout Phase 2 so the body is fully visible. The extra magic consumption is worth the visibility. Stock magic jars from the Shadow Temple pots before entering.

Retreat: Dying resets the boss room.

Reward: Heart Container + Shadow Medallion

Completionist · this area

0 / 1 collected

Watch it instead

5:12:00
▶ Game Master TV
The Legend of Zelda: Ocarina of Time — Full Game Walkthrough / Longplay (N64) 1080p

▲ thumbnail from YouTube's CDN · the player loads only when you press play

9
Dungeon 8

Spirit Temple

Child AND adult sectionsSilver GauntletsMirror Shield
Objectives
  1. Use child and adult eras to clear both halves
  2. Lift the silver boulders with the Silver Gauntlets
  3. Find the Mirror Shield and aim sunlight
  4. Defeat Twinrova
  5. Claim the Spirit Medallion

Golden path

  1. Travel to Gerudo Valley — west of Hyrule Field. The bridge is broken; jump it on Epona or Longshot to the wooden beam under the far side. Cross Gerudo Fortress by either sneaking past the guards (they patrol in pairs; move between pauses) or fighting through them. Enter the Haunted Wasteland at the far gate.
  2. Cross the Haunted Wasteland: follow the row of flags to cross the quicksand safely, then follow the Poe's lantern (a ghostly light that appears in the dark section) across the featureless sand to the oasis. Do not chase the poe — follow it at a modest distance. Enter the Desert Colossus.
  3. Sheik is at the Desert Colossus — he teaches you the Requiem of Spirit warp song. The Spirit Temple entrance is in the hand-shaped stone carving at the back of the oasis. Before entering, go to the Temple of Time and travel back to child Link — you must complete the child section of the temple before the adult side.
  4. As child Link, enter the Spirit Temple and crawl through the small passage on the right. Navigate the child-side rooms using the Slingshot, Boomerang, and Bombs. The most important item here is the Silver Gauntlets chest — reach it via the bombable wall in the north room, and collect the gauntlets from the chest outside the temple on the desert plateau.
  5. Return to the Temple of Time and become adult Link again. Equip the Silver Gauntlets — they allow you to push and carry heavy grey stone blocks, which are required throughout the adult side of the temple.
  6. As adult Link, re-enter the Spirit Temple. Collect the Mirror Shield from the chest in the large central sunbeam room — push the stone block onto the floor switch to trigger the door, enter the sunbeam room, and the chest is on the upper ledge reachable by Hookshot.
  7. The Mirror Shield reflects light beams and Twinrova's elemental blasts. Equip it to the shield slot. The second half of the adult temple is built around angling reflected sunbeams at wall targets to open doors — face the sunbeam source, then turn to aim the reflection at the switch.
  8. Boss — Twinrova: see the boss card below.
  9. After Twinrova, Nabooru is freed and gives you the Spirit Medallion. All six medallions are now collected — the Rainbow Bridge forms automatically across the moat to Ganon's Castle.
Dungeon map — keyed contents 2 floors
Child half
  • 1 item Silver Gauntlets (child-only crawlspaces)
  • 2 switch Small Silver-Rupee and child-size routes
Adult half
  • 3 chest Mirror Shield
  • 4 switch Sun statues — reflect light to open doors
  • 5 boss Twinrova's chamber
Room-by-room & puzzle solutions 6 rooms
Colossus Entrance

Solve Warp in with Requiem of Spirit. As a child, take the small crawlspaces to reach the Silver Gauntlets; as an adult, the Gauntlets let you shove the silver blocks blocking the main route.

Silver Gauntlets Vault

Solve Solve the child-side Silver-Rupee and statue puzzles to reach the Gauntlets chest. Then play the Prelude of Light and return as an adult.

Treasure Silver Gauntlets
Mirror Shield Room

Solve As an adult, push the silver boulders aside and claim the Mirror Shield. Now you can bounce sunbeams and reflect magic attacks.

Treasure Mirror Shield
Sunlight Statues

Solve Stand in a shaft of sunlight and angle the Mirror Shield onto the sun-faced statues to open sealed doors and burn away the giant face's seal.

Iron Knuckle Guardians

Solve Heavy Iron Knuckles guard the inner sanctum. Bait their wide axe swing, dodge behind, and land a few hits before they recover. They hit hard — keep your shield up.

Enemies Iron Knuckles
Twinrova's Chamber

Solve Koume casts fire and Kotake casts ice. Absorb one element with the Mirror Shield, then unleash the stored opposite element back at the merged witch. See the boss card.

Enemies Twinrova
Heads up You must enter this dungeon as a child first. The Silver Gauntlets are in the child-side of the Spirit Temple and are required for the adult side. Enter the temple as Child Link first (via the Temple of Time), complete the child rooms, collect the Gauntlets from the exterior plateau chest, then return to adult. You cannot proceed past the first adult room without them.
Boss Twinrova Spirit Temple — summit throne room

Bring at least nine heart containers and a fairy in a bottle. The absorption system in Phase 2 punishes element-mixing mistakes and you may take several hits while learning the rhythm.

Top up before: Break pots in the hallway before the boss door — one contains a fairy.

Phase 1 — Reflect to the opposite twin
TellKoume (fire) and Kotake (ice) fly in circles and take turns firing. The element each twin fires is telegraphed by their colour — Koume is orange and fires fire, Kotake is blue and fires ice.
CounterEquip the Mirror Shield. When Koume fires a fire blast, reflect it at Kotake (the ice twin) — fire hurts ice and vice versa. Z-target the incoming blast briefly to angle the reflection at the opposite twin.
Damage windowThree successful cross-element reflected hits causes the twins to merge into one body — Twinrova. The phase transitions automatically.
Phase 2 — Absorption and release
TellMerged Twinrova alternates elements with each shot. A flaming crown appears above her head showing which element is currently charged inside the Mirror Shield (fire = orange jewel, ice = blue).
CounterAbsorb two consecutive blasts of the same element into the Mirror Shield, then sidestep the third blast of that element. On the third matching blast, the shield releases the stored energy at Twinrova automatically. Never absorb a mismatched element — it clears the charge.
Damage windowWhen the absorbed blast is released and hits Twinrova, she is briefly stunned — run in and slash with the Master Sword. Three or four stun cycles end the fight.

Where to heal: No exit during the fight. Use your bottled fairy at three hearts.

Easier tactic: In Phase 2, position yourself centrally under Twinrova so you do not need to move much between absorbs. The absorption counter resets if you absorb a different element — count the jewel flashes on the Mirror Shield crown, not Twinrova's shots.

Retreat: Dying resets the boss room.

Reward: Heart Container + Spirit Medallion

Completionist · this area

0 / 1 collected

Watch it instead

5:12:00
▶ Game Master TV
The Legend of Zelda: Ocarina of Time — Full Game Walkthrough / Longplay (N64) 1080p

▲ thumbnail from YouTube's CDN · the player loads only when you press play

10
Final Dungeon

Ganon's Castle

Light ArrowsSix barriersGanon final form
Objectives
  1. Clear the six elemental barrier trials
  2. Recover the Golden Gauntlets
  3. Climb the tower and defeat Ganondorf
  4. Escape the collapsing castle
  5. Defeat Ganon

Golden path

  1. Cross the Rainbow Bridge on foot — it forms automatically once all six medallions are collected. The bridge leads to Ganon's Castle, which replaced Hyrule Castle.
  2. The castle has six barrier rooms, one keyed to each dungeon's element. Each room contains a puzzle that references the corresponding dungeon's mechanics. Dispelling all six barriers reveals the path to the tower. The rooms can be done in any order.
  3. Forest barrier: Hookshot to each of the two chests on raised platforms. Fire barrier: hammer the rusty switch before the platform lowers into lava. Water barrier: use the Silver Gauntlets to move the stone block onto the central switch. Shadow barrier: use the Lens of Truth to navigate the invisible floor maze to the crystal switch. Spirit barrier: reflect the sunbeam with the Mirror Shield onto the eye target. Light barrier: ring all the bells with the Hookshot — the final bell is through the hole in the ceiling.
  4. After all six barriers are down, the central staircase opens. Climb to the top of the tower. A cutscene shows Zelda is revealed, imprisoned in a crystal. She gives you the Light Arrows before Ganondorf shatters the window.
  5. Boss — Ganondorf: see the first boss card below. After Ganondorf, a timed escape sequence begins — the tower begins to collapse. Follow the descending staircase; there are no enemies, only falling debris. You have roughly 90 seconds.
  6. After escaping, Ganondorf uses the Triforce of Power to transform into Ganon — a towering beast with twin fire clubs. The arena is the ruins of the collapsed tower, sealed by a ring of fire. The final boss card below covers this fight.
  7. After defeating Ganon: Zelda, the Six Sages, and the people of Hyrule watch as Ganondorf is sealed in the Sacred Realm. Zelda sends Link back to his childhood to live the years Ganondorf stole. End credits.
Dungeon map — keyed contents 2 floors
Barrier ring
  • 1 room Forest, Water, Shadow, Fire, Light, Spirit trials
  • 2 switch Each trial dispels one tower barrier
Tower
  • 3 item Golden Gauntlets (Spirit trial side)
  • 4 boss Ganondorf — organ chamber, top floor
  • 5 boss Ganon — rubble arena after the escape
Room-by-room & puzzle solutions 6 rooms
Central Barrier

Solve A glowing barrier seals the tower. Six elemental trials ring the chamber — clear all six (you may skip some, but each one you finish dispels part of the barrier).

Light Trial

Solve Use the Lens of Truth to find invisible chests and the small keys, ending with a Light Arrow shot to open the way. The Forest, Fire, Water, Shadow and Spirit trials each test the matching item.

Spirit Trial / Golden Gauntlets

Solve The Spirit trial hands you the Golden Gauntlets — lift the giant pillar to expose the switch and finish the trial.

Treasure Golden Gauntlets
Tower Climb

Solve With the barrier gone, climb the tower past Stalfos and dodge the falling debris to reach Ganondorf's organ chamber. Save at the blue warp first.

Ganondorf's Chamber

Solve Volley his energy orbs back with sword or Master Sword strikes (a tennis rally), stun him with a Light Arrow, then close in and slash. See the boss card.

Enemies Ganondorf
The Escape & Ganon

Solve Guide Zelda out as the castle collapses on a timer, clearing Stalfos at each door. In the final arena, Ganon knocks away the Master Sword — target his tail with arrows and the recovered blade. See the boss card.

Enemies Ganon
Do this now Top up completely before entering — no return. Once inside Ganon's Castle, you cannot leave until the game is finished. Visit the Great Fairy Fountain on Death Mountain summit for a full magic and health restore. Buy two Blue Potions from the Potion Shop in Kakariko Village. There is no healing between Ganondorf and Ganon.
Heads up Light the arena torches immediately on entering Ganon's fight. Ganon extinguishes the arena torches with his first attack, fighting you in near darkness. Din's Fire (if you have it) or Fire Arrows aimed at the two side torches from the arena entrance restores full visibility before Ganon reaches you. Do this as your first action after the cutscene.
Boss Ganondorf Ganon's Tower — summit organ chamber

Bring maximum heart containers (20 if possible) and two fairies in bottles. There is no healing between Ganondorf and the subsequent Ganon fight.

Top up before: Great Fairy fountain on Death Mountain summit restores magic and health. Visit before entering Ganon's Castle.

Phase 1 — Energy ball volley
TellGanondorf floats above his organ and charges a ball of dark energy in one hand — he tilts his wrist back briefly before releasing.
CounterZ-target Ganondorf and shoot a Light Arrow at him before he throws, or bat the energy ball back with a sword swing as it arrives. A Light Arrow hit staggers him immediately.
Damage windowWhen staggered by a Light Arrow or a returned volley he couldn't counter, Ganondorf drops to one knee. Leap to his platform (there are lifts on either side) and slash him with the Master Sword before he recovers — three sword hits per stagger. Three to four stagger cycles deplete his health.

Where to heal: Use a fairy if you drop below three hearts — the descent phase after defeating Ganondorf is timed.

Easier tactic: Lead with a Light Arrow each time — it removes the guesswork of volley timing. You have enough arrow capacity for the entire fight if you collected quiver upgrades.

Retreat: Dying resets the fight.

Reward: Ganondorf defeated — but the tower begins to collapse. Escape sequence begins.
Boss Ganon Collapsed tower exterior — Ganon's final arena

This fight follows directly after the tower escape — use any fairies or potions you have saved before the arena seals.

Top up before: You cannot return to heal between Ganondorf and Ganon. Save all remaining fairies for this fight.

Phase 1 — Twin clubs in darkness
TellGanon swings his twin fire clubs in a wide horizontal arc — there is a half-second wind-up before the swing. He extinguishes the torches around the arena with his first attack — fight in near darkness.
CounterLight the two side torches with Fire Arrows or Dins Fire to restore visibility. Stay at mid-range and dodge the club swings by side-rolling. Target his tail — it glows and extends behind him when he advances.
Damage windowShoot the tail with a Light Arrow to stun Ganon and knock a club from his hand — he drops to one knee. Rush in and hit him with the Master Sword. After several hits, Zelda charges the final arrow.
Phase 2 — Final Light Arrow
TellGanon rises for a final desperate attack. Zelda's golden light is visible at the far side of the arena — position yourself between them.
CounterKeep Ganon Z-targeted and step clear of Zelda's line of fire. She fires when Link is not blocking the path.
Damage windowZelda's Light Arrow hits Ganon and he freezes — press A when the prompt appears to deliver the finishing blow with the Master Sword. End credits.

Where to heal: No exit. Use remaining fairies immediately if you drop below three hearts.

Easier tactic: Light the torches first — the fight in darkness is significantly harder. Dins Fire lights both from the centre of the arena if you run to the exact middle on entry.

Retreat: Dying resets the final fight. You re-enter with whatever health you had at the start of the Ganon encounter.

Reward: The ending. The Sacred Realm is restored. Zelda sends Link back to his childhood.

Completionist · this area

0 / 1 collected

Watch it instead

5:12:00
▶ Game Master TV
The Legend of Zelda: Ocarina of Time — Full Game Walkthrough / Longplay (N64) 1080p

▲ thumbnail from YouTube's CDN · the player loads only when you press play